Viewing all devices
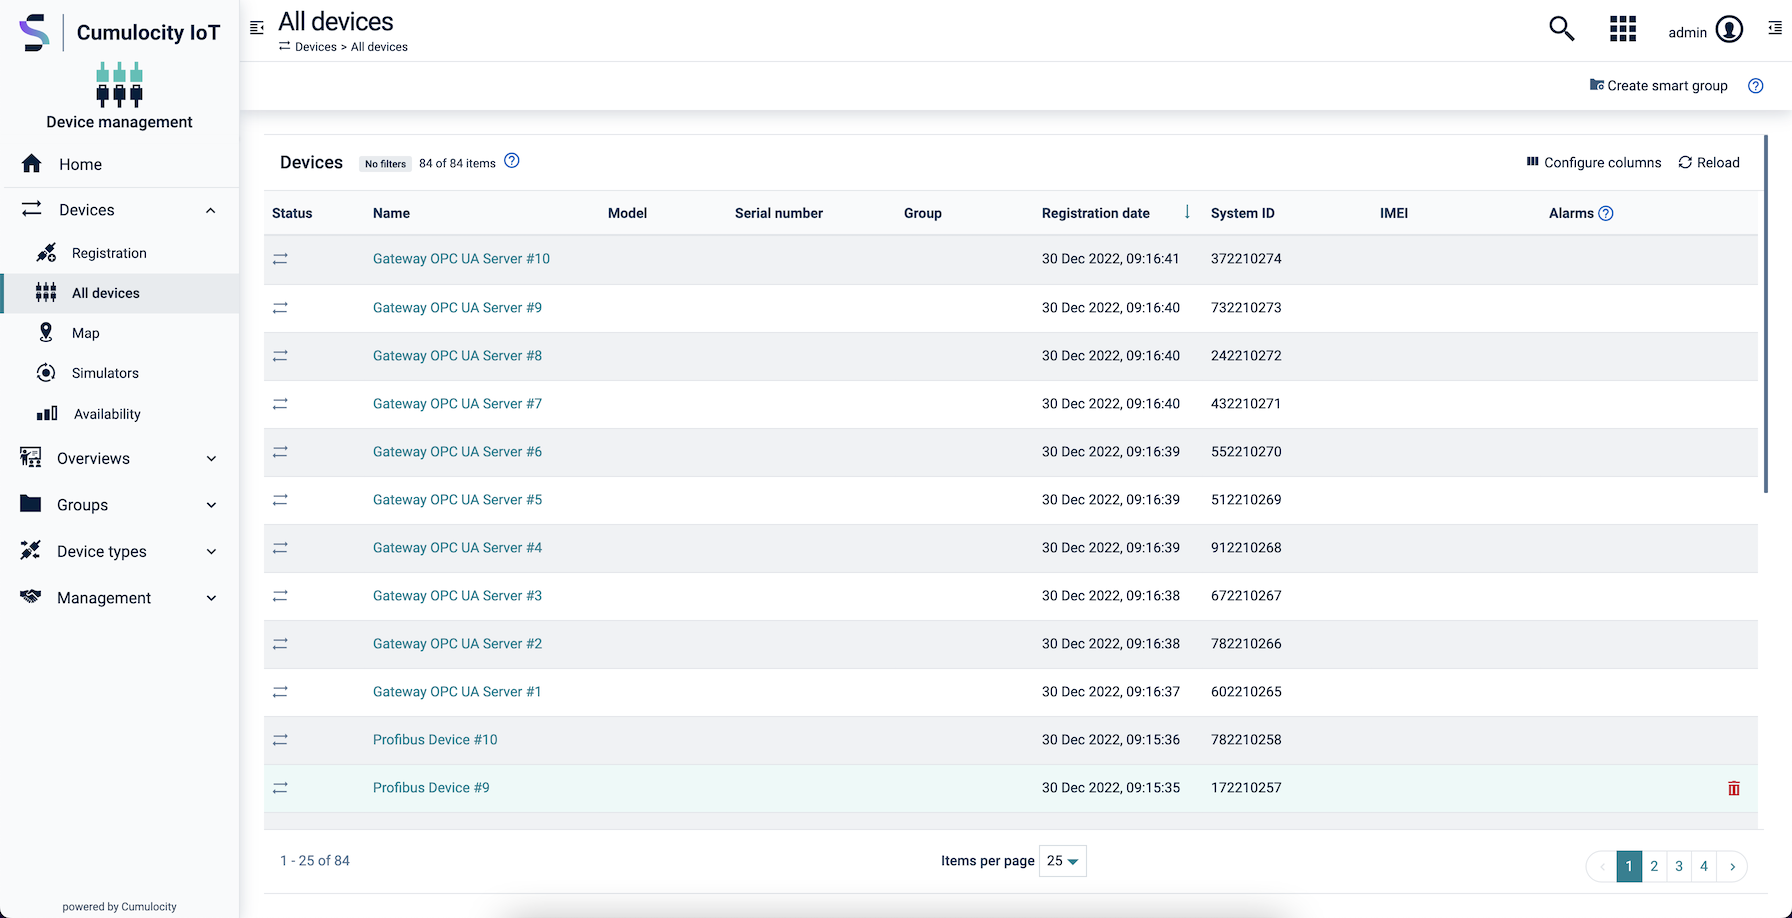
To view all devices connected to your account, click All devices in the Devices menu in the navigator.
A detailed device list will be displayed.
To view all devices connected to your account, click All devices in the Devices menu in the navigator.
A detailed device list will be displayed.
For each device, the device list shows the following information provided in columns:
| Column | Description |
|---|---|
| Status | An icon representing the connection status. For details, see Connection monitoring. |
| Name | Unique name of the device. |
| Model | Model type of the device. Not always displayed, depends on browser width. |
| Serial Number | Serial number of the device. Not always displayed, depends on browser width. |
| Group | Group the device is assigned to, if any. |
| Registration Date | Date when the device was registered to your account. |
| System ID | System ID of the device. |
| IMEI | IMEI of the device. |
| Alarms | The alarm status of the device, showing number and type of alarms currently unresolved for the device. Only includes alarms for the parent device. See Working with alarms for further information on working with alarms. |
For users with global roles the devices list displays the items in a paginated manner. You can select the number of items per page and directly jump to any page. Users with inventory roles see up to 50 items initially. If there are more than 50 devices available more devices are loaded as you scroll down the list.
The columns shown in the device list may be configured to your needs.
The device list will reflect your changes and only show the selected columns.
The device grid offers the option to add custom columns to display selected additional device properties. There are two alternative ways for adding custom columns.
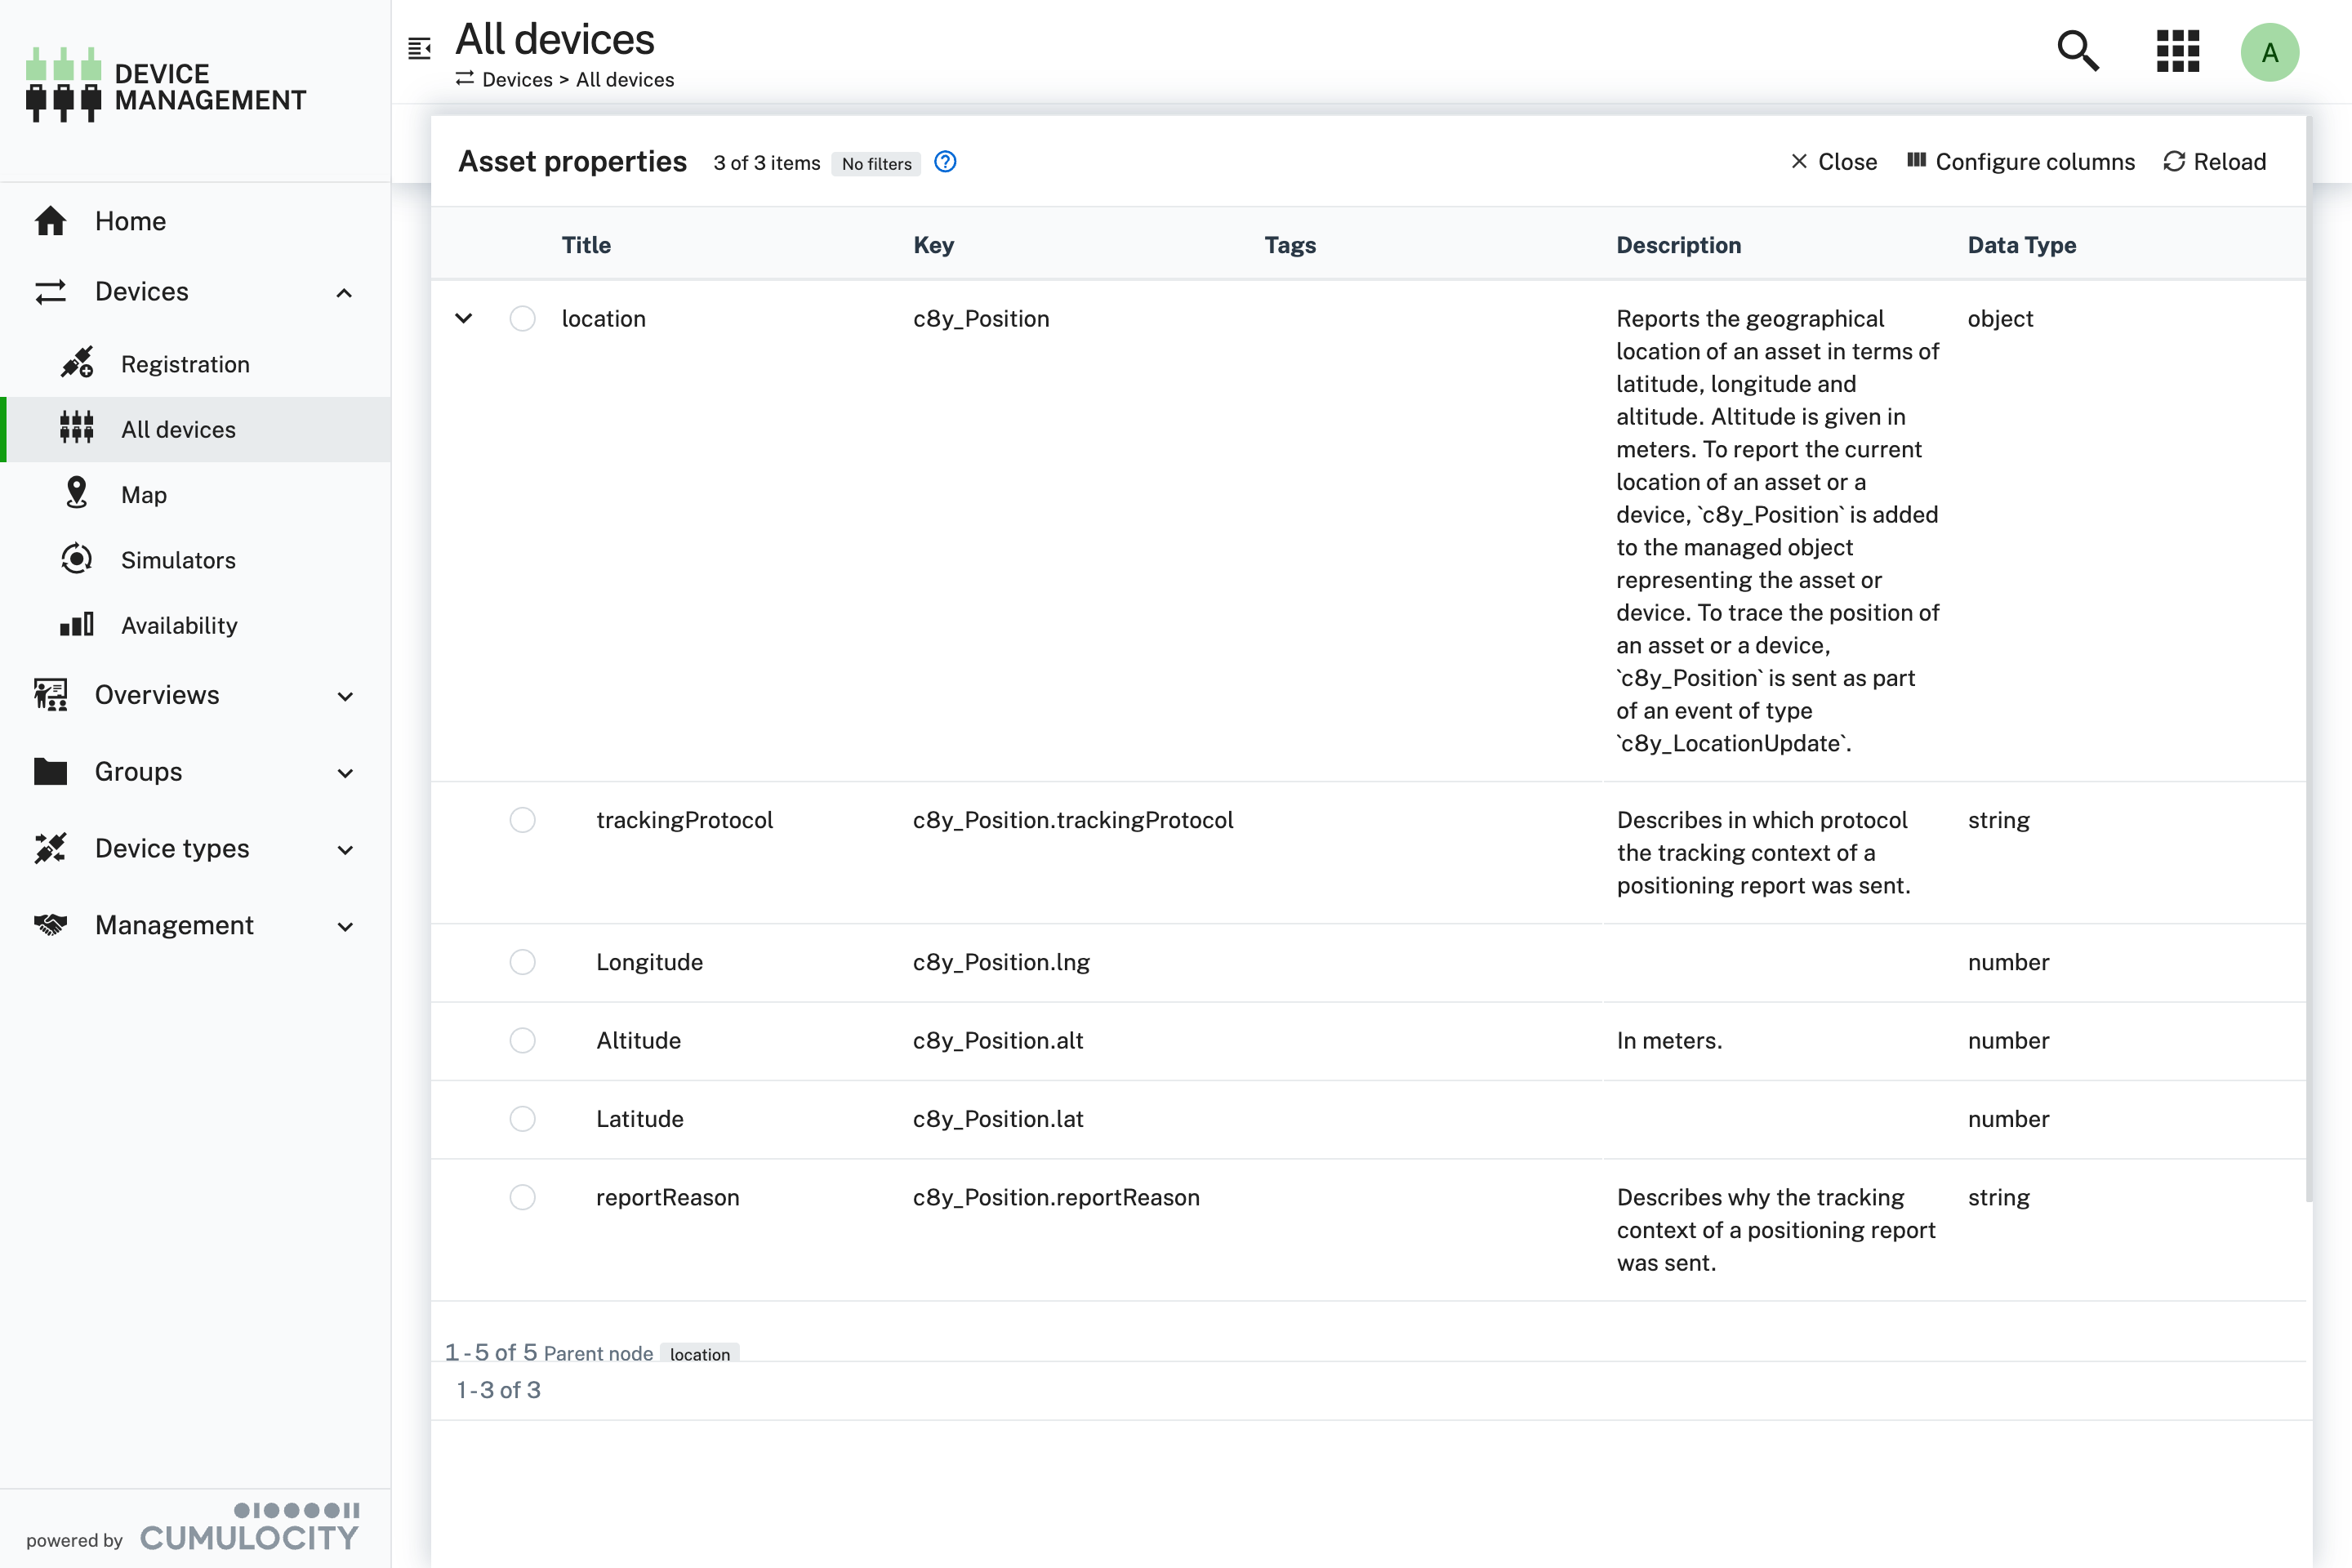
If the Digital Twin Manager application is available on your tenant, you can use pre-configured asset properties to add them as custom columns. Read how to create asset properties in the Asset models > Asset properties section.
If the Digital Twin Manager application is not available on your tenant, you can still create custom columns by manually providing the path to the property you want to display.
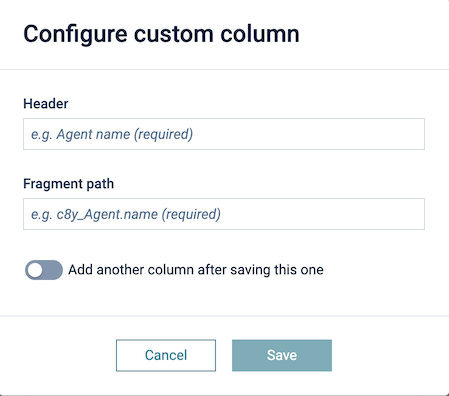
c8y_Mobile.mcc.The new column will be added and displayed in the device list.
The device list offers a filtering functionality to filter devices in the list for specific criteria.
Filtering is available on every column. Click the filter icon next to the name of the column you want to set a filter for.
Specify your filter options in the dropdown list.
Most columns represent text fields. You can filter these columns by simply entering an arbitrary text into the textbox as in the search field. Click + Add next to add another textbox if you want to filter for more than one term.
Apart from filtering for text there are several other options:
Finally, click Apply to carry out the filtering.
The devices list will now only display devices matching the filtering options.
Sorting is available on every column. Click the sort icon in the respective column header once to sort the entries in ascending order and twice to sort the entries in descending order. Click the sort icon once more to remove sorting for this column.
Click Clear filters in the table header if you want to clear all filters and view all devices.
The device list supports the replacement of a physical device with another by preserving the original device representation in the platform including all its generated data. A wizard guides you through this process. Access the wizard by hovering over the device you want to replace in the device list and click the Replace device button.
In the Replacement device step you can see the list of devices available in the platform excluding the device which you are going to replace. Select a replacement device from the list.
The Select external IDs step lists the external IDs assigned to the replacement device. Select those you want assigned to the device representation of the replaced device. You must select at least one external ID. This links the data which your new physical devices sends to the original device representation object.
Before proceeding with the actual replacement, you must confirm this action. Click Replace in the Replace device dialog.
The Replace step displays the progress of the replacement process and the result of every step executed.
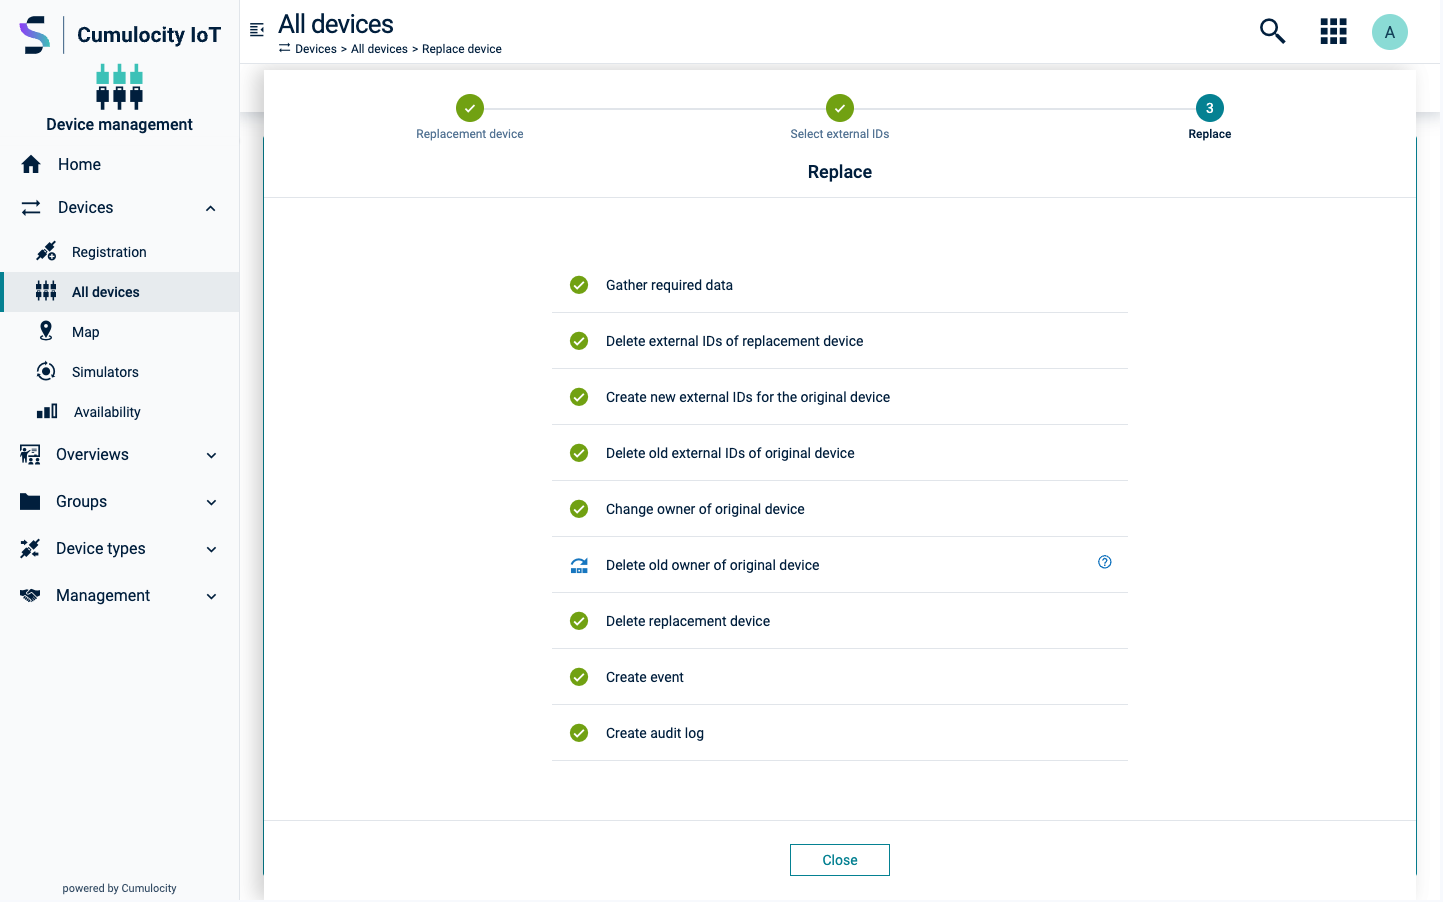
If a step has been skipped you will find an icon with a tooltip which contains the reason why the step has been skipped.
If the execution of a given step has failed, you can see the error details by expanding the step details. Note that an error in one of the steps will not prevent the next steps from being executed. The wizard will try to execute as many steps as possible and provide information about failed steps. If you are able to resolve the reason for the failure(s), you can retry all failed steps by clicking the Retry button in the bottom bar. If you wish to retry a single failed step you can only do so by clicking the Retry this step button form the step actions dropdown.
The Close button brings you back the the updated device list. The replacement device will have been removed from Cumulocity while all data sent by the new physical device will be linked to the platform representation of the original device. This ensures that the physical replacement remains transparent to users.
In order to keep track of the replacements done for a given device an event and an audit log are created for every replacement.
The device will be permanently deleted from the platform.