Managing device data
The Device Management application provides features that support you in efficiently managing your devices. They are accessible through the Management menu in the navigator:
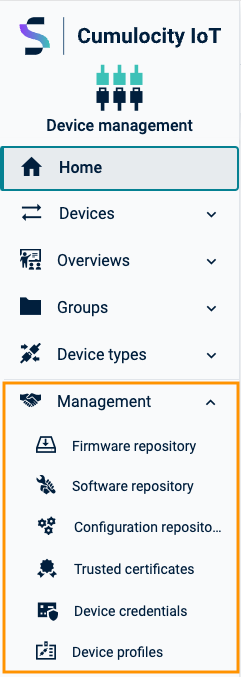
The Device Management application provides features that support you in efficiently managing your devices. They are accessible through the Management menu in the navigator:
In the firmware repository, Cumulocity offers to collect reference firmware for devices.
Only one firmware package version can be applied per device.
Click Firmware repository in the Management menu in the navigator.
The available firmware objects will be displayed as a list.
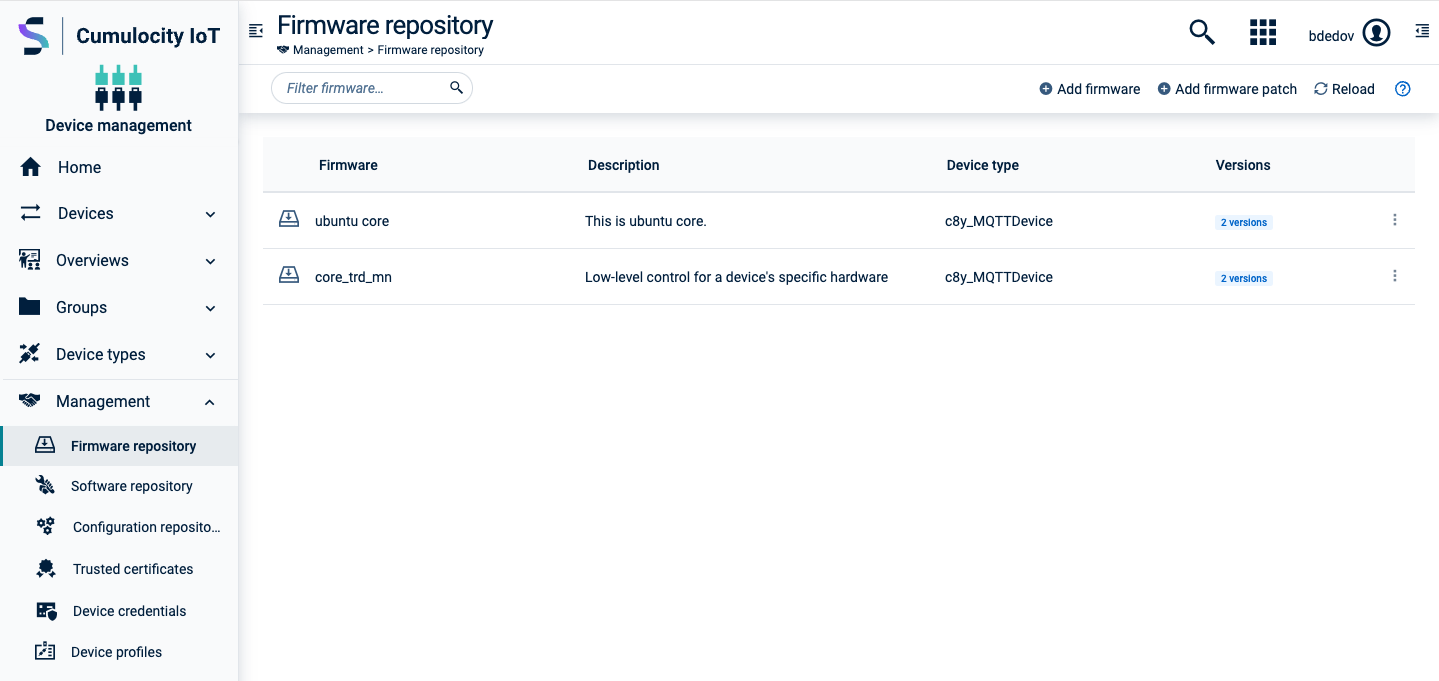
Each entry shows the firmware name, the device type it is applicable for (if set), and a label indicating if and how many versions are available for a particular firmware. At the left in the top menu bar, you can filter the repository entries by name, description or device type. For details on the filtering functionality, see Search and filter functionality.
When clicking on an entry, the details for this firmware are displayed along with all available versions and patches.
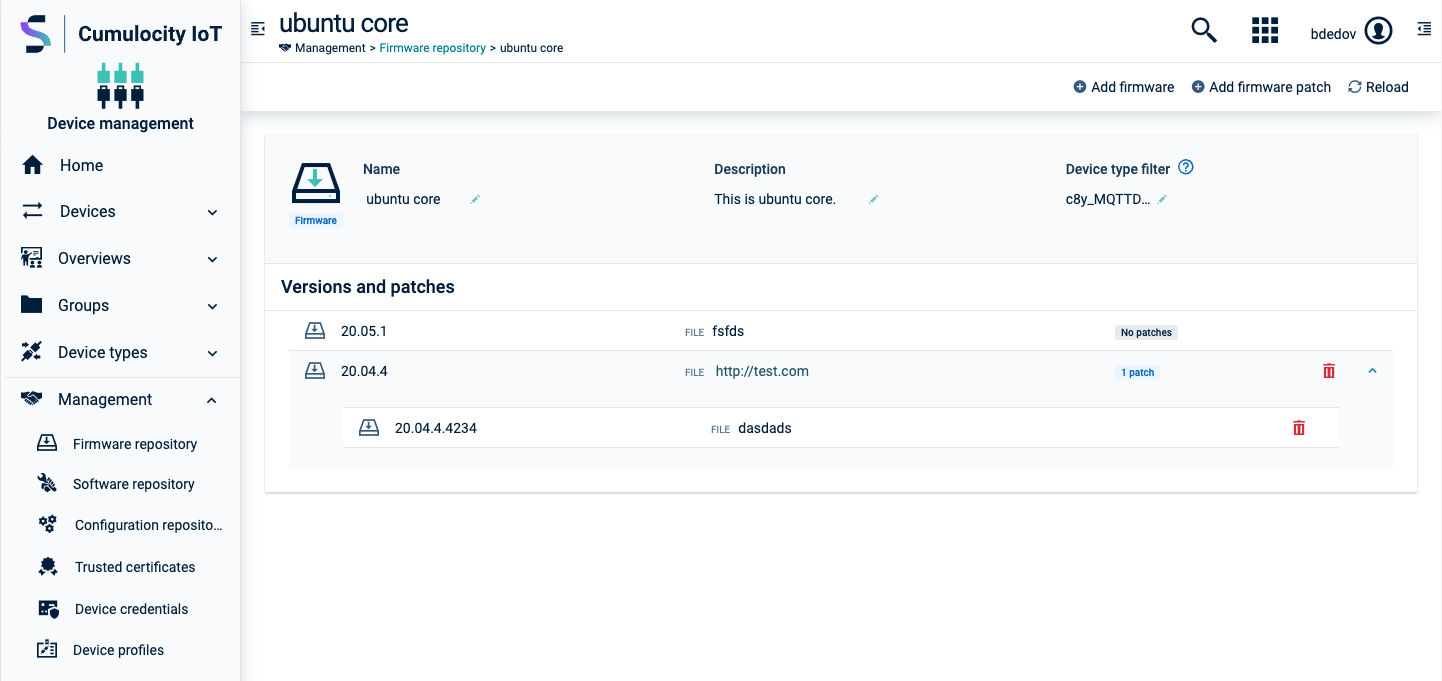
At the top, the firmware name, a description, and optional device type filter(s) are shown. If a filter is set, the firmware will show up for installation only for devices of that type. If no filter is set, it will be available for all devices.
The list of versions and patches shows the version name and the name of the firmware binary. Moreover, the list indicates if a firmware version has patches, which can be viewed by expanding the version entry. The versions and patches are ordered by their creation time (descending).
url attribute.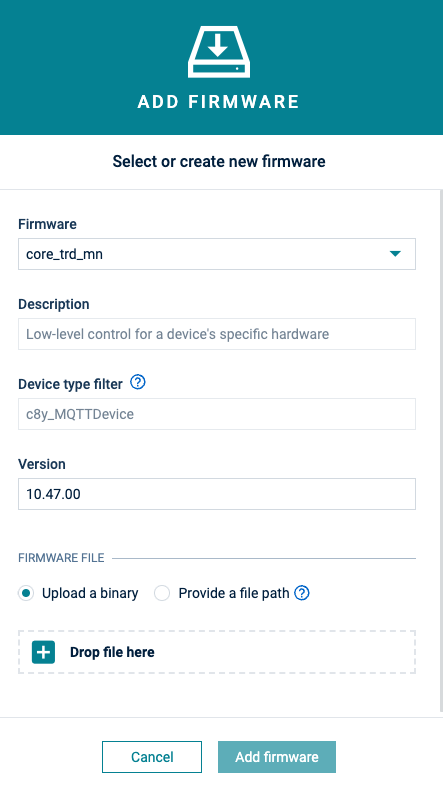
The firmware object will be added to the firmware list or the firmware version will be added to the firmware details and the version label will be updated accordingly.
If you click Add firmware from within the details of a specific firmware, the dialog box looks slightly different as the firmware is already selected. Enter the new version number and upload a binary or provide a file path.
url attribute.As with adding versions, if you click Add firmware patch from within the details of a specific firmware, the dialog box looks slightly different as the firmware is already selected.
The firmware patch will be added to the version details within the firmware details.
The firmware will be updated accordingly.
Click the menu icon at the right of a specific firmware entry and in the context menu click Delete.
The object will be deleted from the firmware repository.
In the details of a specific firmware, hover over the version or patch entry you want to delete and click the delete icon. The firmware version or patch will be deleted from the firmware details.
In the Firmware tab of a device you can manage the installed firmware for the device.
c8y_Firmware operations.Click All devices in the Devices menu in the navigator, select the desired device from the device list and open its Firmware tab.
The Firmware tab shows the current firmware installed on the device.
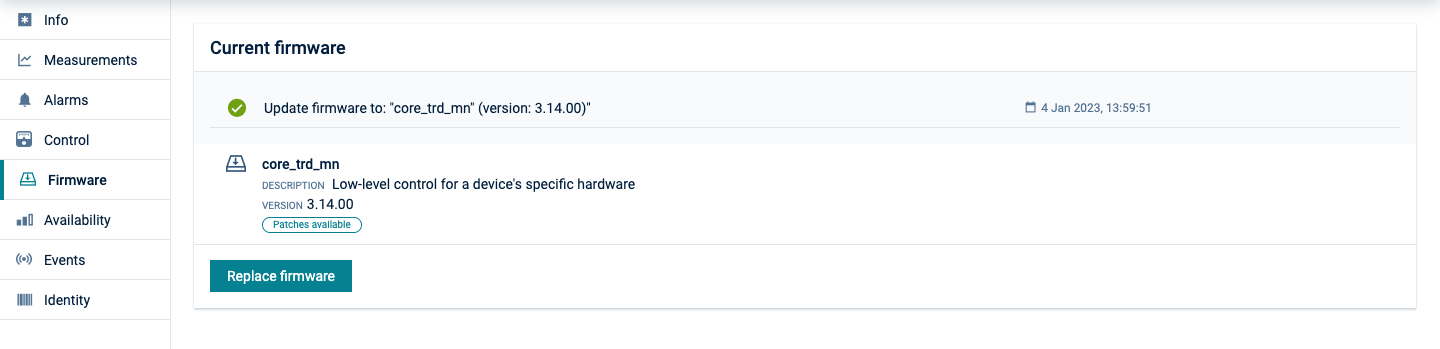
Additionally, it shows the operation status for the last operation (one of SUCCESSFUL, PENDING, EXECUTING, FAILED). Clicking on the operation will show you the operation details.
The install operation to be executed by the device will be created. The firmware installation is completed as soon as the device has executed the operation.
Click on the operation to view its details. The status of the last operation is also shown on the Firmware tab.
Cumulocity offers the option to execute firmware updates for multiple devices at once.
The status of the bulk operation is shown in the Bulk operations tab under Device control.
Moreover, the operation details are shown in the Control tab of the selected devices.
In the software repository, Cumulocity offers to collect reference software for devices. Multiple software packages can be installed on a device.
Click Software repository in the Management menu in the navigator.
The available software objects will be displayed as a list.
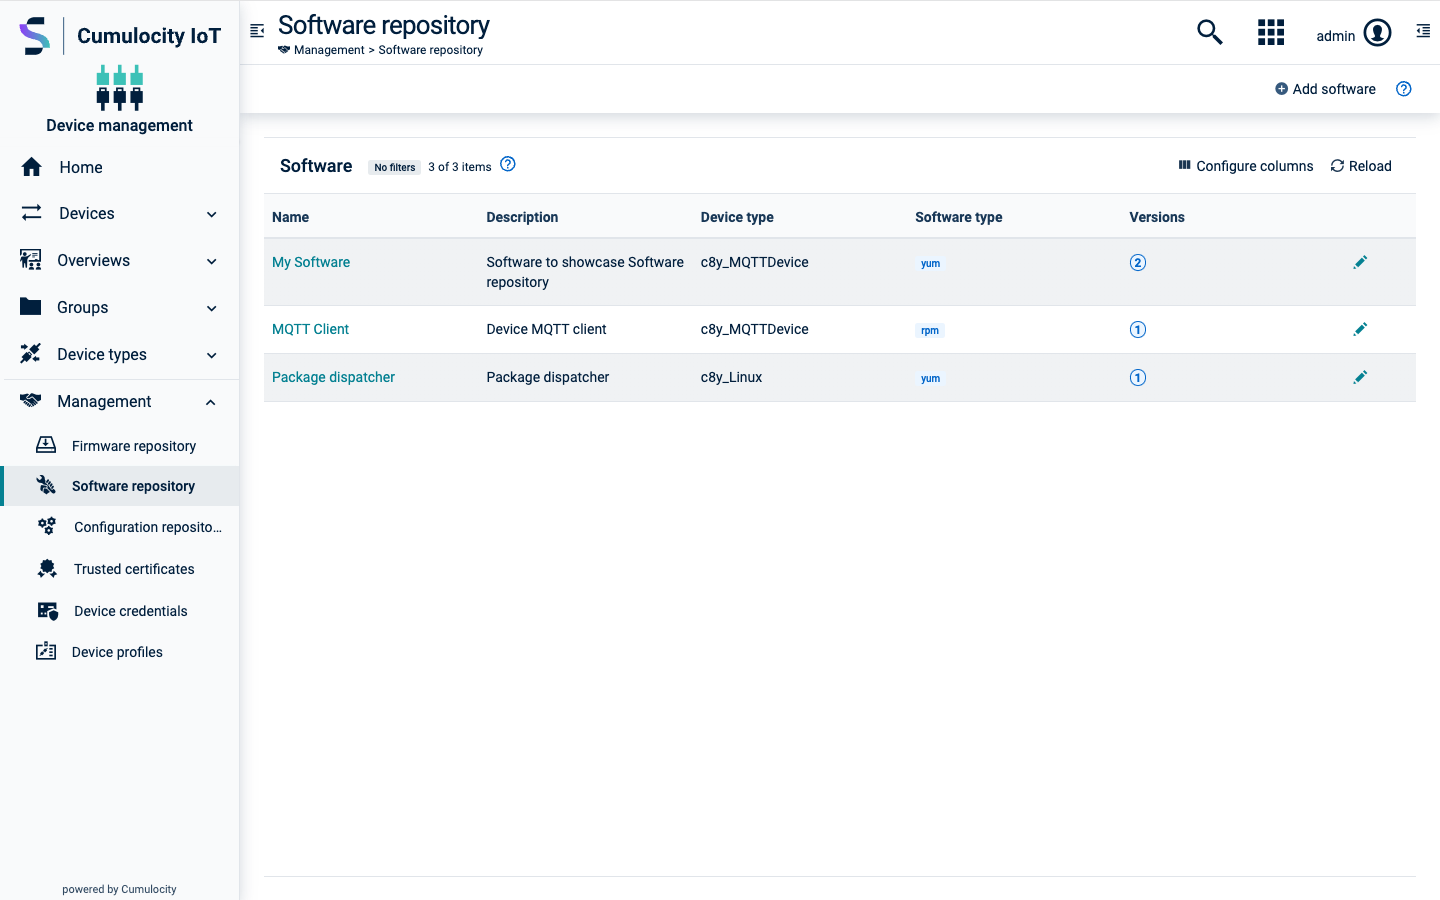
Each entry shows the software name, the device type it is applicable for (if set), the software type (if set), and a badge indicating if and how many versions are available for a particular software. The values in every column except for the Versions column can be filtered and sorted by clicking the filter and sort icons in the column header.
When clicking on an entry, the details for this software are displayed along with all available versions.
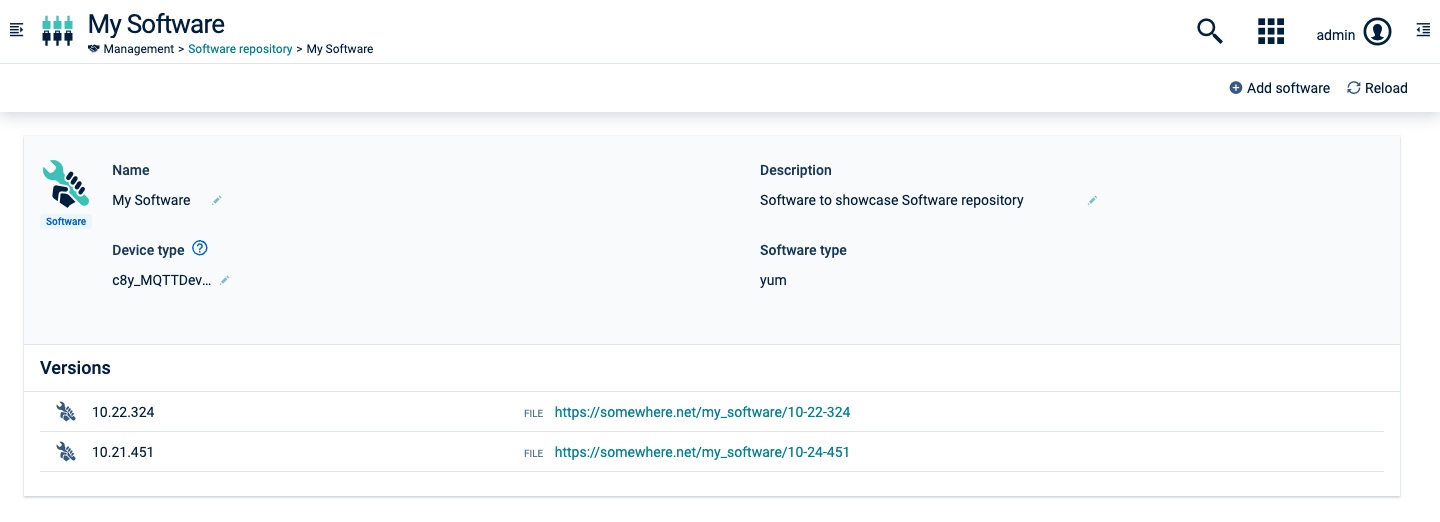
At the top, the software name, a description, an optional device type filter(s), and a software type are shown. If a device type filter is set, the software will show up for installation only for devices of that type. If no filter is set, it will be available for all devices. The software type will make the software installable only on devices that specifically support the particular software type.
container or image, or try to search for more specific types like docker, lxc, and so on. This may prevent you from scattering your software types and using different names for effectively the same software type.The list of versions shows the version name and the name of the software binary. The versions are ordered by their creation time (descending).
url attribute.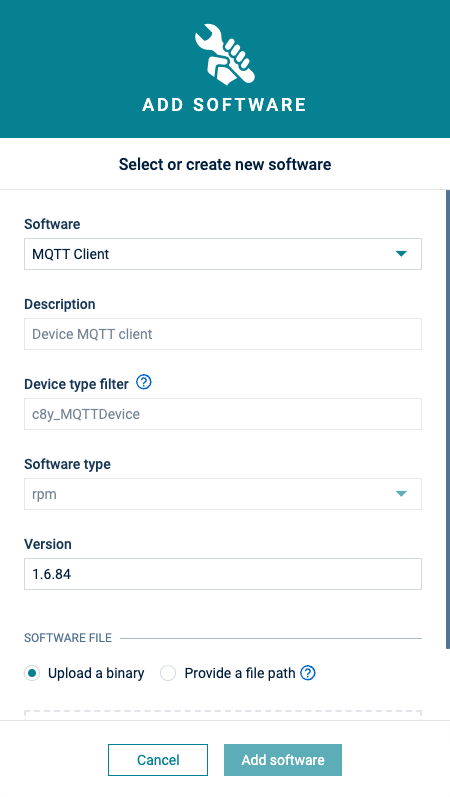
The software object will be added to the software list or the software version will be added to the software details and the version count label will be updated accordingly.
If you click Add software from within the details of a specific software, the dialog box looks slightly different as the software is already selected. Enter the new version number and upload a binary or provide a file path.
The software will be updated accordingly.
Click the delete icon at the right of a specific software item and in the context menu click Delete.
The software and all its versions will be deleted from the software repository.
In the details of a specific software, hover over the version entry you want to delete and click the delete icon . The software version will be deleted from the software details.
If the last version of a software is deleted, the software is entirely removed from the repository.
In the Software tab of a device you can manage the software for the particular device.
Click All devices in the Devices menu in the navigator, select the desired device from the device list and open its Software tab.
The Software tab shows a list of all available software installed on the device. If a given software has a type, it will be displayed next to its name. You can search for a particular software by its name or filter the list by software type.
Additionally, it shows the operation status for the last operation (one of SUCCESSFUL, PENDING, EXECUTING, FAILED). Clicking on the operation will show you the operation details.
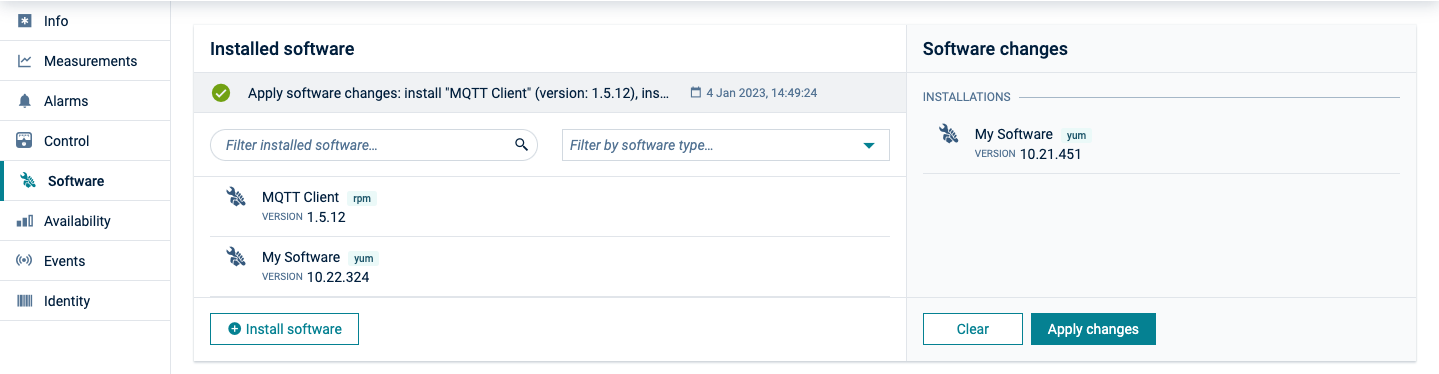
In the Software tab, click Install software.
c8y_SupportedSoftwareTypes declared the dialog will only display the software items matching the supported software types.Select one or multiple software items by selecting the respective version from the list which contains all software items for the particular device type available in the software repository.
For devices supporting advanced software management features, already installed software items cannot be pre-filtered from the list of available software items. Thus, after a particular software version has been selected, a check is done if the selected software is already installed on the device. If this is the case, a warning next to the selected version indicates that this software version is already present on the device.
You can remove the already installed software item under Software changes or leave it and apply it as part of the changes. It is up to the device agent to decide how to handle such an update.
Click Install.
Under Software changes at the right, review your planned changes and confirm the software update operation by clicking Apply changes.
The install operation to be executed by the device will be created. The software installation is completed as soon as the device has executed the operation.
Click on the operation to view its details. The status of the last operation is also shown on the Software tab.
Hover over the software item which you want to update and click Update. Select a version from the list and click Update again.
The software will be updated with the selected version.
Hover over the software item which you want to delete and click the delete icon.
Cumulocity offers the option to execute software updates for multiple devices at once.
The status and details of the bulk operation are shown in the Bulk operations tab under Device control.
Moreover, the operation details are shown in the Control tab of the selected devices.
Cumulocity allows to retrieve configuration data and store and manage it in a configuration repository. The configuration data contains the parameters and the initial settings of your device.
Configuration snapshots help you, for example, to apply the same configuration to multiple devices as described below.
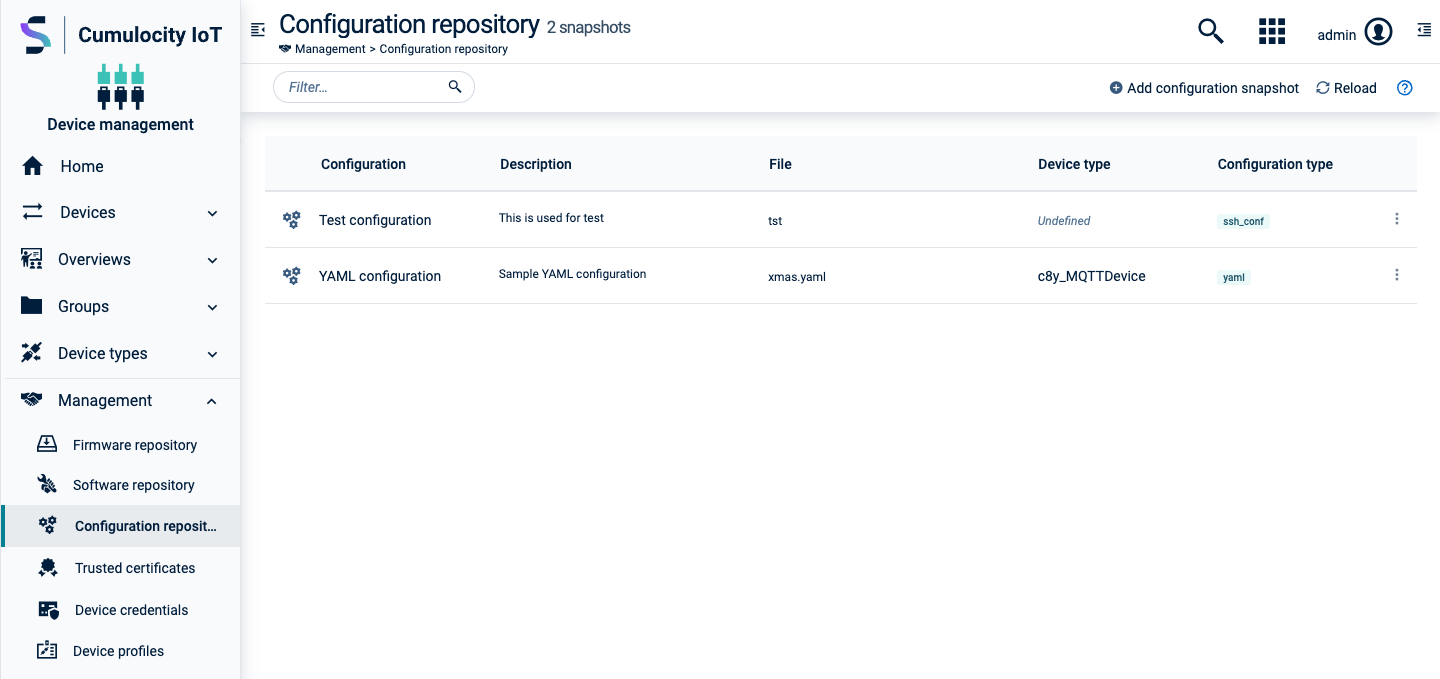
Click Configuration repository in the the Management menu in the navigator. In the Configuration repository page, all available configuration snapshots are listed. Each entry shows the configuration name, the description of the configuration, the device type, and the configuration type.
The configuration snapshot will be added to the configuration repository.
To edit a configuration snapshot, click on the menu icon at the right of the row and then click Edit.
For details on the fields, see To add a configuration snapshot.
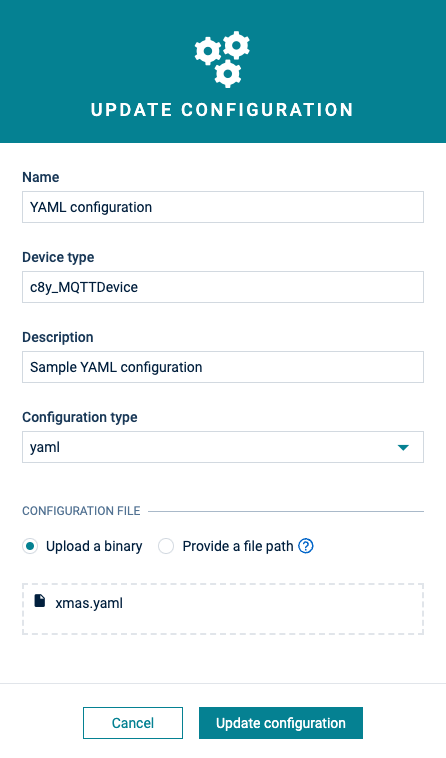
If the configuration content is a text file, it opens in the code editor so that you can adjust it inline. If the content is sourced from a remote URL, it cannot be edited inline; only the file URL is shown.
Click Update configuration to save your changes.
To delete a configuration snapshot, click on the menu icon at the right of the row and then click Delete.
The configuration snapshot will be deleted from the configuration snapshot repository.
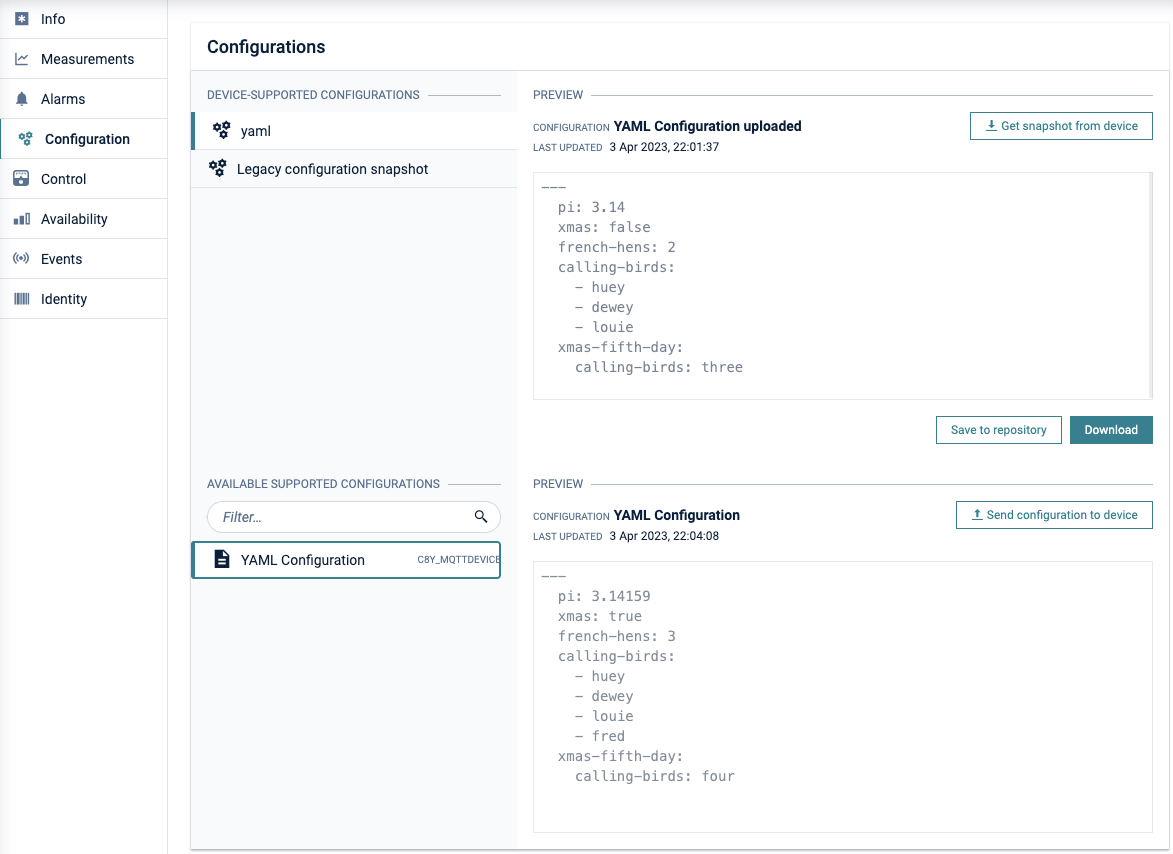
Managing configurations, that is requesting a configuration from a device and sending a configuration to a device, can be done in multiple ways. Depending on user permissions and device settings, you can work with text based, typed file-based or legacy file-based configuration. Refer to Configuration for more detailed and technical information.
We recommend you to use typed file-based configuration. With typed file-based configuration, devices can manage multiple configurations at the same time. You can upload or retrieve different configurations for different types. Using this approach is more versatile because the configurations are handled as events rather than as files, which is more efficient.
Once retrieved, the snapshot is shown in the Preview section in a read-only editor with automatic syntax highlighting. From there you can:
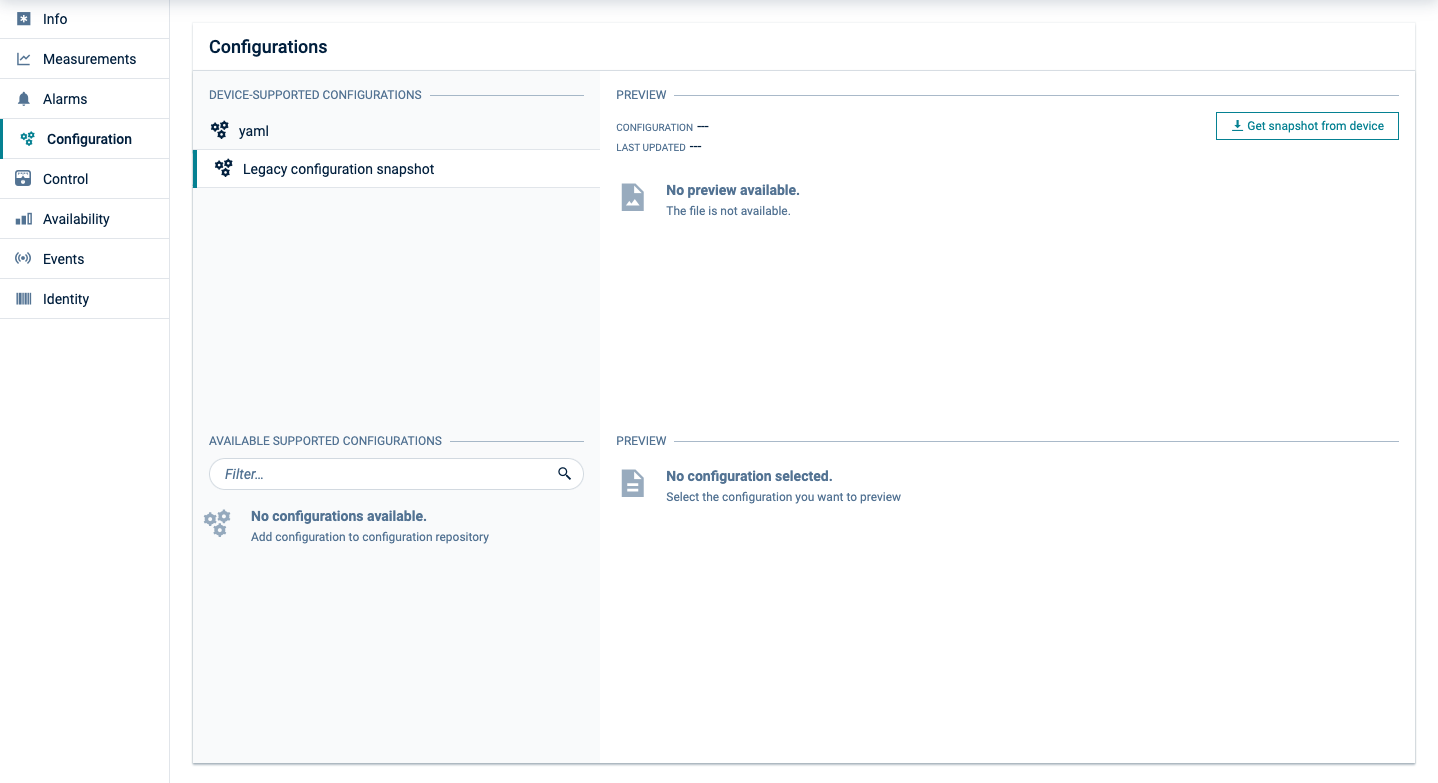
To apply a configuration snapshot to a device which supports multiple configuration types:
When you select a configuration from Available supported configurations, an Edit in repository button is also shown next to Send configuration to device. Click it to open the corresponding entry in the Configuration repository directly in a drawer for editing, without having to navigate to the Configuration repository page.
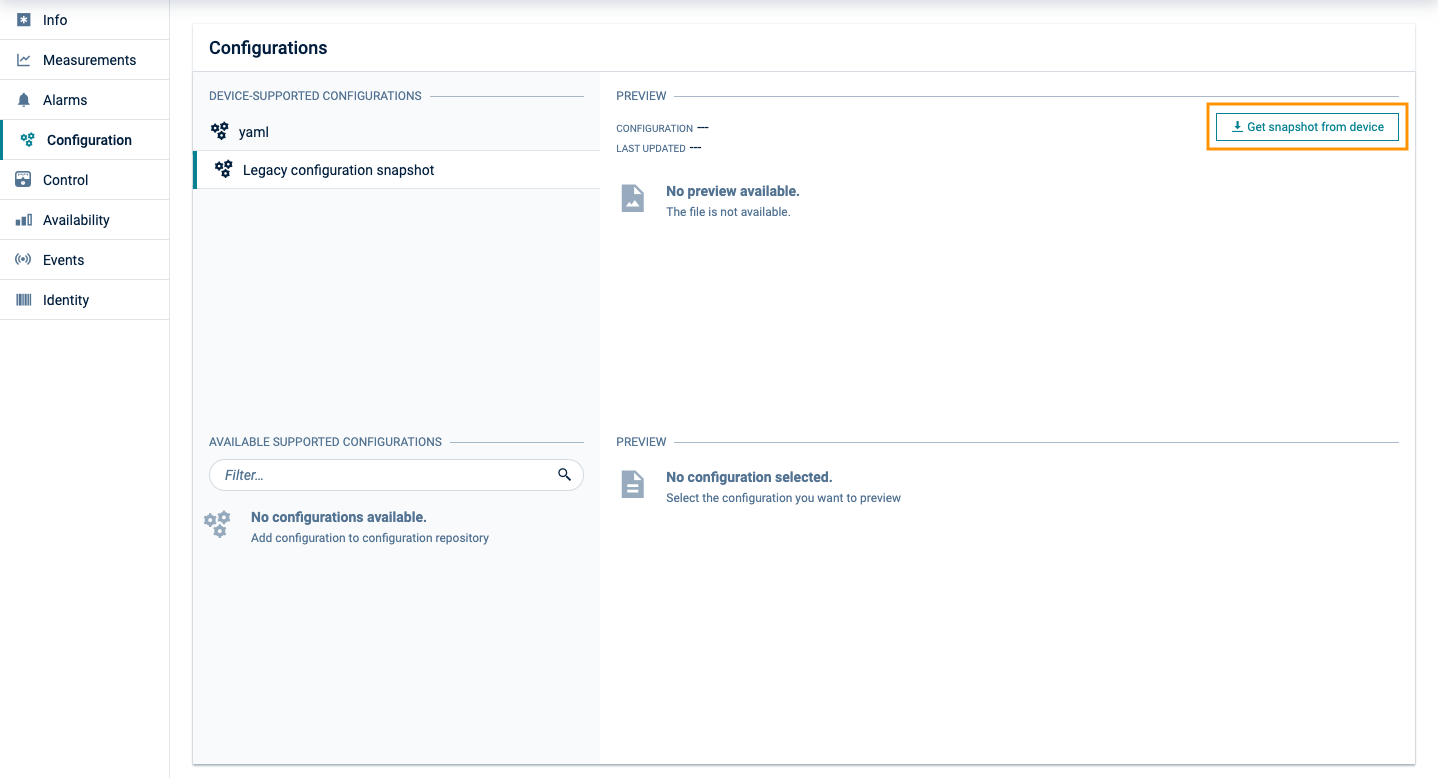
Devices managing configuration as files can do so in a basic form using legacy file-based configuration. Legacy file-based configuration only allows a single configuration to be set per a device.
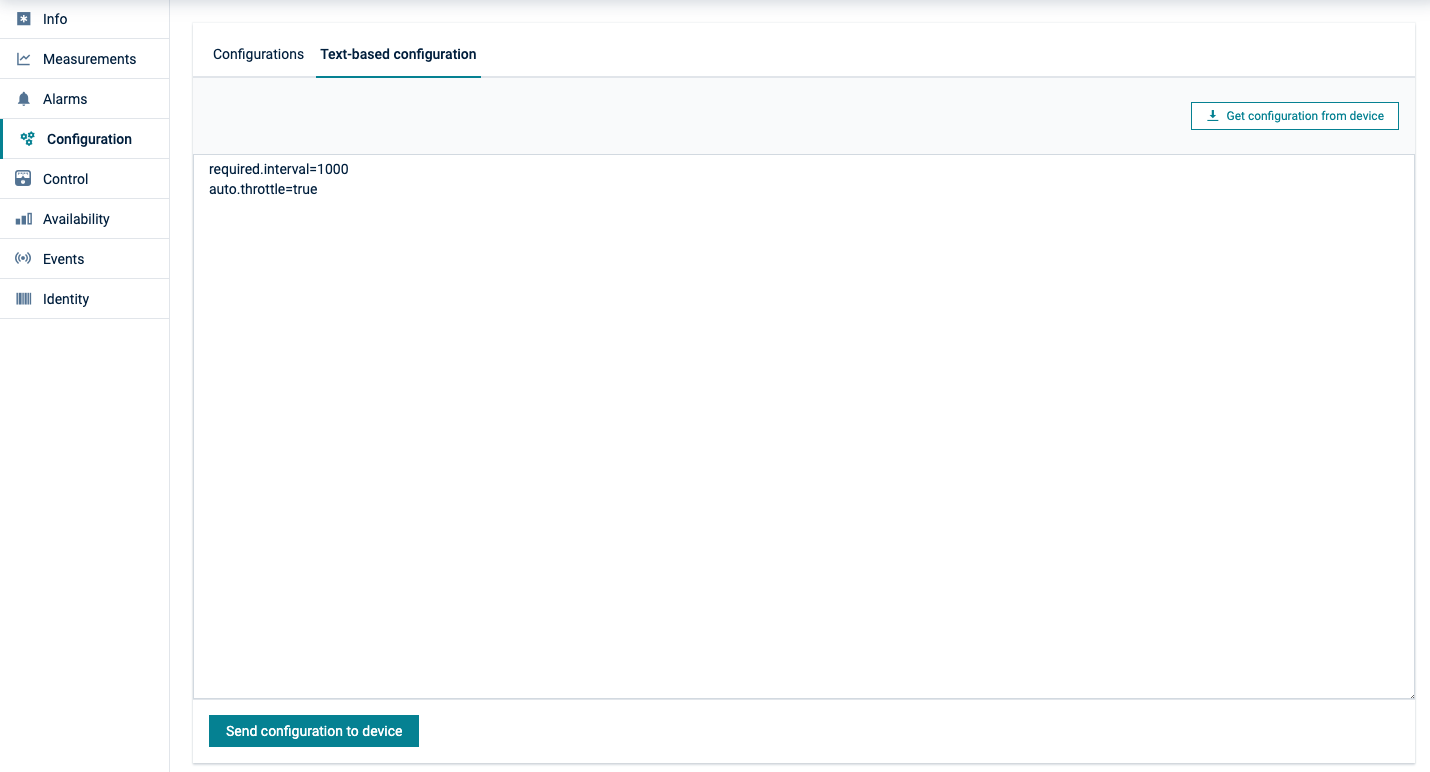
The most basic form of configuration is text-based configuration. A text command can be sent or received from a device. We recommend you to use text-based configuration for short human readable configuration files only.
The Device credentials page lists all credentials that have been generated for your connected devices. Each device that has been registered shows up here with the naming convention “device_<id>”.
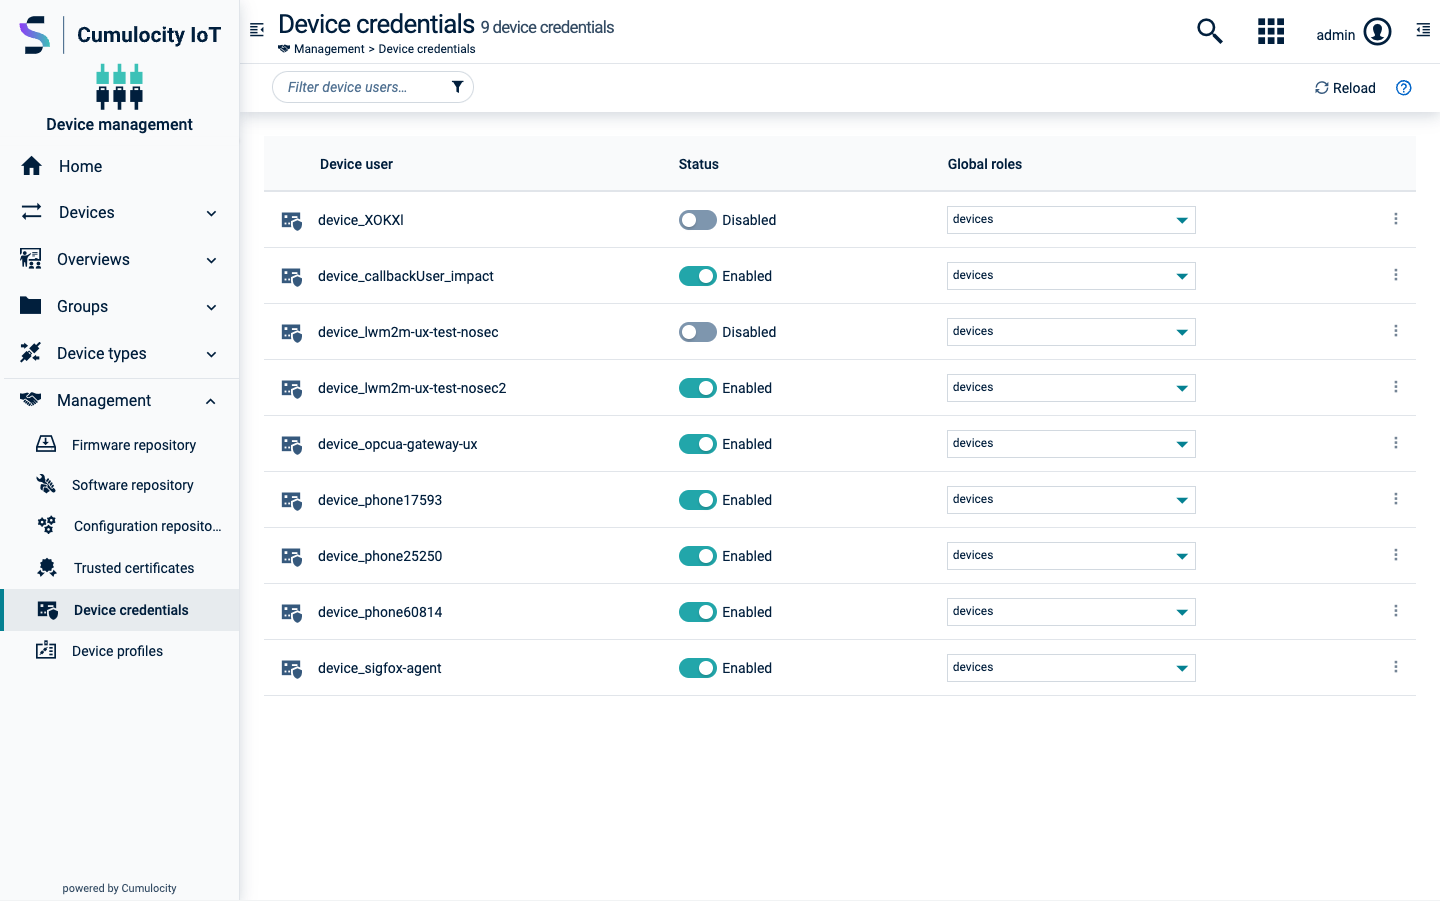
The roles for the device will be updated accordingly.
Click the menu icon at the right of a device credentials entry and then click Edit to open the device details.
In the details page, you may disable/enable a device by clicking the Active toggle, or assign or remove permissions by selecting/deselecting roles in the Global roles list.
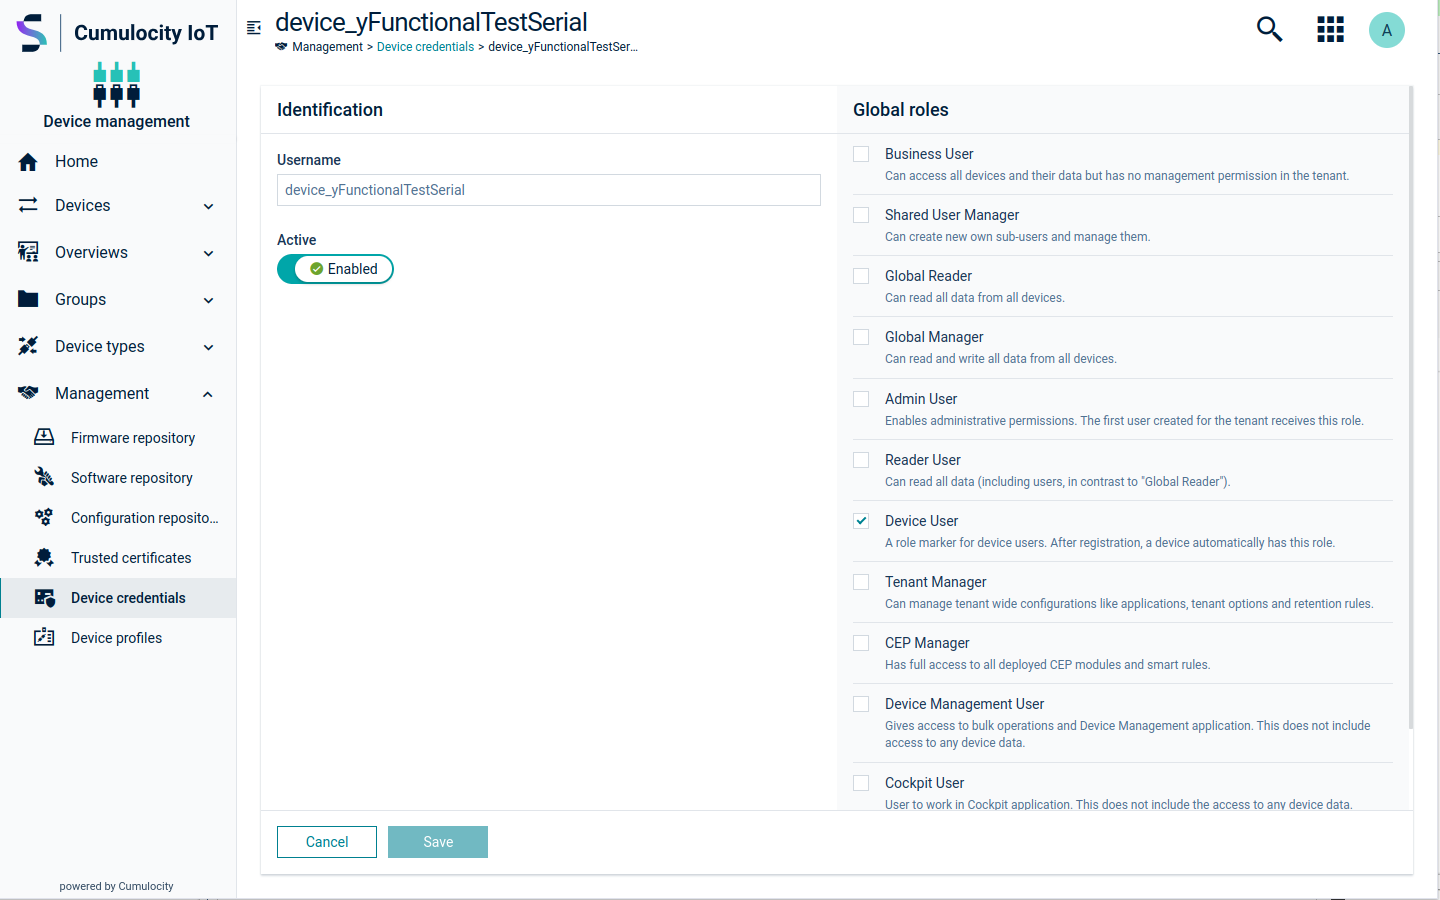
Click Save.
The device details will be updated accordingly.
Click the menu icon at the right of a device credentials entry and then click Disable.
The device credentials will be temporarily disabled.
Click the menu icon at the right of a device credentials entry and then click Delete.
The device credentials will be permanently deleted.
Deleting device credentials might be required if you have carried out a factory reset on a device. In this case, the device will often loose its assigned credentials. Delete the device credentials and continue with the normal registration process to re-register the device.
Device profiles represent a combination of a firmware version, one or multiple software packages, and one or multiple configuration files which can be deployed on a device. Based on device profiles, users can deploy a specific target configuration on devices by using bulk operations.
Click Device profiles in the Management menu in the navigator to access the Device profiles page, which lists all available device profiles.
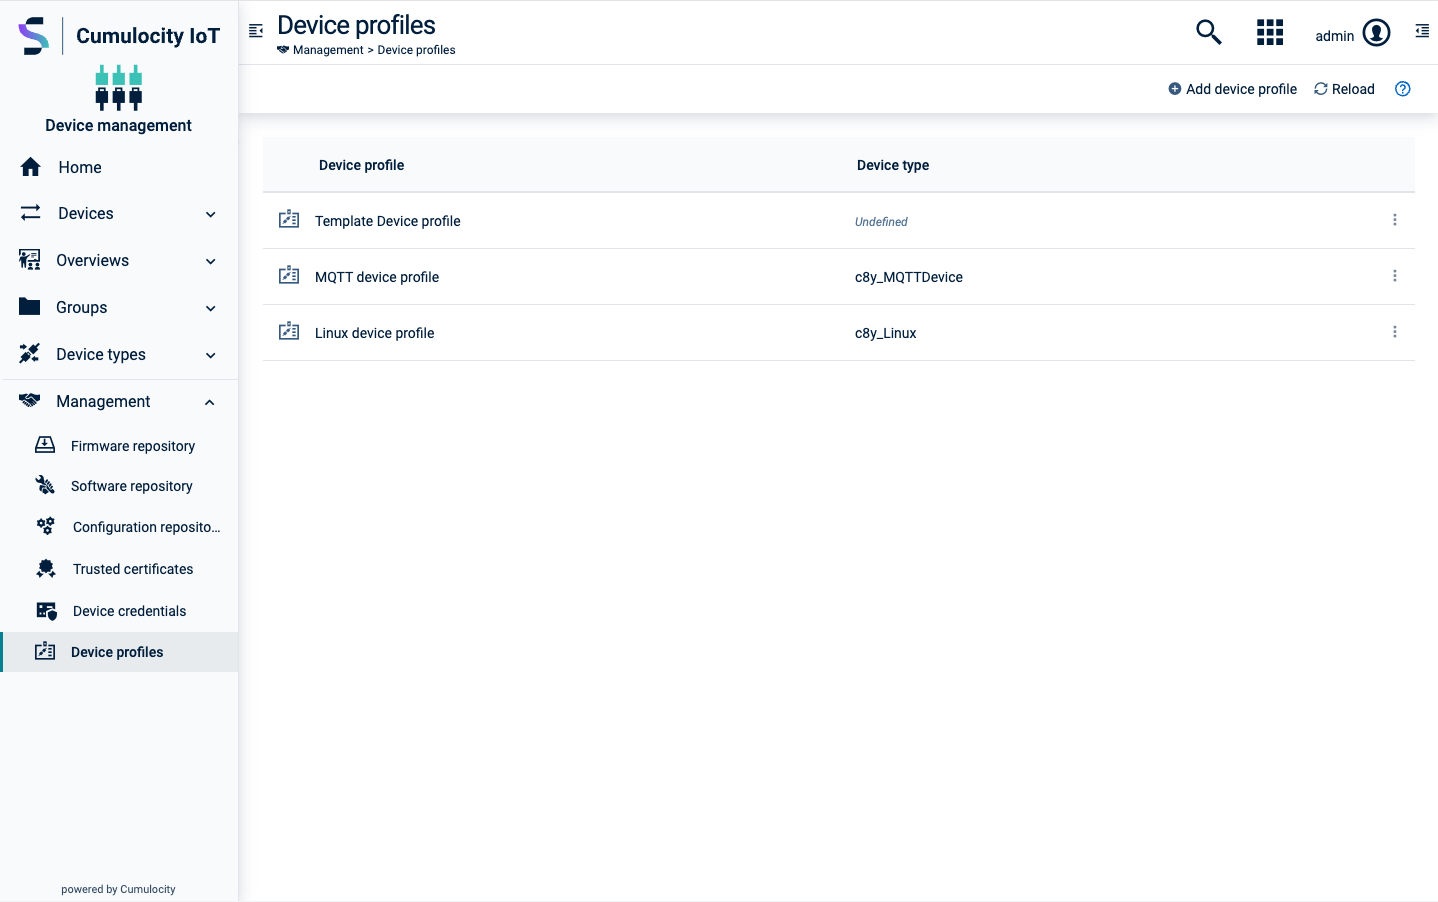
Each device profile entry shows the profile name and the selected device type(s), if any.
Click a device profile name to view its details.
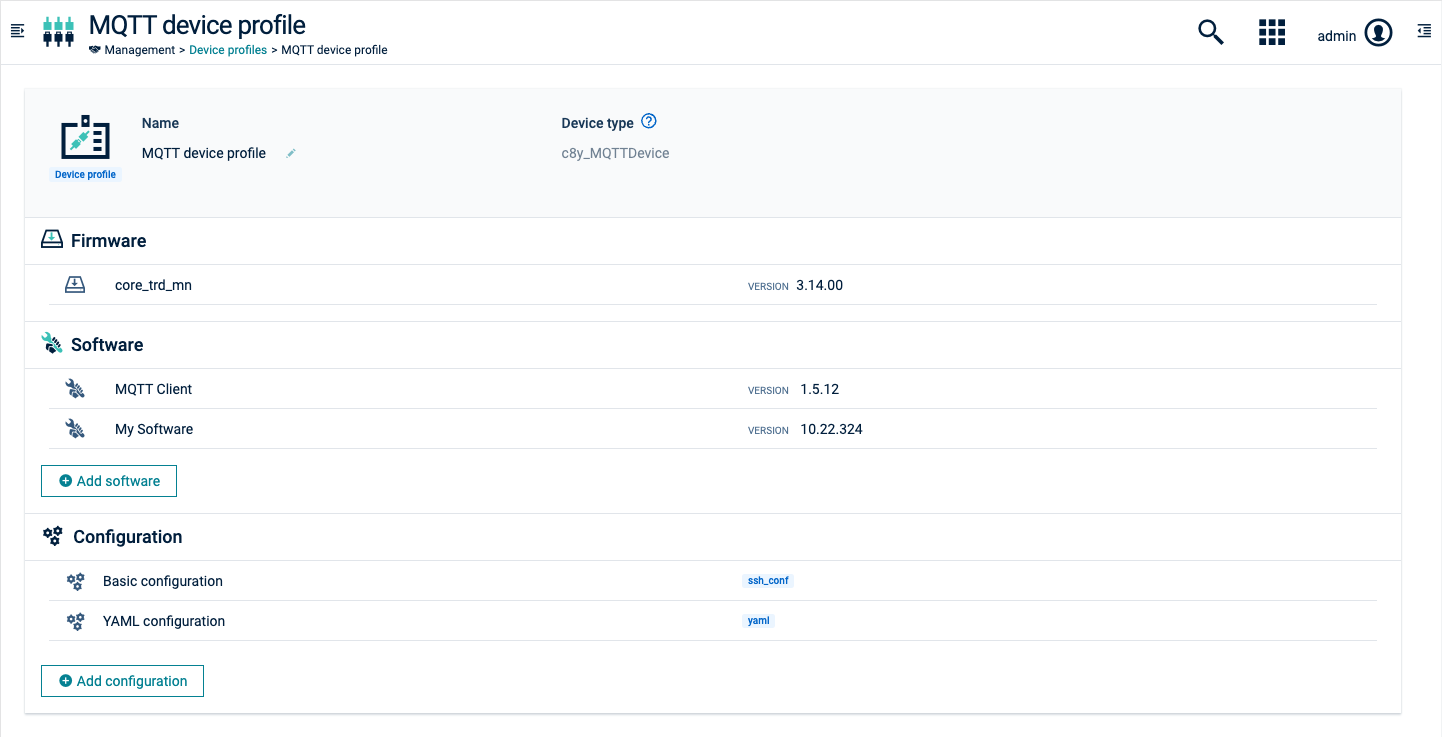
The Name and device type section shows the name of the profile and optionally selected device types.
The sections below list the firmware version, software packages, and configuration files for this particular device profile.
Click Add device profile at the right of the top menu bar, to add a new device profile.
In the Add device profile window, provide a name for the profile and optionally enter one or more device types. If a device type is provided, the device profile can only be assigned to devices of the specified type. If left empty, it will be available for all device types.
In the device profile details, you can add firmware versions, software packages, and configuration files.
Click Add firmware to add a firmware version to the profile. Select a firmware and a version from the list and click Save to add the selection to the profile. If a device type has been defined for the profile, only those firmware versions can be selected that match the device type. Only one firmware version can be added to a profile.
For details on firmware, see Managing firmware.
Click Add software to add a software package to the profile. Select a software and a software version from the list and click Save to add the selection to the profile. If a device type has been defined for the profile, only those software versions can be selected that match the device type. You can add multiple software packages to a profile.
For details on software, see Managing software.
Click Add configuration to add a configuration file to the profile. Select a configuration file from the list and click Save to add the selection to the profile. You can add multiple configuration files to a profile.
For details on configuration snapshots, see Managing configurations.
To update a device profile click the menu icon at the right of the respective device profile entry and then click Edit.
You may edit the name and the device types by clicking the edit icon next to the respective fields. Make the desired changes and click Save to save your edits.
Moreover, you can delete firmware, software or configuration items or add new ones.
To delete an item, hover over it and click the delete icon.
See To add items to a device profile for details on how to add firmware, software or configuration items.
Note that in case of firmware, only one item is allowed in a profile at a time.
To duplicate a device profile, click the menu icon at the right of the respective device profile entry and then click Duplicate.
Duplicating a profile creates another instance of the profile with the same content. Per default, the original profile name is extended with “Copy of”. You may give the profile a more appropriate name by clicking the edit icon next to the name field and editing it.
To delete a device profile, click the menu icon at the right of the respective device profile entry and then click Delete.
Device profiles can be assigned to:
The Device profile tab of a particular device shows the details of the currently installed profile on a device.
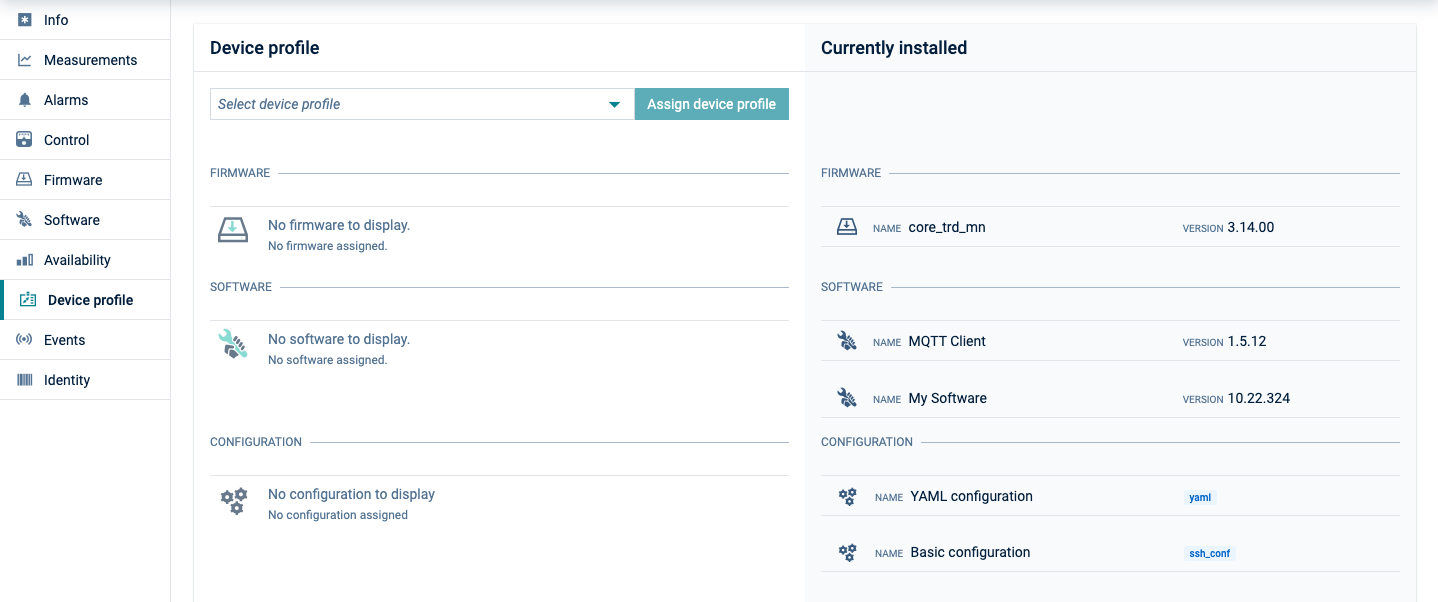
c8y_DeviceProfile operations.Device profiles can be applied to individual devices in the Device Profile tab of the particular device.
Device profiles can be applied to multiple devices by using bulk operations.
The devices will install the firmware, software, and configurations items of the profile and report back the status of the operation. After applying the profile, the device objects in the platform are updated accordingly with the new profile information.