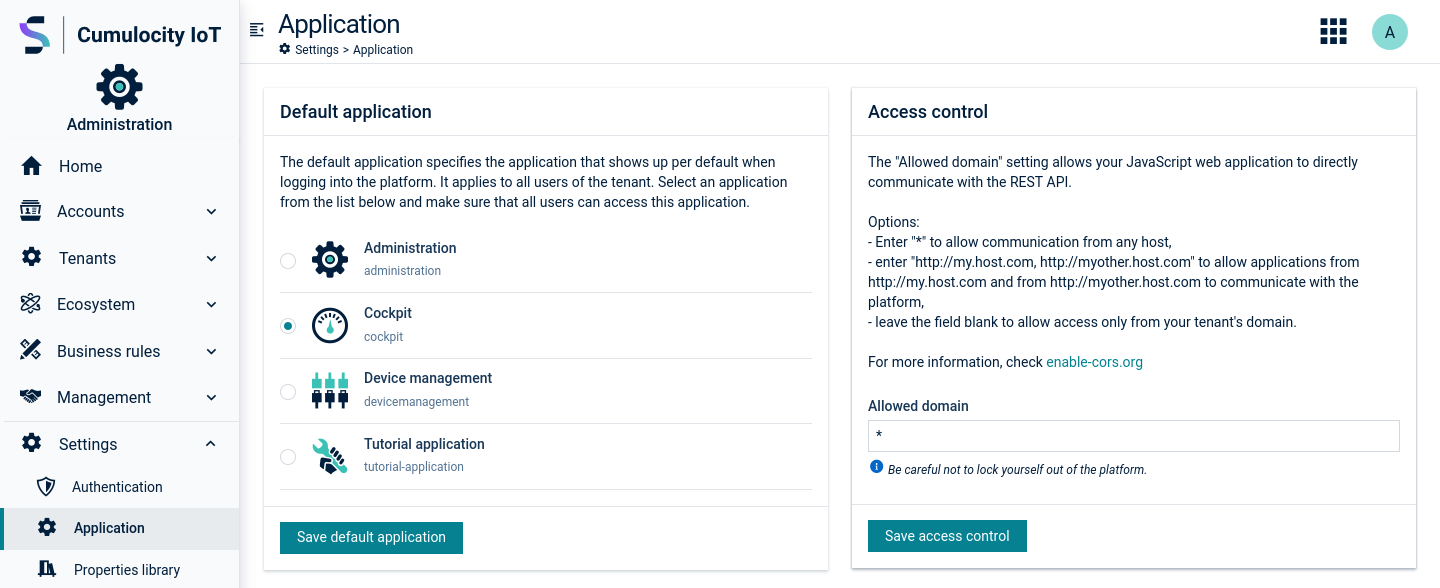
Click Application in the Settings menu to change applications settings.
To change application settings
Under Default application, you can select a default application from the list which will apply to all users within the tenant. Whenever the platform is accessed, for example, by domain name only, without mentioning a specific application, the application selected as default application is used as default landing page.
Info
All users must have access to this application.
Under Access control, administrators can enable cross-origin resource sharing or “CORS” on the Cumulocity API.
The Allowed Domain setting will enable your JavaScript web applications to directly communicate with REST APIs.
Set it to “*” to allow communication from any host.
Set it to http://my.host.com, http://myother.host.com to allow applications from http://my.host.com and from http://myother.host.com to communicate with the platform.
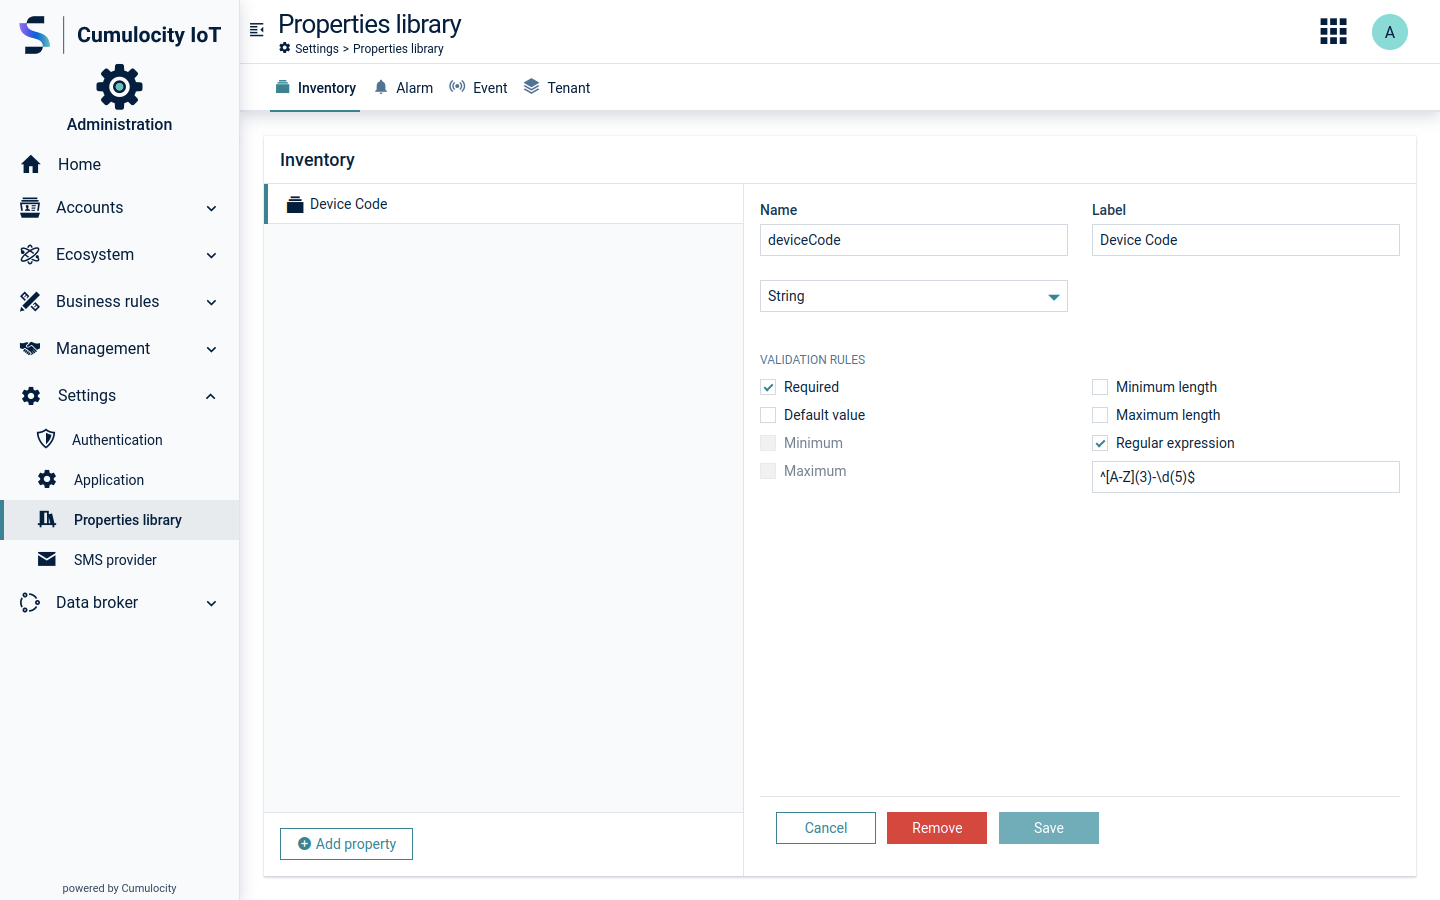
Custom tenant properties are available during tenant creation. The custom properties can be edited under Subtenants in the Custom properties tab of each tenant. Additionally, these properties can be viewed and exported in the Usage statistics.
Custom alarm and event properties can be used as custom fields which can be added to your reports and will be available in the Export page in the Cockpit application.
Click on the name of a property in the list to open it.
Click Remove to delete the property.
SMS provider
Requirements
ROLES & PERMISSIONS:
To view SMS provider configurations: READ permission for the permission type “SMS”
To set or remove SMS provider configurations: ADMIN permission for the permission type “SMS”
SMS are used throughout the platform for various features like two-factor authentication and user notifications, for example, on alarms.
By providing your credentials you enable platform features that utilize SMS services.
To enter SMS provider credentials
Click SMS provider in the Settings menu.
In the SMS provider page, select one of the available SMS providers from the SMS provider dropdown field. You can start typing to filter items and more easily find your preferred provider.
In the resulting dialog, enter the required credentials and properties or specify optional settings, which differ depending on the provider you selected.
Click Save to save your settings.
Info
OpenIT does not serve new customers anymore and is in the process of shutting down their SMS provider business. We therefore recommend you to select one of the other SMS providers.
Connectivity
In the Connectivity page, you can manage credentials for different providers. In order to add or replace credentials ADMIN permissions are required.
Requirements
ROLES & PERMISSIONS:
The Connectivity menu item is only available if you are logged in to the Cumulocity platform as administrator and if you have READ or ADMIN permission for the permission type “Connectivity”.
To view connectivity settings: READ permission for the permission type “Connectivity”
To set or remove connectivity provider configurations: ADMIN permission for the permission type “Connectivity”
The following provider settings may currently be specified:
Enter the credentials of your provider platform. Depending on the provider, these credentials will be either the credentials of your account in the provider platform or the credentials with which you can register in the Cumulocity connectivity page, will be displayed in your account in the provider platform.
Finally, click Save to save your settings.
Depending on the provider you have selected, there may be additional fields, which will be explained in the respective agent documentation, see Device integration.
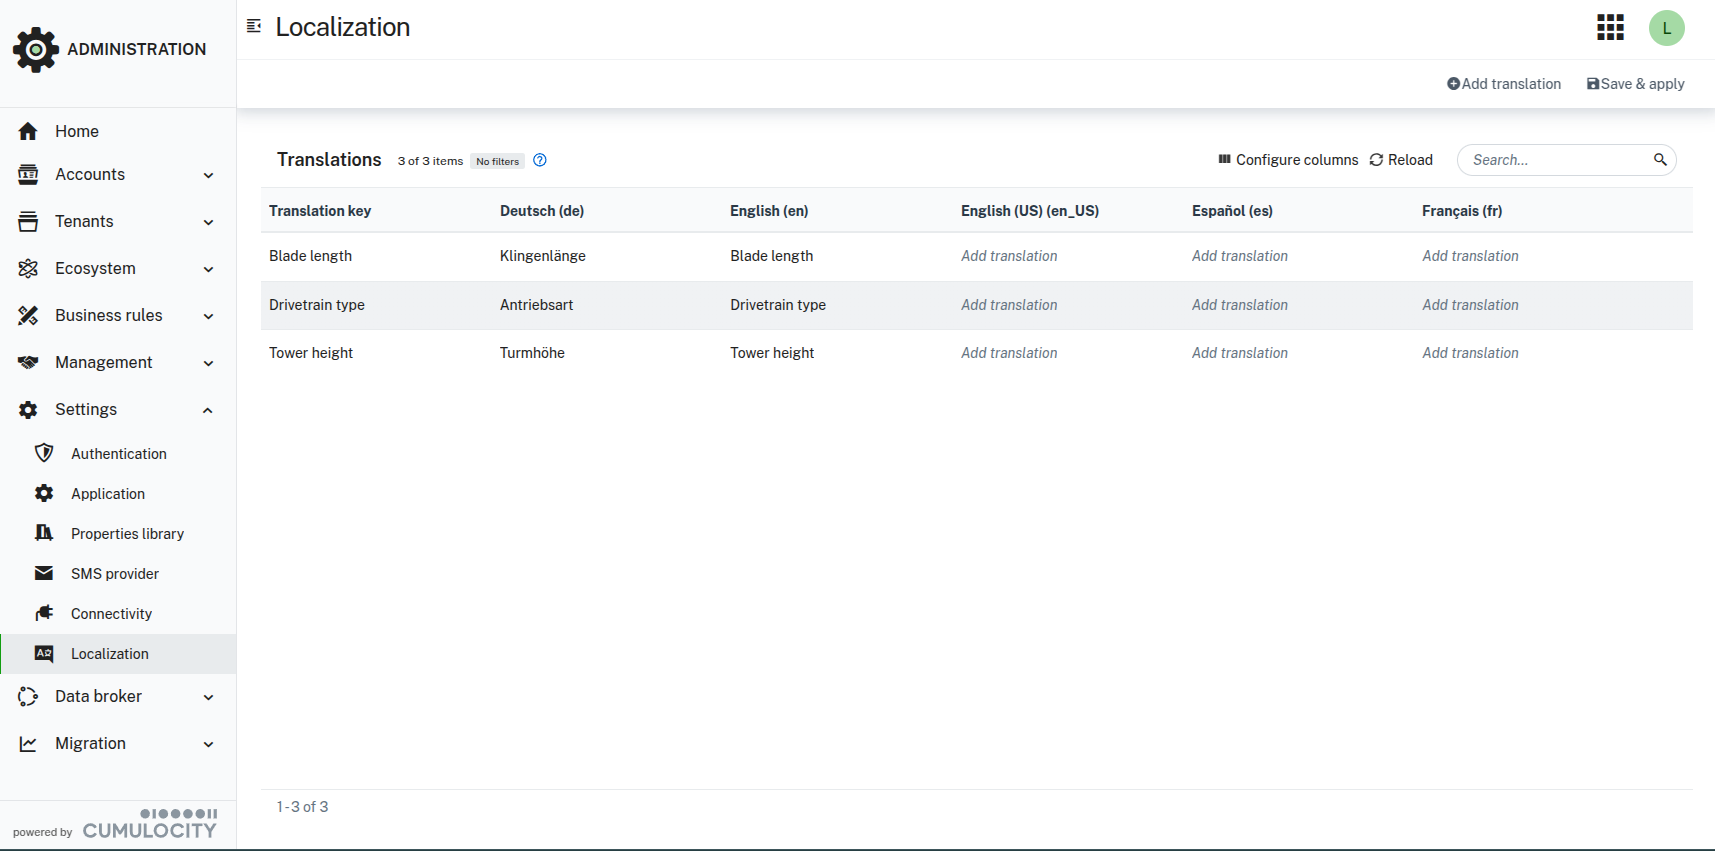
Localization
Using the Localization functionality you can add custom translations for existing static text in the UI.
Requirements
To view the Localization page: READ permission for permission type “Application management”
To add/update/delete localization identifiers: ADMIN permission for permission type “Application management”
Your user must have a role with READ permission for “Application management”. See Managing permissions and roles for more information.
Click Localization in the Settings menu in the navigator to open the translation editor.
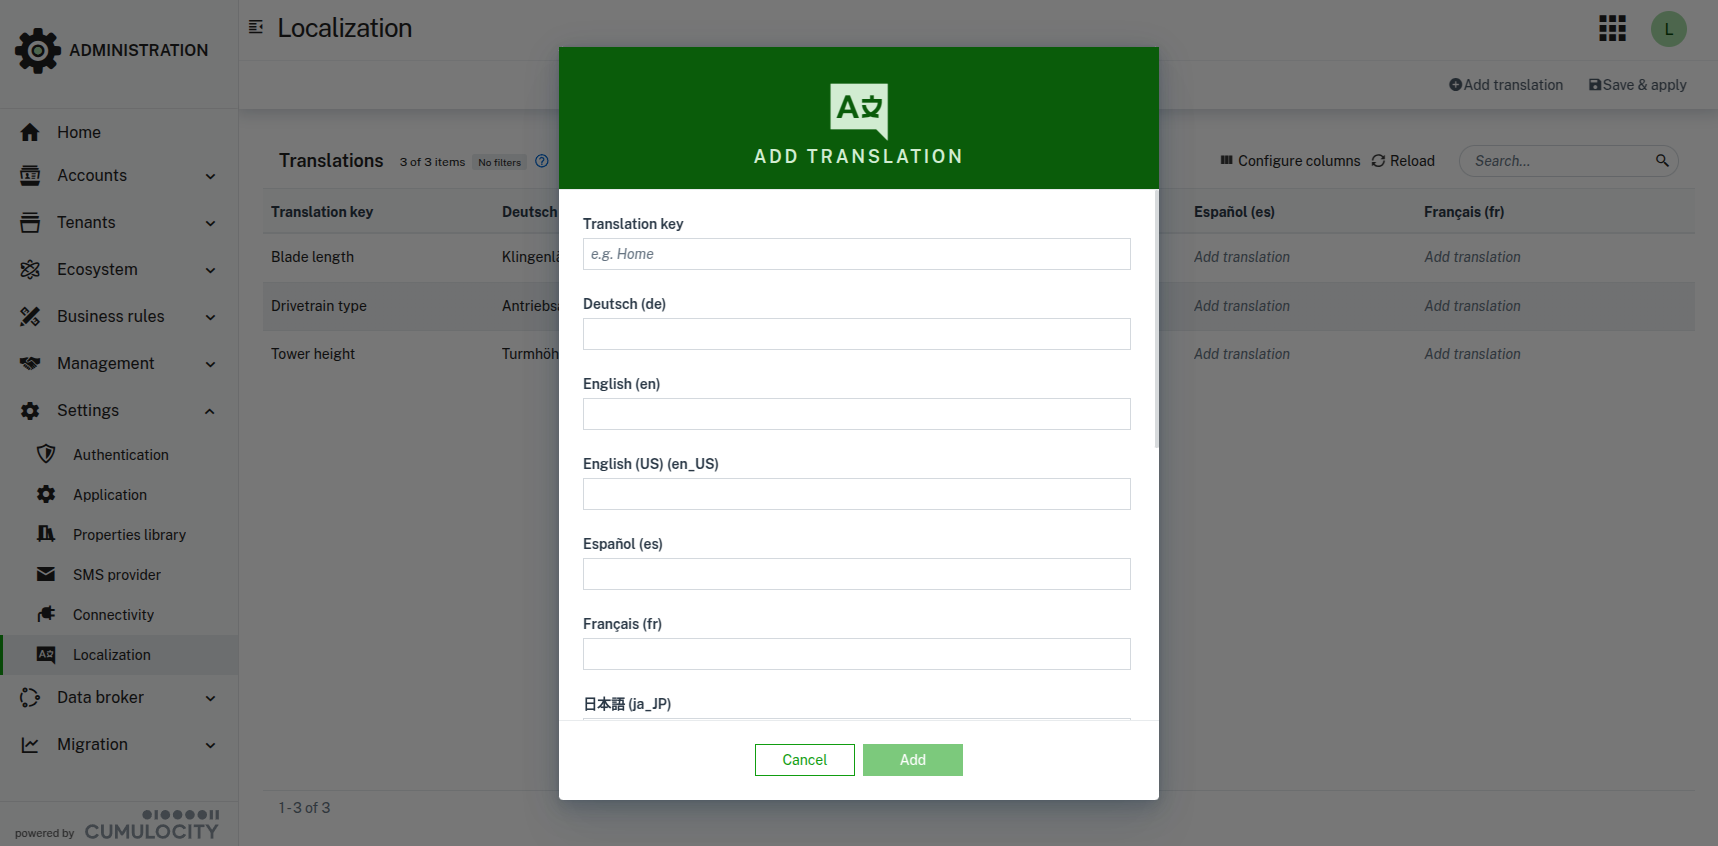
To add new identifier for translations
Click Add translation on the top menu bar.
In the resulting dialog box, add a name for the new translation key.
Optionally, add translations in the respective fields.
Click Add to close the the translation editor.
Click Save & apply in the top menu bar to save the new translation identifier and apply it to the UI.
To add and edit translations
You can add or edit translations for every identifier in two ways:
Hover over the respective column to display the edit icon .
Click the edit icon next to the field you want to edit.
Add or edit the translation.
Click the green checkmark to save the translation.
Click Save & apply to apply the changes.
Or:
Click the edit icon in any row to open the translation editor for the respective identifier.
Add or edit the translations.
Click Add to close the translation editor.
Click Save & apply to apply the changes.
To view the added or modified translations in the UI, change the language from the user menu, see To change user settings.
Feature toggles
The Feature toggles functionality enables or disables specific preview features in the UI.
This provides early access to new features before they are generally available.
Moreover, you can temporarily disable a feature that is generally available when you experience an issue with it.
Your feedback on these features is very valuable to us. Please submit your thoughts via the support portal.
Requirements
To view the Feature toggles page: No specific permissions.
To update the state of a feature toggle: ADMIN permission for the permission type “Tenant management”.
Click Feature toggles in the Settings menu in the navigator to open the Feature toggles page.
The Feature toggles page displays the following columns:
Name: The display name of the feature. Optional.
Description: A brief explanation of what the feature does. Optional.
Key: The unique identifier for the feature toggle.
Phase: The current phase of the feature, either “Generally available” or “Public Preview”.
Status: The current state of the feature toggle, either “Enabled” or “Disabled”. The state of a feature toggle depends on the phase of the feature. Before a feature is generally available, it is disabled by default. You must opt in to enable it. When a feature is generally available, it is enabled by default. You must opt out to disable it.
Strategy: Indicates if the state of a feature toggle has been customized. Once you customize a feature toggle, it no longer changes its state according to the phase. To return to the default behavior, click the reset button in the customized row.
To toggle a feature
Identify the row of the feature toggle that you want to change in the list.
Click the toggle switch in the Status column to change the state of the feature toggle.
To manage features of subtenants
Users on the Management tenant can also manage the feature toggles of subtenants on the environment.
Management tenant see an additional Feature toggles tab in the detail view of a subtenant.
This functionality is not available on Enterprise tenants.