Working with simulators
With the Cumulocity simulator all aspects of IoT devices can be simulated, such as:
- Setting up a simulated device or a network of simulated devices.
- Specifying the operations which a device can process.
- Creating work instructions based on predefined message templates or user-defined templates and scheduling work steps.
- Creating up to ten devices of a defined type.
- Generating messages for measurements, alarms, events and inventory.
- Viewing simulation problems as alarms.
About simulators
With the simulator you can create devices that simulate the same level of functionality as connected hardware devices.
A simulator uses a playlist to simulate messages that the device sends to the Cumulocity platform. A playlist is a series of instructions that the simulator executes one after the other. When the last instruction is reached, the simulator starts again with the first one.
An instruction can either send a message (measurements, alarms, events and inventory) or wait for a specified time (sleep).
A message is defined by choosing a message template (like sending a temperature) and providing the values for this template (for example 23.0 degrees). Many predefined message templates are provided, for example, for creating a measurement, sending an event, creating and cancelling an alarm. These templates are based on MQTT static templates. Additionally, custom message templates can be defined using the SmartREST template editor.
To view simulators
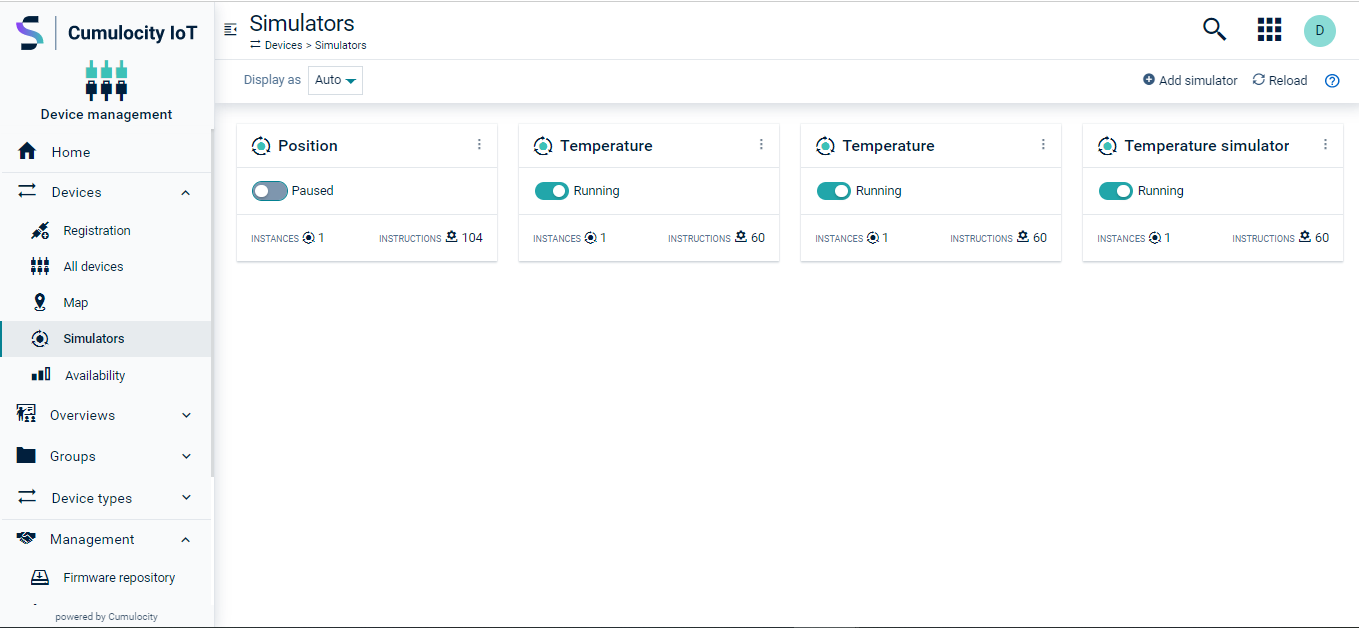
Click Simulators in the Devices menu in the navigator to open the Simulators page.

All simulators which you can access will be listed here.
To create a simulator
- Click Add simulator at the right of the top menu bar.
- In the resulting dialog box, select a simulator type from the dropdown list in the Presets field. Select “Empty simulator” to create a simulator from scratch or select one of the sample simulators.
- Enter a name for the simulator.
- Select the number of instances for this simulator (up to ten).
- Click Create.
The simulator will be created and added to the list.
To edit a simulator
- Click the menu icon at the top right of a simulator card and then click Edit, or simply click the simulator card.
- In the resulting dialog box, make the relevant changes.
- Click Save to apply your changes.
To duplicate a simulator
- Click the menu icon at the top right of a simulator card and then click Duplicate.
- In the resulting dialog box, provide a name for the new simulator.
- Click Duplicate.
The new simulator will be added to the list.
To remove a simulator
- Click the menu icon at the top right of a simulator card and then click Remove.
- In the resulting dialog box, confirm to remove the simulator.
- Click Save.
The simulator will be removed from the list.
Instructions
For each simulator, you can create instructions specifying what the simulator is supposed to do. Instructions are single tasks added to a playlist through which the simulator will work.
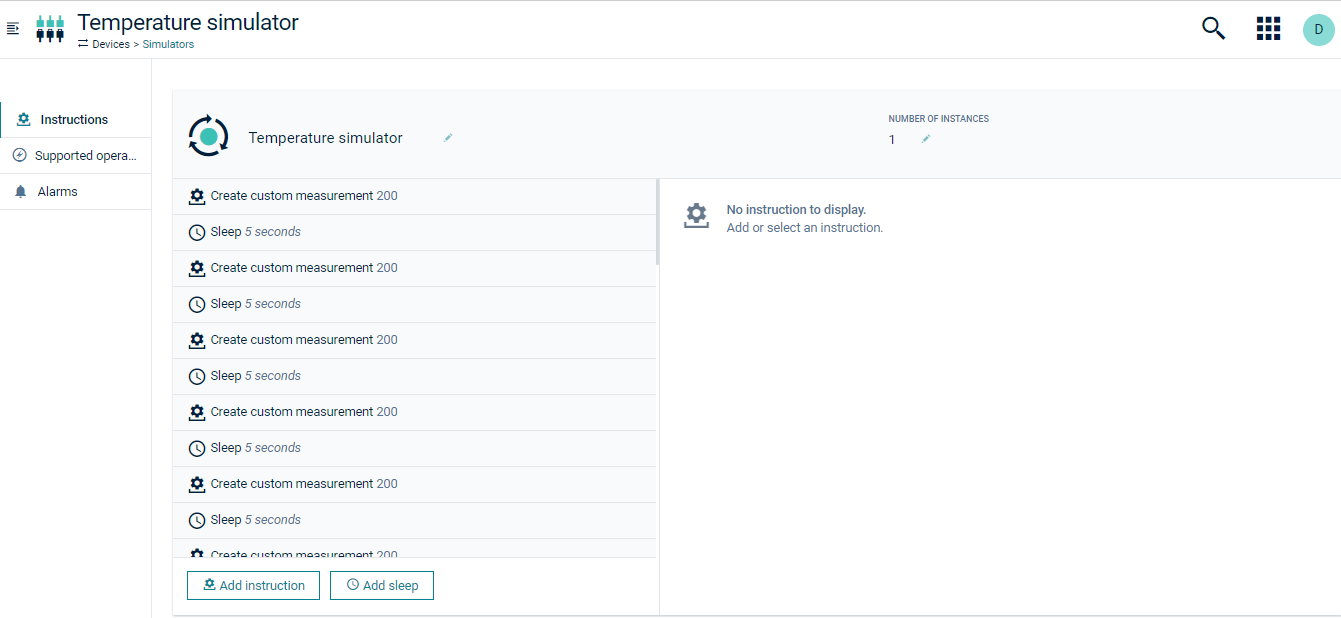
Instructions can be viewed and edited on the Instructions tab of the simulator.

Examples
The simulator presets already contain sample instructions. For example, the “Temperature measurement” preset contains instructions for the steps “Create measurement” and “Sleep”, see image above.
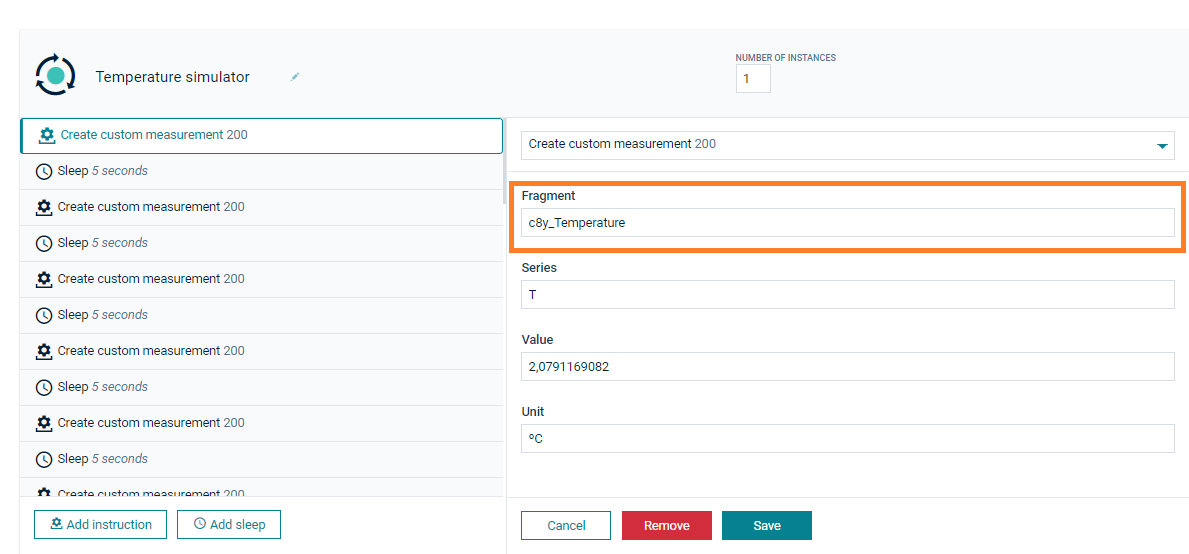
The panel at the right changes according to the type of instruction selected at the left.

The measurement instruction refers to a fragment. Fragments are used to identify capabilities of a managed object. Find more details about fragments in the fragment library.
The “Sleep” instruction requires one value for its duration in seconds.
To add an instruction
- Click Add instruction to add a new instruction to the simulator.
- In the resulting dialog box, select a message from the dropdown list.
- Specify the required parameters, depending on the message type.
- Click Save.
The new instruction will be added to the simulator.
To add a sleep
- Click Add sleep to add a new instruction to the simulator.
- In the resulting dialog box, specify the duration.
- Click Save.
The new sleep instruction will be added to the simulator.
To remove an instruction
Hover over the instruction or the sleep you want to remove and click the remove icon .
The instruction will be removed from the simulator.
Supported operations
In the Supported operations tab of a simulator you can find specific operations like configurations or software/firmware updates.

Click the toggle to turn the respective operation on or off.
To add a custom operation
- Click Add custom operation to specify a customized operation.
- In the resulting dialog box, Enter the custom operation type to be supported by the simulator.
- Click Add.
The custom operation will be added to the operation list.
Alarms (simulator)
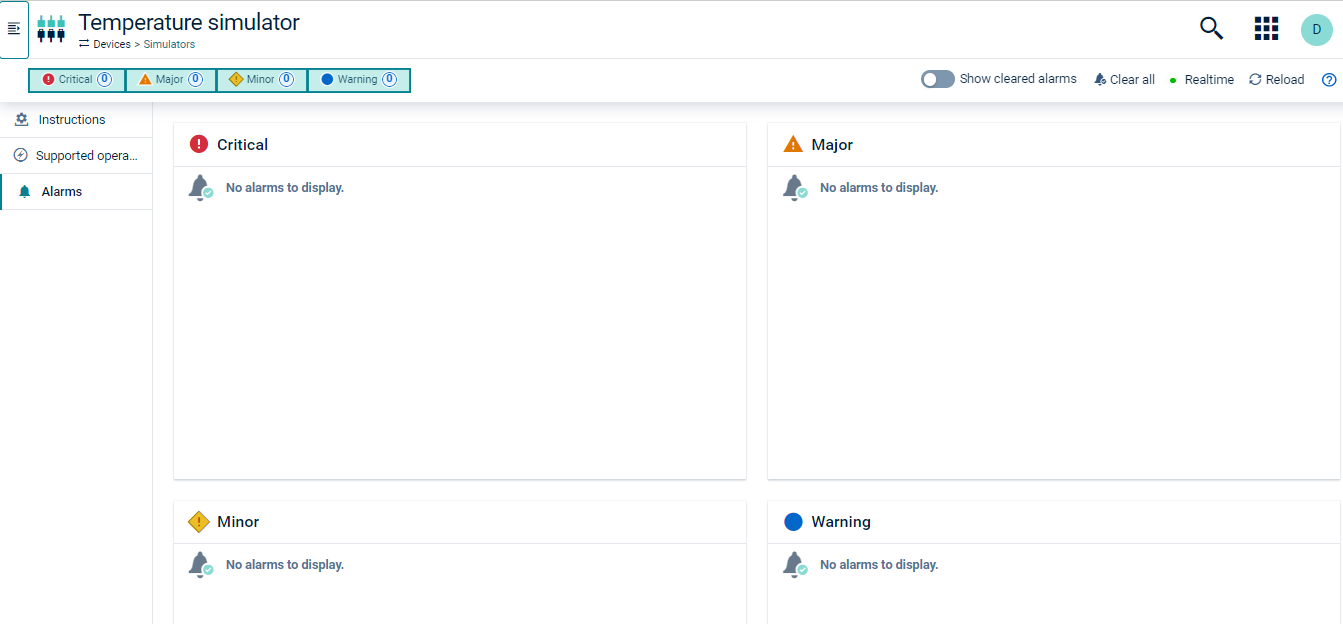
The Alarm tab of a simulator displays alarms related to the simulator itself, not related to the simulated device, that is, if the simulator itself does not work correctly. See Working with alarms for information on alarms.

