Configuring Cumulocity IoT Edge
This section describes configuring Cumulocity IoT Edge. You can perform all the configuration only after a successful installation.
This section describes configuring Cumulocity IoT Edge. You can perform all the configuration only after a successful installation.
After a successful installation, you can reconfigure the network and also configure the network CIDR.
Important: Do not use the IP addresses 10.244.0.0 and 10.96.0.0 in your network configuration. These IP addresses are reserved for Cumulocity IoT Edge internal purpose.
Log in to the Management tenant.
Switch to the Administration application using the application switcher at the right of the top bar ![]() .
.
Click Edge Configuration > Network in the navigator.
The current network configuration for the Edge appliance appears.
Click Edit to reconfigure the network.
Provide the new IP address for you network. For example, 192.168.66.10
Provide the Netmask IP for your network. For example, 255.255.255.0
Provide the Gateway IP for your network. For example, 192.168.66.1
Provide the DNS for your network. For example, 8.8.8.8
For DNS, do not use the IP addresses 10.96.0.10 and 127.0.0.1.
Provide the Address range CIDR. For example, 172.18.0.0/16
The CIDR suffix must be between 0 and 27 inclusive. The default value is 172.16.0.0/15.
The Address range CIDR must not overlap with the reserved IP addresses. See Reserved IP addresses.
Info: If the IP address of the Edge appliance overlaps with the Edge appliance’s address range, then you must update the Address range CIDR.
To configure the network for the Edge appliance, use the following endpoints:
The network CIDR fails in the following scenarios:
The network CIDR unavailable on boot time.
Description: The default network CIDR range is not available in the network. If the network range is already utilized, the network CIDR does not start properly and the Kubernetes cluster startup fails.
Invalid network CIDR provided during IP change.
Description: You tried to change the network CIDR of the properly running Edge appliance, but the range is not available in the network.
To troubleshoot these scenarios:
The Cumulocity IoT tenant allows you to remotely manage your Edge appliance by registering the Edge appliance in the Cumulocity IoT tenant account. To do so, you must first enable remote-connectivity in the Edge appliance and then register your Edge appliance in the Cumulocity IoT tenant account. The Cumulocity IoT tenant uses the SSH protocol to access the remote Edge appliance through a web browser.
Important: If you want to configure remote-connectivity, you must configure the DNS when configuring the network, for example, using the
/edge/configuration/networkendpoint.
Log in to the Management tenant.
Switch to the Administration application using the application switcher at the right of the top bar ![]() .
.
Click Edge Configuration > Remote Connectivity in the navigator.
Click Enable remote connectivity toggle to enable remote-connectivity.
Provide the URL of the Cumulocity IoT tenant in the Remote tenant URL field.
Click Save.
Next steps: Note down the Edge device ID and register your Edge appliance in the Cumulocity IoT tenant.
To configure remote-connectivity, use the following endpoints:
Before performing these steps, ensure that you have configured the URL for the Cumulocity IoT tenant in the Edge appliance.
Log in to your Cumulocity IoT tenant.
Go to Device Management.
Click Registration in the Devices menu and then click Register device.
Select General device registration.
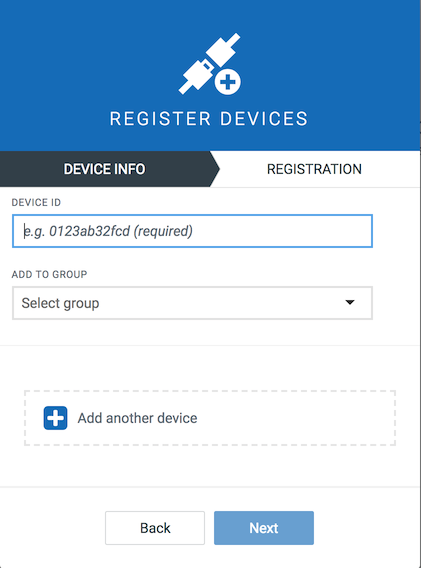
In the Device ID field, enter the Edge device ID.
Click Next.
Click Complete to register your Edge appliance.
After successful registration, the Edge appliance appears in the Device registration page with the status Waiting for connection.
Turn on the Edge appliance and wait for the connection to be established.
Once the device is connected, the device status changes to Pending acceptance.
Click Accept to confirm the connection. The status of the device changes to Accepted.
The Cumulocity IoT Cloud Remote Access allows you to remotely access the Edge appliance through a web browser. The remote Edge appliance is represented as a device in the Device Management application of Cumulocity IoT.
To use Cloud Remote Access, you need:
The following protocols are supported to connect to the Edge appliance through remote access from the Cumulocity IoT tenant:
For more information about remote access, see Cloud Remote Access.
You can access the Edge appliance from the Cumulocity IoT tenant by installing the VNC components on your Edge appliance.
Info: Ensure that you have registered your Edge appliance with the Cumulocity IoT tenant. See Registering the Edge appliance in the Cumulocity IoT tenant.
Info: The Edge appliance must be connected to the internet to install the VNC components.
Run the script vnc-setup.sh.
[admin@iot-edge-server ~]$ sudo /opt/c8y/utilities/vnc-setup.sh
The vnc-setup.sh script installs the VNC components. After installing the VNC components, you should configure the VNC server for each user.
To configure the VNC server, run the vnc-user-setup.sh script. Each user should run this script to set up VNC components and be able to connect to the Edge appliance. The vnc-user-setup.sh script enables the current user to use VNC functionality and set a VNC password for the current user.
Run the script vnc-user-setup.sh.
[admin@iot-edge-server ~]$ /opt/c8y/utilities/vnc-user-setup.sh
Provide and verify the password.
Select Y or N to enter a view-only password.
Record the allocated port number. This port number will be used to connect to the VNC server on your Edge appliance.
Info: You can also get the allocated port number from the /opt/c8y/utilities/vnc-display-mapping file. In this file, you will find the VNC display number allocated for each user. For example, admin:1. You must add 5900 to the number associated with the user. In this example, the port number for the user admin is 5901.
To access and connect to the Edge appliance:
In the Cumulocity IoT tenant for your registered Edge appliance, add a remote access endpoint. See Adding remote access endpoints. You must use the same port number that is allocated for you.
Connect to the endpoint. See Connecting to endpoints.
The connection to the Edge appliance is established and the GUI appears for the Edge appliance. Right-click in the screen to open the desktop components xterm and firefox.
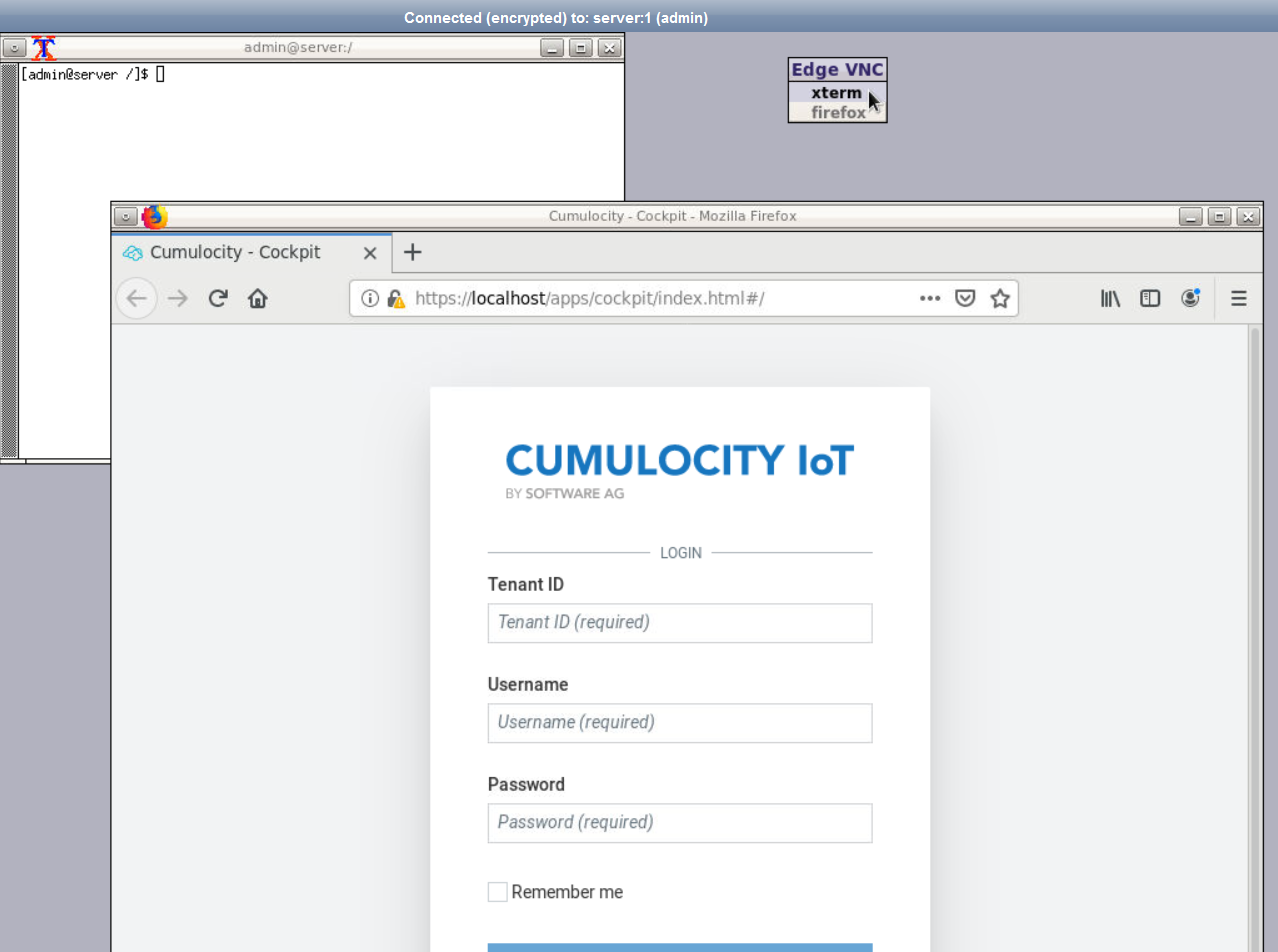
Important: Do not use the Send Ctrl+Alt+Del button in the VNC interface. If you do so, you will lose the VNC connection and not be able to reconnect until you restart the Edge appliance.
You can change the VNC password for the current user by running the vnc-user-setup.sh script. After changing the password, you must update the password in the remote access endpoint.
You can access the Edge appliance from the Cumulocity IoT tenant through SSH.
Info: Ensure that you have registered your Edge appliance with the Cumulocity IoT tenant. See Registering the Edge appliance in the Cumulocity IoT tenant.
To access and connect to the Edge appliance:
In the Cumulocity IoT tenant for your registered Edge appliance, add a remote access endpoint. See Adding remote access endpoints. You must use the same port number that is allocated for you.
Connect to the endpoint. See Connecting to endpoints.
Data broker lets you upload the data to a Cumulocity IoT tenant account selectively. Note that you must first create a Cumulocity IoT tenant account.
You can share the following data with the tenant account:
Important: Data broker in Cumulocity IoT Edge does not support synchronization of the operations.
To upload the data to a Cumulocity IoT tenant account, you must first create a data connector in the Edge appliance and subscribe this connector in the tenant account.
A data connector describes the subset of the data that you would like to send to a destination tenant. For more information, see Enterprise tenant > Using the data broker > Data connector in the User guide.
To create a data connector and upload the data to the tenant account, perform the following steps:
In your Edge appliance, log in to the edge tenant.
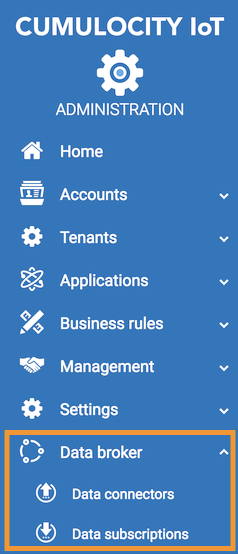
In your Edge appliance, go to the Administration application. Click Data broker > Data connectors.
Click Add data connector and provide all the information and filters. See Enterprise tenant > Using the data broker > Data connector > To add a data connector in the User guide.
Note down the security code. This security code will be used to subscribe the connector in the tenant account.
Log in to the Cumulocity IoT tenant account.
In the tenant account, go to the Administration application. Click Data broker > Data subscriptions to subscribe the connector created in your Edge appliance.
Click Add data subscription and provide the security code. Click Submit and accept the subscription. See Enterprise tenant > Using the data broker > Data subscriptions in the User guide.
You can now navigate to the Device Management application or the Cockpit application. You will find a new “virtual group” with a specific icon showing the forwarded devices. The group will have the same name as your subscription.
For more information about sending and receiving data in Cumulocity IoT, see Enterprise tenant > Using the data broker.
Microservices are server-side applications which may be used to extend the Cumulocity IoT Edge platform with customer-specific functionality. For more information, see Microservices SDK. When you enable or disable the microservice feature, the Device simulator microservice also gets enabled or disabled. To use the Device simulator, add the Simulator permission. For more information, see Global roles.
For more information about Device simulator, see Working with simulators.
Info: Ensure that you have fulfilled the minimum system requirements: 4 logical CPU cores and 8 GB RAM.
If you want to use the microservice hosting feature, ensure that you do not use these IP ranges in your local network where the Edge virtual machines are configured. When you enable the microservice hosting feature, the Kubernetes system reserves these IP ranges on the Edge instances.
To enable or disable the microservice hosting feature, use the following endpoints:
Important: To enable or disable the microservice hosting feature, you must have the “Tenant Manager” role.
After you enable the microservice hosting feature, ensure that the microservices are active and healthy before using the microservices. For more information about microservices runtime, see Microservice runtime.
On some hardware configurations, enabling or disabling the microservice hosting feature may take more than 15 minutes.
Before disabling the microservice hosting feature, you should unsubscribe from all the microservices that have been uploaded. You can also delete the microservice if you are not planning to enable again and subscribe to the same microservice. For more information about developing and hosting a microservice, see Microservices SDK.
Info: Cumulocity IoT Edge appliance will be temporarily non-operational during the operation.
For many use cases, and especially when using Apama, the time inside the Edge appliance must be synchronized with the network.
By default, the chrony service is responsible for time synchronization with the host operating system. For Hyper-V, the chronyd service is disabled by default for accurate time synchronization.
Once the time synchronization is enabled, you can specify the NTP servers and the interval to trigger the time synchronization.
To configure the time synchronization, use the following endpoints:
You must always have an SSL certificate for your domain name that is configured. If the validity of the certificate expires, you must upload a new certificate. You can upload the certificate using the GUI and REST APIs.
Log in to the Management tenant.
Switch to the Administration application using the application switcher at the right of the top bar ![]() .
.
Click Edge Configuration > Domain/Certificate in the navigator.
Review the domain name and the SSL certificate.
Click Edit to upload the new SSL certificate file and the key file.
Provide the new SSL certificate file and the SSL certificate key file.
If you do not have an SSL certificate, select Generate self-signed certificate to generate one.
Click Save.
To upload the new SSL certificate and the key file, use the following endpoints:
You can expand the disk size of the installation disk and the data disk using the REST APIs. You can either expand the disk size for both the disks or any one of the disk at a time. There is no limit on the number of the disk expansion process. Before expanding the disk size, you must set or edit the disk size in the hypervisor. See the hypervisor specific documentation for editing the disk size.
To expand the disk size of the installation disk and the data disk, use the following endpoint:
Info: If there is no disk space to expand, the task will be marked as success.
You can change the hostname of your Edge appliance using the REST APIs. The default hostname of the Edge appliance is iot-edge-server.
To configure the hostname of your Edge appliance, use the following endpoints:
If the system performance is slow, you must increase the memory. Stop the Edge appliance and increase the memory of the Edge appliance using the hypervisor.
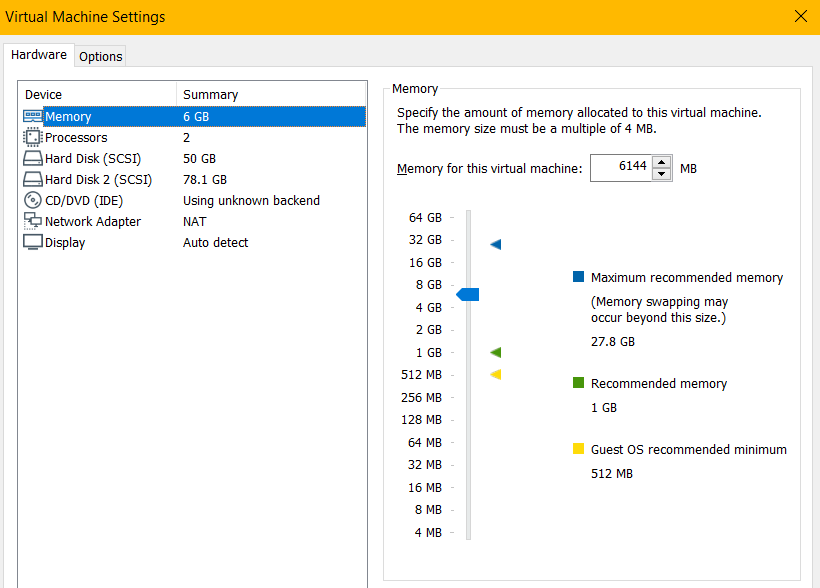
Increasing the memory of the Edge appliance must be followed by increasing the memory of the JVM.
To increase the memory of the JVM:
Start the Edge appliance.
Log in to Edge appliance.
Open the file /usr/share/cumulocity-core-karaf/bin/setenv.
Edit the value of the parameter JAVA_MAX_MEM. The default size is 1024 MB.
export JAVA_MAX_MEM=1024M # Maximum memory for the JVM
After increasing the size, restart Karaf:
[admin@iot-edge-server ~]$ sudo service cumulocity-core-karaf stop
and
[admin@iot-edge-server ~]$ service cumulocity-core-karaf start
This section describes how to change the log level for Cumulocity IoT Edge specific applications in the back-end. It does not explain how to change log settings for standard components like databases or other operating system related services.
The log level for Karaf is defined in the following file.
/usr/share/cumulocity-core-karaf/etc/org.ops4j.pax.logging.cfg
The file has the following structure:
# Root logger
log4j.rootLogger=INFO,out,osgi:*
log4j.throwableRenderer=org.apache.log4j.OsgiThrowableRenderer

# Error appender
log4j.appender.out=org.apache.log4j.rolling.RollingFileAppender
log4j.appender.out.rollingPolicy=org.apache.log4j.rolling.FixedWindowRollingPolicy
log4j.appender.out.rollingPolicy.maxIndex=10
log4j.appender.out.triggeringPolicy=org.apache.log4j.rolling.SizeBasedTriggeringPolicy
log4j.appender.out.triggeringPolicy.MaxFileSize=104857600
log4j.appender.out.rollingPolicy.FileNamePattern=${karaf.data}/log/error-%i.log.gz
log4j.appender.out.rollingPolicy.ActiveFileName=${karaf.data}/log/error.log
log4j.appender.out.layout=org.apache.log4j.PatternLayout
log4j.appender.out.layout.ConversionPattern=%d{yyyy-MM-dd} %d{HH:mm:ss}  | %-5.5p | %-16.16t | %-32.32c{1} | %X{bundle.id} - %X{bundle.name} - %X{bundle.version} | %m%n
log4j.appender.out.append=true

# CXF request and response info:
# * ERROR - none
# * INFO - just headers (default)
# * DEBUG - whole, with payloads
log4j.additivity.com.cumulocity.rest.interceptors=false
log4j.logger.com.cumulocity.rest.interceptors=INFO,access

# Access appender
log4j.appender.access=org.apache.log4j.rolling.RollingFileAppender
log4j.appender.access.rollingPolicy=org.apache.log4j.rolling.FixedWindowRollingPolicy
log4j.appender.access.rollingPolicy.maxIndex=10
log4j.appender.access.triggeringPolicy=org.apache.log4j.rolling.SizeBasedTriggeringPolicy
log4j.appender.access.triggeringPolicy.MaxFileSize=262144000
log4j.appender.access.rollingPolicy.FileNamePattern=${karaf.data}/log/access-%i.log.gz
log4j.appender.access.rollingPolicy.ActiveFileName=${karaf.data}/log/access.log
log4j.appender.access.layout=org.apache.log4j.PatternLayout
log4j.appender.access.layout.ConversionPattern=%d{yyyy-MM-dd} %d{HH:mm:ss}  | %-5.5p | %-16.16t | %-32.32c{1} | %X{bundle.id} - %X{bundle.name} - %X{bundle.version} | %m%n
log4j.appender.access.append=true

# Error response info:
# * INFO - just error message (default)
# * DEGUB - full stack trace
log4j.logger.com.cumulocity.rest.mediatypes=INFO
Change the following entries to adjust the log levels:
log4j.rootLogger=INFO,out,osgi:*

log4j.logger.com.cumulocity.rest.interceptors=INFO,access

log4j.logger.com.cumulocity.rest.mediatypes=INFO
Adjust the log levels by changing the level attribute according to the following values. The levels are inclusive - meaning a given level will also include all “lower” log levels, e.g. when you set the level to WARN you will also get ERROR events.
| Level | Description |
|---|---|
| ERROR | Log errors only |
| WARN | Give information up to warnings |
| INFO | Give information about normal operations |
| DEBUG | Log all internal debug information |
Save the file. It is re-read by the application every few minutes so you do not have to restart the Java process.
In Cumulocity IoT Edge, you can customize the appearance of your tenant to your own preferences.
Info: Use the domain name to access the Cumulocity IoT Edge platform to properly apply the branding and see the effects after branding.
To access the branding feature:
Log in to the Management tenant.
Switch to the Administration application using the application switcher at the right of the top bar ![]() .
.
Go to Settings > Enterprise tenant.
For information about branding configuration, see Branding in the User guide.
Modbus is a serial communications protocol originally published by Modicon and used to establish primary-replica/client-server communication between devices.
Before you connect a Modbus device, ensure that the agent is running.
Use the following command to check if the agent is running in Cumulocity IoT Edge (running on port 6670):
[admin@iot-edge-server ~]$ systemctl status cumulocity-agent
If the agent is not running, start it with the following command:
[admin@iot-edge-server ~]$ systemctl start cumulocity-agent
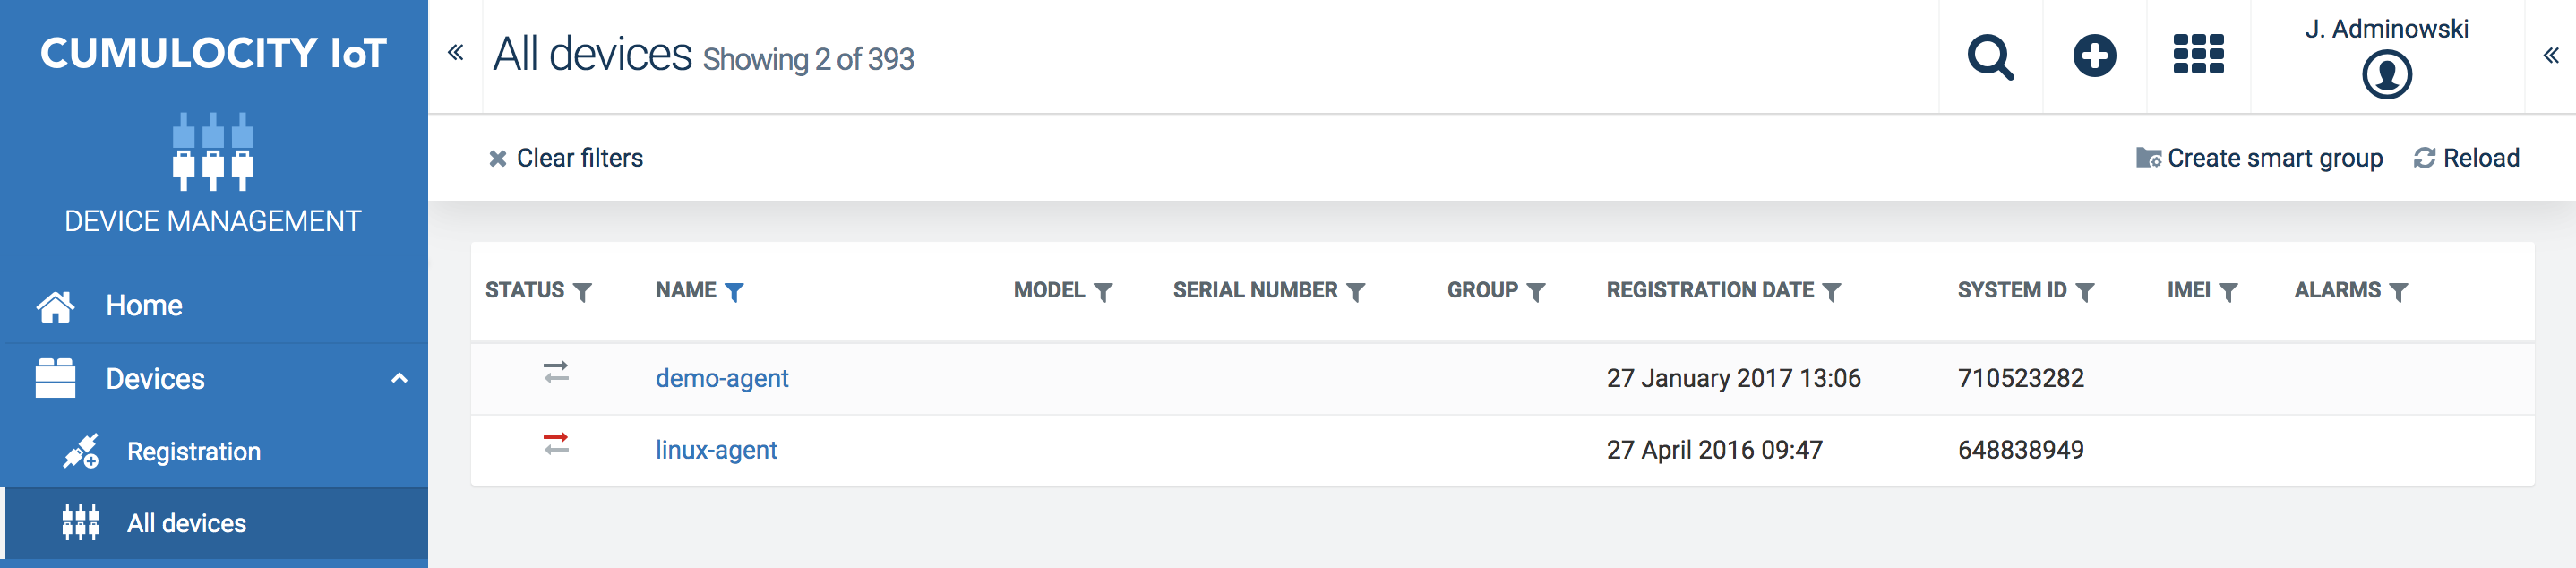
The Modbus agent is pre-registered. In the Device Management application, click All devices in the navigator and find the Modbus agent (called “linux-agent”) in the device list.
For more information about connecting and managing Modbus devices, see Cloud Fieldbus in the Protocol integration guide.
Important: While configuring the OPC UA server, ensure that the server is reachable from the Edge appliance. If you are using a hostname, configure the DNS accordingly.
To connect an OPC UA device in the Edge appliance, follow the steps below.
OPC UA Management service
Check if the OPC UA management service is running in Cumulocity IoT Edge (running on port 8083):
[admin@iot-edge-server ~]$ sudo service opcua-mgmt-service status
If the agent is not running, start it with the following command:
[admin@iot-edge-server ~]$ sudo service opcua-mgmt-service start
OPC UA Device Gateway
Check if the OPC UA device gateway is running in Cumulocity IoT Edge (running on port 1099):
[admin@iot-edge-server ~]$ sudo service opcua-device-gateway status
If the agent is not running, start it with the following command:
[admin@iot-edge-server ~]$ sudo service opcua-device-gateway start
Next, you must register a device in the Device Management application with the name opcua-gateway.
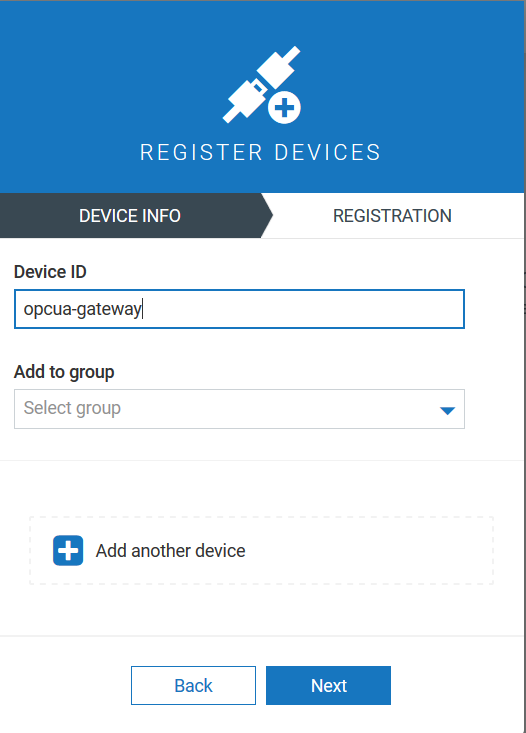
Follow the description in Device Management > Connecting devices in the User guide to register a device.
In the Device Management application, click All devices in the navigator and find the OPCUA device in the device list.
For further information about managing and configuring OPCUA devices, see OPC UA in the Protocol integration guide.
In your Cumulocity IoT tenant, you can monitor the measurements of the Edge appliance listed in the table below:
Measurement |
Metrics |
Description |
|---|---|---|
| Disk space | - Total disk space - Free disk space - Used disk space - Percentage of used disk space |
The Edge appliance sends the disk space metrics as a measurement for both installation disk and data disk, every 10 minutes. The measurements are sent in gigabytes (GB) rounded to two decimal places. The percentage is rounded to one decimal place. The data points for this measurement are: - c8y_InstallationDisk - c8y_DataDisk If Cumulocity IoT Edge is unable to read the metrics from the installation disk or the data disk, an alarm is sent to the Cumulocity IoT tenant. The alarms have a minor severity and the data points for the alarms are: - c8y_FileSystemMeasurementErrorInstallationDisk - c8y_FileSystemMeasurementErrorDataDisk |
| Memory (RAM) | - Total RAM - Free RAM - Used RAM - Percentage of RAM used |
The Edge appliance sends the memory usage metrics as a measurement every 5 seconds in gibibytes (GiB). The data point for this measurement is c8y_Memory If Cumulocity IoT Edge is unable to read the metrics from the memory, an alarm is sent to the Cumulocity IoT tenant. The data point for the alarm is: - c8y_MemoryMeasurementError. |
| CPU | Percentage of CPU used Unit: Percentage |
The Edge appliance sends the percentage of CPU used at intervals over 5 seconds, 60 seconds, and 600 seconds. The data points for this measurement are: - c8y_CpuUsage5Seconds - c8y_CpuUsage60Seconds - c8y_CpuUsage600Seconds If Cumulocity IoT Edge is unable to read the metrics from the CPU, an alarm is sent to the Cumulocity IoT tenant. The data point for the alarm is: - c8y_CPUMeasurementError. |
| Disk I/O | - Data read per second - Data written per second Unit: KB/s |
The Edge appliance sends the disk input/output metrics as a measurement for both installation disk and data disk at intervals over 5 seconds, 60 seconds, and 600 seconds. The data points for this measurement are: - c8y_DataDiskIo5Seconds - c8y_DataDiskIo60Seconds - c8y_DataDiskIo600Seconds - c8y_InstallationDiskIo5Seconds - c8y_InstallationDiskIo60Seconds - c8y_InstallationDiskIo5Seconds If Cumulocity IoT Edge is unable to read the metrics from the disk, an alarm is sent to the Cumulocity IoT tenant. The data point for the alarm is: - c8y_DiskIOMeasurementError. |
| Network | - Data and packets sent per second - Data and packets received per second Unit: KB/s and packets/s |
The Edge appliance sends the network metrics as a measurement at intervals over 5 seconds, 60 seconds, and 600 seconds. The data points for this measurement are: - c8y_NetworkInterface_lo-5Seconds - c8y_NetworkInterface_lo-60Seconds - c8y_NetworkInterface_lo-600Seconds If Cumulocity IoT Edge is unable to read the metrics from the network, an alarm is sent to the Cumulocity IoT tenant. The data point for the alarm is: - c8y_NetworkIoMeasurementError. |
To monitor the metrics in your Cumulocity IoT tenant, you can create a dashboard and add widgets in the Cockpit application of your tenant. For more information about creating dashboards, see Cockpit > Dashboards in the User guide.
Also, you can define smart rules to create alerts or raise alarms for the metrics. For example, when the free disk space is less than 5 GB, create an alert. For more information about smart rules, see Cockpit > Smart rules in the User guide.
To configure the “reset password” template and email server settings, perform the following steps:
Log into the Management tenant using https://<tenant-domain>/apps/administration/index.html#/configuration.
Update the email server details and templates as mentioned in Configuring password reset and Configuring email server in the User guide.
If you develop a Cumulocity IoT web application using the Web SDK, for an Edge appliance configured with a certificate not trusted by Node.js (for example, a self-signed certificate), then you must ensure that Node.js trusts the root certificate.
To add the Edge appliance’s self-signed certificate to the Node.js trust store, set the environment variable NODE_EXTRA_CA_CERTS to the path of the certificate before executing the npm commands.
For example:
On Windows Powershell
$env:NODE_EXTRA_CA_CERTS=<path-to-the-certificate>\certificate.pem
On Windows command prompt
set NODE_EXTRA_CA_CERTS=<path-to-the-certificate>\certificate.pem
On Linux platforms
export NODE_EXTRA_CA_CERTS=<path-to-the-certificate>/certificate.pem
For more information on the Cumulocity IoT web application development, see the Web SDK guide.