Overview
This section describes how to develop and deploy microservices on top of Cumulocity using the Microservice SDK for Java. It also contains a Hello world tutorial that you may follow to get the basics of developing microservices using Java. After you have successfully deployed your first microservice to Cumulocity, you may also continue with the section Developing microservices to learn more about other features and capabilities of the SDK.
Info: You can develop microservices for Cumulocity with any IDE and build tool that you prefer, but this section focuses on Maven and Eclipse.
These are some useful references to get started with the basic technologies underlying the SDK:
- The client libraries use the Cumulocity REST interfaces as underlying communication protocol as described in the section Using the REST interface.
- All examples and libraries are open source and can be reviewed at the M2M Repositories.
- The JavaDoc for the Java Microservice SDK can be found on our resources website.
Important: You need to have at least version 7 of the Java Development Kit installed in your development environment as older versions of the JRE and JDK are not updated with the latest security patches and are not recommended for use in production.
If you face any issue or need technical support, please use the Cumulocity community at Stack Overflow. You will find there many useful questions and answers.
Hello world tutorial
Here you will learn how to create your first microservice that can be run on the Cumulocity platform using the Microservice SDK for Java.
Prerequisites
Create an account on the Cumulocity platform, for example by using a free trial. At this step you will be provided with a dedicated URL address.
Use the following command to verify that you have Maven 3 installed with Java 7 or later.
$ mvn -v
Apache Maven 3.1.1 (0728685237757ffbf44136acec0402957f723d9a; 2013-09-17 17:22:22+0200)
Maven home: /usr/local/Cellar/maven/3.1.1/libexec
Java version: 1.7.0_45, vendor: Oracle Corporation
Java home: /Library/Java/JavaVirtualMachines/jdk1.7.0_45.jdk/Contents/Home/jre
Maven can be downloaded from the Maven website. You will also need a Docker installation, and in case that you don’t have it, go to the Docker website to download and install it.
Cumulocity hosts linux/amd64 Docker containers and not Windows containers. The Docker version must be 1.12.6 or above. Use the following command to verify your Docker installation:
$ docker version
Client: Docker Engine - Community
 Version:           18.09.2
 API version:       1.39
 OS/Arch:           darwin/amd64

Server: Docker Engine - Community
 Engine:
  Version:          18.09.2
  API version:      1.39 (minimum version 1.12)
  OS/Arch:          linux/amd64
Developing the “Hello world” microservice
To develop a very simple “Hello world” microservice for Cumulocity, you need to
- create a Maven project,
- configure the pom.xml file including a dependency to the Cumulocity Microservice SDK library,
- create a Java application,
- configure the microservice,
- configure the build,
- build and run the Java application.
Creating a Maven project
Execute the following Maven command to create a plain Java project:
$ mvn archetype:generate -DgroupId=c8y.example -DartifactId=hello-world-microservice -DarchetypeArtifactId=maven-archetype-quickstart -DinteractiveMode=false
This will create a folder hello-world-microservice in the current directory with a skeleton structure for your project.
Adding the Java Microservice library
Inside the hello-world-microservice folder you will find the pom.xml file. Start editing this file by adding a properties element as follows:
<properties>
    <maven.compiler.source>1.7</maven.compiler.source>
    <maven.compiler.target>1.7</maven.compiler.target>
    <spring-boot-dependencies.version>1.5.7.RELEASE</spring-boot-dependencies.version>
    <c8y.version>9.16.2</c8y.version>
    <microservice.name>my-first-microservice</microservice.name>
</properties>
Edit the <c8y.version> element to use the latest version of the client library. It may be obtained by reviewing the Release notes or the Maven repository. This particular example was implemented using version 9.16.2.
Now add repository and plugin elements to point to the Cumulocity Maven repository which stores the client libraries.
<repositories>
    <repository>
        <id>cumulocity</id>
        <layout>default</layout>
        <url>http://download.cumulocity.com/maven/repository</url>
    </repository>
</repositories>
<pluginRepositories>
    <pluginRepository>
        <id>public</id>
        <url>http://download.cumulocity.com/maven/repository</url>
    </pluginRepository>
</pluginRepositories>
Also add a dependency element for the Java Microservice SDK library inside the <dependencies> node.
<dependency>
	<groupId>com.nsn.cumulocity.clients-java</groupId>
	<artifactId>microservice-autoconfigure</artifactId>
</dependency>
Creating a Java application
Edit the App.java file located in the folder hello-world-microservice/src/main/java/c8y/example with the following content:
package c8y.example;

import com.cumulocity.microservice.autoconfigure.MicroserviceApplication;
import org.springframework.boot.SpringApplication;
import org.springframework.web.bind.annotation.RequestMapping;
import org.springframework.web.bind.annotation.RequestParam;
import org.springframework.web.bind.annotation.RestController;

@MicroserviceApplication
@RestController
public class App {
    public static void main (String[] args) {
        SpringApplication.run(App.class, args);
    }

    @RequestMapping("hello")
    public String greeting (@RequestParam(value = "name", defaultValue = "World") String you) {
        return "Hello " + you + "!";
    }
}
The code uses four annotations; three are part of the Spring Framework and one of the Cumulocity Microservice SDK. The @RestController annotation marks the class as a controller where every method returns a domain object instead of a view. The @RequestMapping annotation ensures that HTTP requests to hello endpoint are mapped to the greeting() method. @RequestParam binds the value of the query string parameter name into the you parameter of the greeting() method. Refer to the Spring Guides for more details about building RESTful Web Services using the Spring Framework.
Employing the @MicroserviceApplication annotation is a simple way to add required behavior for Cumulocity microservices including:
- Security
- Subscription
- Health endpoint at /service/<microservice-name>/health
- Context
- Settings
- Internal platform API
- Spring Boot application
Configuring the microservice
Add an application.properties file to the src/main/resources directory with the following properties:
application.name=my-first-microservice
server.port=80
Add a cumulocity.json file to the src/main/configuration directory with the following content:
{
  "apiVersion": "1",
  "version": "@project.version@",
  "provider": {
    "name": "Cumulocity GmbH"
  },
    "isolation": "MULTI_TENANT",
    "requiredRoles": [
    ],
    "roles": [
    ]
}
This is the Manifest file and it is required to deploy the microservice in the Cumulocity platform.
Configuring the build
To create a deployable ZIP file, you need to add the following code to your pom.xml file:
<dependencyManagement>
    <dependencies>
        <!-- microservice api -->
        <dependency>
            <groupId>com.nsn.cumulocity.clients-java</groupId>
            <artifactId>microservice-dependencies</artifactId>
            <version>${c8y.version}</version>
            <type>pom</type>
            <scope>import</scope>
        </dependency>
    </dependencies>
</dependencyManagement>

<build>
    <plugins>
        <plugin>
            <groupId>org.springframework.boot</groupId>
            <artifactId>spring-boot-maven-plugin</artifactId>
            <version>${spring-boot-dependencies.version}</version>
            <executions>
                <execution>
                    <goals>
                        <goal>repackage</goal>
                    </goals>
                </execution>
            </executions>
        </plugin>
        <plugin>
            <groupId>com.nsn.cumulocity.clients-java</groupId>
            <artifactId>microservice-package-maven-plugin</artifactId>
            <version>${c8y.version}</version>
            <executions>
                <execution>
                    <id>package</id>
                    <phase>package</phase>
                    <goals>
                        <goal>package</goal>
                    </goals>
                    <configuration>
                        <name>${microservice.name}</name>
                        <image>${microservice.name}</image>
                        <encoding>UTF-8</encoding>
                    </configuration>
                </execution>
            </executions>
        </plugin>
    </plugins>
</build>
Building the microservice
In a terminal, navigate to the folder where your pom.xml is located and execute the following Maven command. Note that after a successful build you will find a ZIP file inside the target directory.
$ mvn clean install
Running the microservice locally
You can run the Docker container locally in order to test the REST calls from the microservice to Cumulocity.
The microservice must be deployed to verify the REST calls from Cumulocity to the microservice.
To run a microservice which uses the Cumulocity API locally, you need:
- A valid tenant, a user and a password in order to access Cumulocity.
- An authorization header as “Basic <Base64(<tenantID>/<username>:<password>)>”.
For instance, if your tenant ID, username and password are tenant, testuser and secret123 respectively, you can get the Base64 string with the following command:
$ echo -n tenant/testuser:secret123 | base64
dGVuYW50L3Rlc3R1c2VyOnNlY3JldDEyMw==
and your authorization header would look like "Authorization": "Basic dGVuYW50L3Rlc3R1c2VyOnNlY3JldDEyMw==".
Step 1 - Create the application
If the application does not exist, create a new application on the Cumulocity platform employing a POST request.
POST <URL>/application/applications

HEADERS:
  "Authorization": "<AUTHORIZATION>"
  "Content-Type": "application/vnd.com.nsn.cumulocity.application+json"
  "Accept: application/vnd.com.nsn.cumulocity.application+json"

BODY:
{
  "name": "<APPLICATION_NAME>",
  "type": "MICROSERVICE",
  "key": "<APPLICATION_NAME>-microservice-key"
}
You have to replace the values <URL> with the URL of your Cumulocity tenant, <AUTHORIZATION> is Basic with a Base64 encoded string, and for <APPLICATION_NAME> use the desired name for your microservice application and its key name.
Important: When naming your microservice application use only lower-case letters, digits and dashes. The maximum length for the name is 23 characters.
The curl command can be used to create the application with a POST request:
$ curl -X POST -s \
  -d '{"name":"my-first-microservice","type":"MICROSERVICE","key":"my-hello-world-ms-key"}' \
  -H "Authorization: <AUTHORIZATION>" \
  -H "Content-Type: application/vnd.com.nsn.cumulocity.application+json" \
  -H "Accept: application/vnd.com.nsn.cumulocity.application+json" \
  "<URL>/application/applications"
In case of errors, e.g. invalid names, you will get the details printed in the console. When the application is created successfully, you will get a response in JSON format as the following example:
{
  "id": "<APPLICATION_ID>",
  "key": "my-hello-world-ms-key",
  "name": "my-first-microservice",
  "type": "MICROSERVICE",
  "availability": "PRIVATE",

  "self": "<URL>/application/applications/<APPLICATION_ID>",

  "owner": {
    "self": "...",
    "tenant": {
      "id": "<TENANT>"
    }
  },
  "requiredRoles": [],
  "manifest": {
    "noAppSwitcher": true
  },
  "roles": [],
  "contextPath": "my-first-microservice"
}
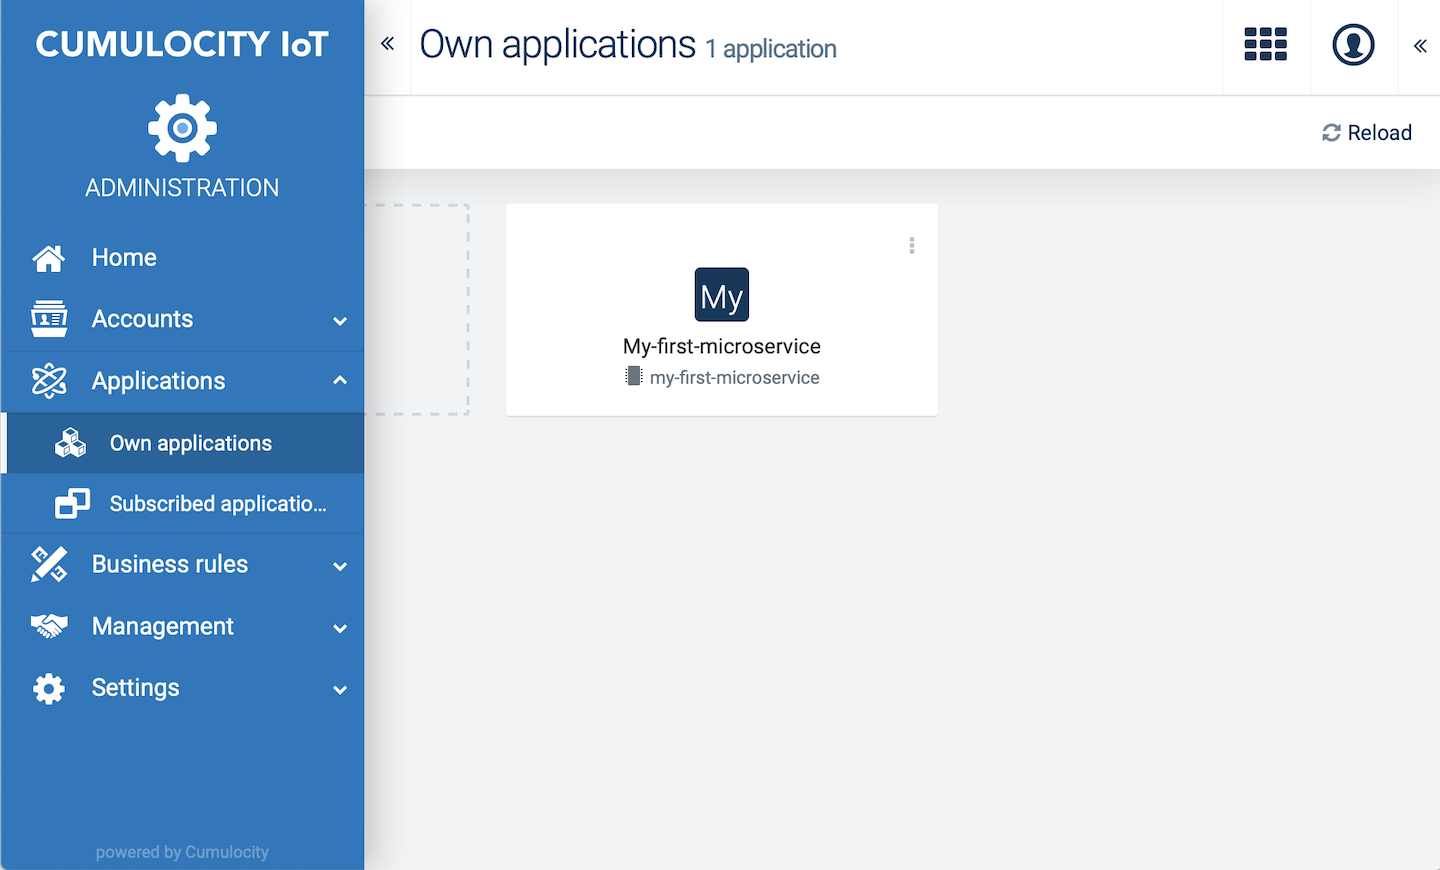
In the Administration application, navigate to Applications > Own applications. There you will see the newly created microservice.
Step 2 - Acquire the microservice bootstrap user
You will need the bootstrap user credentials in order to run the microservice locally. Get the details of your bootstrap user with a GET request as follows:
GET <URL>/application/applications/<APPLICATION_ID>/bootstrapUser

HEADERS:
  "Authorization": <AUTHORIZATION>
  "Content-Type": application/vnd.com.nsn.cumulocity.user+json
Info: Besides the
curlcommand, you can also employ a graphical interface such as Postman.
Step 3 - Run the microservice locally
The Docker image was built and added to the local Docker repository during the Maven build. You can list all the Docker images available with the following command:
$ docker images
Get your image ID and tag from the list. While not strictly a means of identifying a container, you can specify a version of an image you would like to run the container with. Run the Docker container for the microservice also providing the URL of your tenant and the bootstrap user credentials. Do not forget to expose the port 80 to a port on your host system, e.g. 8082.
$ docker run -p 8082:80 -e C8Y_BOOTSTRAP_TENANT=<BOOTSTRAP_TENANT> -e C8Y_BOOTSTRAP_USER=<BOOTSTRAP_USERNAME> -e C8Y_BOOTSTRAP_PASSWORD=<BOOTSTRAP_USER_PASSWORD> -e C8Y_MICROSERVICE_ISOLATION=MULTI_TENANT -i -t -e C8Y_BASEURL=<URL> <DOCKER_REPOSITORY_IMAGE>:<TAG>
If your Docker image has run successfully, you shall see the output on the console similar to the one below.
  .   ____          _            __ _ _
 /\\ / ___'_ __ _ _(_)_ __  __ _ \ \ \ \
( ( )\___ | '_ | '_| | '_ \/ _` | \ \ \ \
 \\/  ___)| |_)| | | | | || (_| |  ) ) ) )
  '  |____| .__|_| |_|_| |_\__, | / / / /
 =========|_|==============|___/=/_/_/_/
 :: Spring Boot ::        (v1.5.7.RELEASE)

2019-03-01 13:57:13.638  INFO 8 --- [main] c8y.example.App                          : Starting App on 855d1971889b with PID 8 (/data/my-first-microservice.jar started by root in /)

...

2019-03-01 13:57:24.728  INFO 8 --- [main] s.b.c.e.t.TomcatEmbeddedServletContainer : Tomcat started on port(s): 80 (http)
2019-03-01 13:57:24.750  INFO 8 --- [main] c8y.example.App                          : Started App in 12.044 seconds (JVM running for 12.911)
At this point, you may open your favorite browser and test your microservice at http://localhost:8082/hello. Enter your bootstrap user credentials using <tenant>/<username> and your password. You shall see a response message in JSON format like “Microservice my-first-microservice is not subscribed by tenant”.
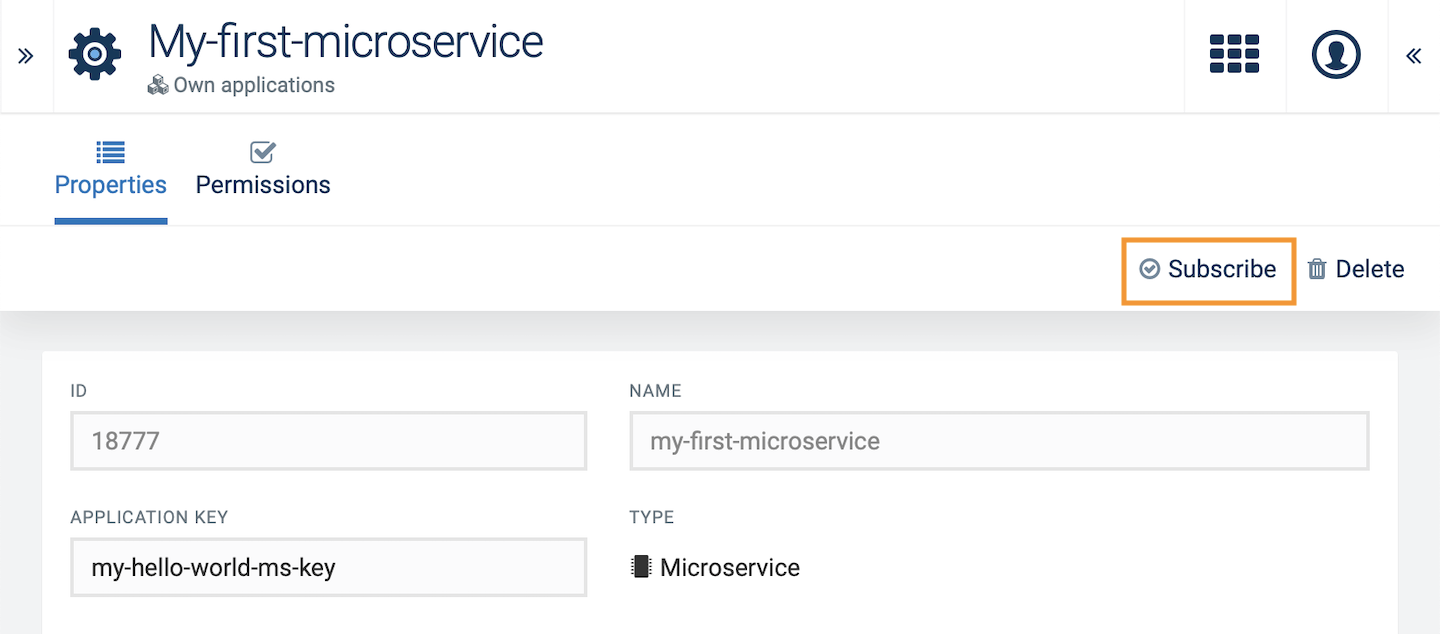
Step 4 - Subscribe to the microservice
In the Administration application, navigate to Applications > Own applications. Locate your microservice application and click it to open its details. On the top right side click Subscribe.
Now you can test your microservice locally using the endpoint /hello and with a parameter, e.g. /hello?name=Neo.
It is also possible to subscribe to the microservice with a POST request:
POST <URL>/tenant/tenants/<TENANT_ID>/applications

HEADERS:
  "Authorization": "<AUTHORIZATION>"

BODY:
  {
    "application": {
        "id": "<APPLICATION_ID>"
    }
  }
Deployment
Once you have tested your microservice locally, you can deploy it on the Cumulocity platform and you need:
- A valid tenant, a user and a password in order to access Cumulocity.
- An authorization header as “Basic <Base64(<username>:<password>)>”.
- The application created on the previous steps.
- The ZIP file built with Maven on the previous steps.
You need to upload the ZIP file to the Cumulocity platform and this might require some seconds, depending on your internet connection. Make a POST request to upload your ZIP file as follows:
POST <URL>/application/applications/<APPLICATION_ID>/binaries

HEADERS:
  "Authorization": "<AUTHORIZATION>"
  "Content-Type": "multipart/form-data"
Example:
$ curl -F "data=@<PATH_TO_YOUR_ZIP_FILE>" \
	     -H "Authorization: <AUTHORIZATION>" \
	     "<URL>/application/applications/<APPLICATION_ID>/binaries"
Important: The Microservice hosting feature must be activated on your tenant, otherwise your request will return an error message like “security/Forbidden, access is denied”. This feature is not assigned to tenants by default, so trial accounts won’t have it. Contact us via Empower Portal so that we can assist you with the activation. Note that this is a paid feature.
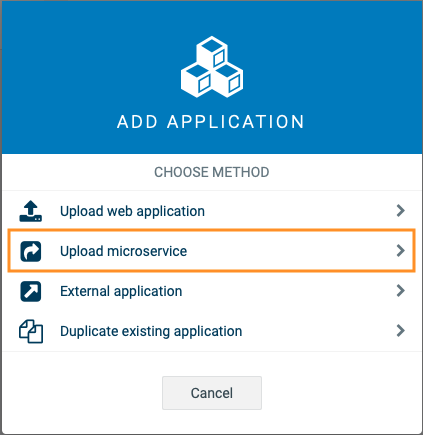
It is also possible to upload the ZIP file directly on your tenant. In the Administration application, navigate to Applications > Own applications, click Add application and select Upload microservice from the options list.
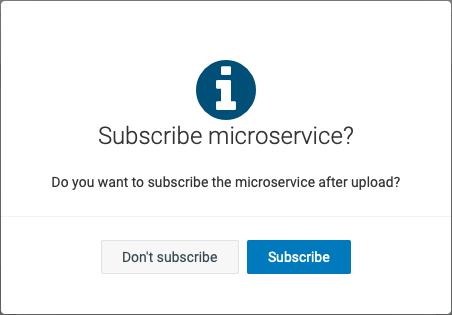
Locate the ZIP file of your microservice application and click Subscribe to subscribe the microservice afterwards.
Once the ZIP file has been uploaded successfully, you will see a new microservice application created.
Test the deployed microservice
The curl command can be used to verify that the microservice is up and running using the /health endpoint:
$ curl -H "Authorization: <AUTHORIZATION>" \
       <URL>/service/my-first-microservice/health
You can also test your microservice with your favorite browser. Remember to enter your user credentials using <tenant>/<username> and your password.
Improving the microservice
Now that you have done your first steps, check out the section Developing microservices to find out what else can be implemented. Review also the Java example in this guide to learn using more features of the microservice SDK and REST API by employing third-party services.
Developing microservices
It is described below the different microservice SDK features, including annotations, services, configuration files, logging and the Maven build plugin.
There are two possible deployment types on the platform:
- Hosted deployment - The default for microservices and the suggested one for typical use cases.
- External/legacy deployment - Requires custom installation of the platform and agent.
For development and testing purposes, one can deploy a microservice on a local Docker container.
Annotations
The simplest way to add required behavior to your application is to annotate a main class with @MicroserviceApplication. This is a collective annotation consisting of:
| Annotation | Description |
|---|---|
| @SpringBootApplication | Comes from Spring Boot auto configure package |
| @EnableContextSupport | Required to use @UserScope or @TenantScope scopes for method invocations |
| @EnableHealthIndicator | Provides a standard health endpoint used by the platform to monitor the microservice availability |
| @EnableMicroserviceSecurity | Provides a standard security mechanism, verifying user and roles against the platform |
| @EnableMicroserviceSubscription | Responsible for subscribing microservices to the platform, updating metadata and listening to tenant subscription change events |
| @EnableMicroservicePlatformInternalApi | Injects the platform API services into Spring context for a microservice to use |
| @EnableTenantOptionSettings | Provides microservice configuration within tenant options and allows overriding default properties from files |
Context support
It is described below the context support as utility tool for the user management described in General aspects of microservices in Cumulocity.
@UserScope and @TenantScope at type level annotation indicate that a bean created from class will be created in the scope defined. The user scope implies using tenant platform user credentials for platform calls. The tenant scope implies using service user credentials.
An example of injecting a bean into the tenant scope is available in the platform API module as follows:
@TenantScope
public EventApi eventApi (Platform platform) throws SDKException {
    return platform.getEventApi();
}
A sample utilization of the bean can be as follows:
@Autowired
private PlatformProperties platformProperties;
@Autowired
private ContextService<MicroserviceCredentials> contextService;
@Autowired
private EventApi eventApi;

public PagedEventCollectionRepresentation get10Events () {
    return contextService.callWithinContext(
            (MicroserviceCredentials) platformProperties.getMicroserviceBoostrapUser(),
             new Callable<PagedEventCollectionRepresentation>(){
        public PagedEventCollectionRepresentation call(){
            return eventApi.getEvents().get(10);
        }
    });
}
Microservice security
The @EnableMicroserviceSecurity annotation sets up the standard security configuration for microservices. It requires basic authorization for all endpoints (except for health check endpoint configured using @EnableHealthIndicator). A developer can secure its endpoints using standard Spring security annotations, e.g. @PreAuthorize("hasRole('ROLE_A')") and user’s permissions will be validated against user’s roles stored on the platform.
Microservice subscription
The microservice subscription module is responsible for two main features:
- Registration
- Tenant subscription event listening
The default behavior for the package is self-registration, which means that after you run the application it will try to register and use the generated credentials for the communication with the platform. The self-registration is required to correctly deploy the microservice on the platform.
The other way to register an application to the platform is to do it manually. This can be done by creating a new application on the platform with the same application name and providing the following properties into the microservice:
application.name=<application_name>
C8Y.bootstrap.register=false
C8Y.bootstrap.tenant=<tenant>
C8Y.bootstrap.user=<username>
C8Y.bootstrap.password=<password>
To create an application and acquire credentials, refer to Creating applications and Acquiring microservice credentials in the Using the REST interface section.
The subscription package provides means to monitor and it acts upon changes in tenant subscriptions to a microservice. To add a custom behavior, a developer can add an event listener for MicroserviceSubscriptionAddedEvent and MicroserviceSubscriptionRemovedEvent as the following example:
@EventListener
public void onAdded (MicroserviceSubscriptionAddedEvent event {
    log.info("subscription added for tenant: " + event.getCredentials().getTenant());
});
On application startup, the MicroserviceSubscriptionAddedEvent is triggered for all subscribed tenants.
Platform API
The package consists of a number of services that are built and injected into Spring context. A developer can use them to perform basic operations against the platform. The beans are built based on the properties read from a file. For hosted deployment, most of the properties are provided by the platform.
The API provides the following services:
- Alarm - AlarmApi
- AuditRecord - AuditRecordApi
- CepModule - CepApi
- Operation - DeviceControlApi
- Event - EventApi
- ExternalID - IdentityApi
- Binary - BinariesApi
- ManagedObject - InventoryApi
- Measurement - MeasurementApi
The API provides basic CRUD methods. The following is an alarm interface example:
// Methods
AlarmRepresentation create(final AlarmRepresentation alarm)
Future createAsync(final AlarmRepresentation alarm)

AlarmRepresentation getAlarm(final GId gid)
AlarmCollection getAlarms()
AlarmCollection getAlarmsByFilter(final AlarmFilter filter)

AlarmRepresentation update(final AlarmRepresentation alarm)
Sample usage:
@Autowired
private AlarmApi alarms;

public AlarmRepresentation addHelloAlarm (){
    AlarmRepresentation alarm = new AlarmRepresentation();
    alarm.setSeverity("CRITICAL");
    alarm.setStatus("Hello");

    return alarms.create(alarm);
}
Configuration files
The properties file used by the hosted deployment must be located in src/main/resources/application.properties.
The properties used by a microservice are:
| Property | Description |
|---|---|
| application.name | The name of the microservice application |
| C8Y.bootstrap.register | Indicates if a microservice should follow self-registration process. True by default |
| C8Y.baseURL | Address of the platform. Provided by the deployment process |
| C8Y.baseURL.mqtt | Address of the MQTT service. Provided by the platform |
| C8Y.bootstrap.tenant | Microservice owner tenant |
| C8Y.bootstrap.user | User used by a microservice or by the microservice registration process |
| C8Y.bootstrap.password | Password used by a microservice or by the microservice registration process |
| C8Y.bootstrap.delay | Subscription refresh delay |
| C8Y.bootstrap.initialDelay | Initial subscription delay |
| C8Y.microservice.isolation | Microservice isolation. Only PER_TENANT or MULTI_TENANT values are available. MULTI_TENANT by default |
Microservice settings
The microservice settings module provides two features:
- Configure a microservice by defining tenant options
- Override existing properties - Tenant options can override default values from properties files
By default the microservice loads the tenant options for the category specified by the microservice context path.
The custom settings category can be specified by the manifest parameter: settingsCategory.
When neither settings category nor context path is provided in the microservice manifest, the application name is used.
Info: Once the microservice is deployed it is not possible to change the category during application upgrade.
Options can be configured for the application owner or the subscriber. The subscriber can override the owner’s option value only when such option is defined as editable.
Settings are lazy cached for 10 minutes, so when they were accessed previously, the user must wait the remaining time to see the change being applied. When the access attempt occurs to fetch settings without the tenant context being specified, the application owner is used to complete the request.
Info: For security reasons, the functionality is not available when running the microservice in legacy mode, i.e. local development or RPM installation.
Tenant option settings can be accessed in two ways:
Using Environment:
@Autowired
private Environment environment;

public int getAccessTimeout() {
    return environment.getProperty("access.timeout", Integer.class, 30);
}
Using settings service:
@Autowired
private MicroserviceSettingsService settingsService;

public String getAccessTimeout() {
    return settingsService.get("access.timeout");
}
Settings can be encrypted by using the credentials. prefix for the tenant option key. They will be decrypted and become available within the microservice environment.
Defining tenant options for a microservice with the same key as it was defined in the configuration files, such as .properties or the manifest file, will override the particular property.
For instance, there is a property defined in the application.properties file of the microservice hello-world with context path helloworld:
access.timeout=25
Now the microservice owner can override it by defining the following setting in the cumulocity.json manifest file:
"settings": [{
    "key": "access.timeout",
    "defaultValue": "35",
    "editable": true
}]
Because the access.timeout setting is defined as editable, the subscriber can override it by creating an own tenant option via REST API:
POST <URL>/tenant/options

BODY:
  {
    "category": "helloworld",
    "key": "access.timeout",
    "value": "40"
  }
Note: You cannot override a property injected by Spring
@Value("${property.name}").
Logging
The standard output should be used for hosted deployment.
Maven plugin
The package module provides a Maven plugin to prepare a ZIP file required by the microservice deployment. The build requires an executable JAR file. To create one, a developer can use spring-boot-maven-plugin. An example with minimum configuration is presented below:
<plugin>
    <groupId>org.springframework.boot</groupId>
    <artifactId>spring-boot-maven-plugin</artifactId>
    <executions>
        <execution>
            <goals>
                <goal>repackage</goal>
            </goals>
        </execution>
    </executions>
    <configuration>
        <mainClass>${main.class}</mainClass>
    </configuration>
</plugin>
<plugin>
    <groupId>com.nsn.cumulocity.clients-java</groupId>
    <artifactId>microservice-package-maven-plugin</artifactId>
    <version>9.16.2</version>
    <executions>
        <execution>
            <id>package</id>
            <phase>package</phase>
            <goals>
              <goal>package</goal>
            </goals>
            <configuration>
              <name>hello-world</name>
              <encoding>UTF-8</encoding>
              <rpmSkip>true</rpmSkip>
              <containerSkip>false</containerSkip>
            </configuration>
        </execution>
        <execution>
            <id>microservice-package</id>
            <phase>package</phase>
            <goals>
              <goal>microservice-package</goal>
            </goals>
            <configuration>
              <name>hello-world</name>
              <image>hello-world</image>
              <encoding>UTF-8</encoding>
              <skip>false</skip>
            </configuration>
        </execution>
    </executions>
</plugin>
Package goal
The package plugin is responsible for the creation of a Docker container, rpm file and for creating a ZIP file that can be deployed on the platform. It can be configured with the following parameters:
- name (alias package.name) - defaults to project.artifactId
- description (alias package.description) - defaults to project.description
- jvmArgs (alias agent-package.jvmArgs) - jvm-gc arguments. The default value is
-XX:+UseConcMarkSweepGC -XX:+CMSParallelRemarkEnabled -XX:+ScavengeBeforeFullGC -XX:+CMSScavengeBeforeRemark". It will be overwritten if other options are provided. - arguments (alias agent-package.arguments) - arguments passed during application startup
- encoding (alias project.build.sourceEncoding) - defaults to UTF-8
- heap (alias agent-package.heap) - defaults to min = 128MB max = 384MB
- perm (alias agent-package.perm) - defaults to min = 64MB max = 128MB
- skip (alias skip.agent.package) - to skip the whole packaging part
- rpmSkip (alias skip.agent.package.rpm) - to skip rpm file creation. False by default
- containerSkip (alias skip.agent.package.container) - to skip Docker image creation. True by default
- manifestFile - points to a manifest file location. Default value: $
/src/main/configuration/cumulocity.json
Example configuration:
<configuration>
    <name>hello-world</name>
    <encoding>UTF-8</encoding>
    <rpmSkip>true</rpmSkip>
    <containerSkip>false</containerSkip>
    <manifestFile>${basedir}/src/main/microservice/cumulocity.json</manifestFile>
</configuration>
Push goal
The push plugin is responsible for pushing the Docker image to a registry. The registry can be configured by:
- containerSkip (alias skip.agent.package.container) - Prevents the push to execute. True by default
- registry (alias agent-package.container.registry) - Docker registry address
Example configuration:
<configuration>
    <registry>http://{yourregistry.com}</registry>
    <containerSkip>false</containerSkip>
</configuration>
Upload goal
The upload goal is responsible for deploying the microservice to a server. There are three options to configure the server URL and credentials:
- settings.xml - Maven global configuration placed at ~/.m2/settings.xml
- pom.xml - Maven project configuration file
- Command line
All three ways can be used together, e.g. a goal partially can be configured in the settings.xml and partially in the pom.xml. In case of conflicts, the command line configuration has the highest priority and settings.xml configuration the lowest.
To upload a microservice to the server you need to configure the following properties:
- url - Mandatory URL that will be used for deployment. Empty by default.
- username - Mandatory tenant ID and user name used for authorization. Empty by default.
- password - Mandatory password used for authorization. Empty by default.
- name - Optional name of the uploaded application. By default it is the same as
package.nameproperty orartifactIdifpackage.nameis not provided.
settings.xml
To configure the goal in the settings.xml file, add the server configuration as follows:
<server>
    <id>microservice</id>
    <username>demos/username</username>
    <password>******</password>
    <configuration>
        <url>https://demos.cumulocity.com</url>
    </configuration>
</server>
pom.xml
To configure the plugin in the pom.xml file, add the server configuration as follows:
<plugin>
    <groupId>com.nsn.cumulocity.clients-java</groupId>
    <artifactId>microservice-package-maven-plugin</artifactId>
    <configuration>
        <application>
            <name>cep</name>
        </application>

        <!-- please note that the credentials are optional if they are already configured in settings.xml -->
        <credentials>
            <url>https://demos.cumulocity.com</url>
            <username>demos/username</username>
            <password>******</password>
        </credentials>
    </configuration>
</plugin>
Command line
To pass the configuration only to the particular build, execute the following command:
$ mvn microservice:upload -Dupload.application.name=cep -Dupload.url=https://demos.cumulocity.com -Dupload.username=demos/username -Dupload.password=******
Deployment
Hosted deployment
Info: For your convenience, Cumulocity provides a Microservice utility tool for easy packaging, deployment and subscription.
To deploy an application on an environment you need the following:
- URL address of your tenant
- Authorization header as “Basic <Base64(
: )>” - Tenant - tenant ID
- ZIP build from previous steps
Step 1 - Create the application
If the application does not exist, create a new application on the platform:
POST /application/applications
Host: ...
Authorization: Basic xxxxxxxxxxxxxxxxxxx
Content-Type: "application/json"

BODY:
  {
		"name": "<APPLICATION_NAME>",
		"type": "MICROSERVICE",
		"key": "<APPLICATION_NAME>-microservice-key"
  }
Example:
$ curl -X POST -s \
      -d '{"name":"hello-microservice-1","type":"MICROSERVICE","key":"hello-microservice-1-key"}' \
      -H "Authorization: <AUTHORIZATION>" \
      -H "Content-type: application/json" \
      "<URL>/application/applications"
If the application has been created correctly, you can GET the application ID:
GET /application/applicationsByName/<APPLICATION_NAME>
Host: ...
Authorization: Basic xxxxxxxxxxxxxxxxxxx
Accept: "application/json"
Example:
$ curl -H "Authorization:<AUTHORIZATION>" \
     <URL>/application/applicationsByName/hello-world
Step 2 - Upload the ZIP file
POST /application/applications/<APPLICATION_ID>/binaries
Host: ...
Authorization: Basic xxxxxxxxxxxxxxxxxxx
Content-Type: "multipart/form-data"
Example:
$ curl -F "data=@<PATH_TO_ZIP>" \
	     -H "Authorization: <AUTHORIZATION>" \
	     "<URL>/application/applications/<APPLICATION_ID>/binaries"
Step 3 - Subscribe to the microservice
POST /tenant/tenants/<TENANT_ID>/applications
Host: ...
Authorization: Basic xxxxxxxxxxxxxxxxxxx
Content-Type: "multipart/form-data"

BODY:
  {
    "application": {
        "id": "<APPLICATION_ID>"
    }
  }
Example:
$ curl -X POST -d '{"application":{"id": "<APPLICATION_ID>"}}'  \
       -H "Authorization: <AUTHORIZATION>" \
       -H "Content-type: application/json" \
       "<URL>/tenant/tenants/<TENANT_ID>/applications"
Local Docker deployment
To deploy the application on a local Docker container, one needs to inject the environment variables into a container. This is done with the Docker run -e command. The full description of available parameters is available in Environment variables.
An example execution could be:
$ docker run -e "C8Y_BASEURL=<C8Y_BASEURL>" -e "C8Y_BASEURL_MQTT=<C8Y_BASEURL_MQTT>" <IMAGE_NAME>
Monitoring
The microservice’s health endpoint can be checked to verify if a hosted microservice is running successfully. This endpoint is enabled by default for all microservices that are developed using the Java Microservice SDK.
GET <URL>/service/<APPLICATION_NAME>/health
Example response when the microservice is functional:
HTTP/1.1 200
{
  "status": "UP"
}
or in case it is not working:
HTTP/1.1 503
{
  "status": "DOWN"
}
Legacy Deployment
Properties
For external/legacy deployment, the following paths will be searched in order to find a properties file specific for the environment the application is run on:
- {UPPERCASE(application_name)}_CONF_DIR/.{application_name}
- {UPPERCASE(application_name)}_CONF_DIR/{application_name}
- {user/home}/.{application_name}
- {user/home}/{application_name}
- {CONF_DIR}/.{application_name}
- {CONF_DIR}/{application_name}
- /etc/{application_name}
Logging
For external/legacy deployment, logging into the application implies using Spring Logging. The following locations are searched for log-back file:
- {UPPERCASE(application_name)}_CONF_DIR/.{application_name}/logging.xml
- {UPPERCASE(application_name)}_CONF_DIR/{application_name}/logging.xml
- {user/home}/.{application_name}/logging.xml
- {user/home}/{application_name}/logging.xml
- {CONF_DIR}/.{application_name}/logging.xml
- {CONF_DIR}/{application_name}/logging.xml
- /etc/{application_name}/logging.xml
Services platform and SMS API
This section describes the Cumulocity SMS API and shows how to access it using the Cumulocity Java Client. You will also learn how to send and receive SMS messages via the Java Client API.
Using the services platform
The services platform interface is responsible for connecting to the Java services (SMS) API.
ServicesPlatform platform = new ServicesPlatformImpl("<URL>", new CumulocityCredentials("<tenant>", "<user>", "<password>", "<application key>"));
The URL pointing to the platform must be of the form <tenant>.cumulocity.com, for example https://demos.cumulocity.com, which will process all the API requests.
Info: You need to have appropriate credentials to be able to access the Services API from outside. See the example above.
Accessing the SMS Messaging API
The following code snippet shows how to obtain a handle to the SMS API from Java.
SmsMessagingApi smsMessagingApi = platform.getSmsMessagingApi();
Using this handle, you can send and retrieve the SMS messages from Java by calling its functions.
Assigning required roles
To use the SMS messaging API, the user must have the required roles SMS_ADMIN and SMS_READ for sending and receiving messages respectively. Refer to Administration > Managing permissions in the User guide.
Choosing a SMS provider
OpenIT
OpenIT credentials can be assigned using the Administration application. Click OpenIT credentials in the navigator and save these credentials for your tenant.
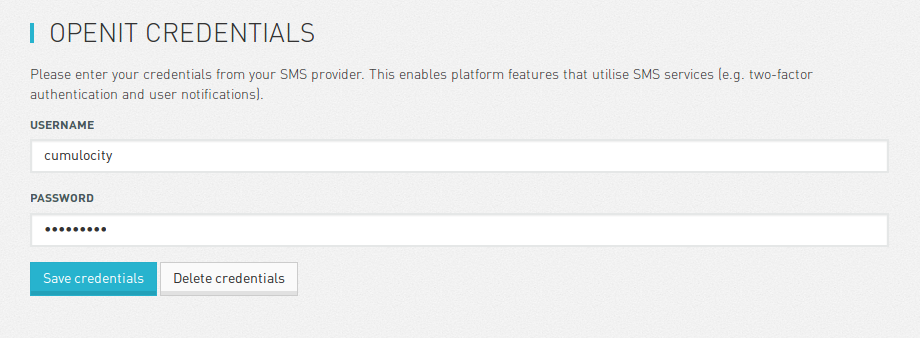
Note that receiving messages and receiving specific messages are not supported for this provider.
Jasper Control Center
Refer to Optional services > Connectivity in the User guide for information about how to set these credentials.
Ericsson
Use our Rest API to store tenant options separately for each key:
POST /tenant/options
Host: ...
Authorization: Basic ...
Provider:
{
    "category": "messaging",
    "key": "provider",
    "value": "ericsson-dcp"
}
Base URL:
{
    "category": "messaging",
    "key": "ericsson-dcp.baseUrl",
    "value": "<URL>"
}
Username:
{
    "category": "messaging",
    "key": "ericsson-dcp.username",
    "value": "<username>"
}
Password:
{
    "category": "messaging",
    "key": "ericsson-dcp.password",
    "value": "<password>"
}
Sender address:
{
    "category": "messaging",
    "key": "sms.senderAddress",
    "value": "<The phone number all SMS will be sent from (provided by Ericsson DCP)>"
}
Sender name:
{
    "category": "messaging",
    "key": "sms.senderName",
    "value": "<The name associated with the phone number>"
}
Note that receiving specific messages is not supported for this provider.
Telia Sonera
Use our Rest API to store tenant options separately for each key:
POST /tenant/options
Host: ...
Authorization: Basic ...
Provider:
{
    "category": "messaging",
    "key": "provider",
    "value": "soneraoma"
}
Username of Telia Sonera Client Application:
{
    "category": "messaging",
    "key": "soneraoma.username",
    "value": "<username>"
}
Password assigned for Telia Sonera Client Application:
{
    "category": "messaging",
    "key": "soneraoma.password",
    "value": "<password>"
}
Telia Sonera OAuth Service Endpoint:
{
    "category": "messaging",
    "key": "soneraoma.authUrl",
    "value": "<OAuth Service endpoint URL as appears in TS Application Profile, e.g., https://api.sonera.fi/autho4api/v1>"
}
Telia Sonera Messaging OMA v1 Endpoint:
{
  "category": "messaging",
  "key": "soneraoma.messagingUrl",
  "value": "<Messaging endpoint URL as appears in TS Application Profile, e. g., https://api.sonera.fi/sandbox/messaging/v1>"
}
Note that receiving messages and receiving specific messages is not supported for this provider.
Tropo
Use our Rest API to store tenant options separately for each key:
POST /tenant/options
Host: ...
Authorization: Basic ...
Provider:
{
    "category": "messaging",
    "key": "provider",
    "value": "tropo"
}
Base URL:
{
    "category": "messaging",
    "key": "tropo.baseUrl",
    "value": "<URL>"
}
Credentials:
{
    "category": "messaging",
    "key": "tropo.credentials",
    "value": "<credentials>"
}
Sender address:
{
    "category": "messaging",
    "key": "sms.senderAddress",
    "value": "cumulocity"
}
Sender name:
{
    "category": "messaging",
    "key": "sms.senderName",
    "value": "cumulocity"
}
Note that receiving messages and receiving specific message is not supported for this provider.
Sending a message
To send a SMS message using the API, prepare the message with the SendMessageRequest builder and call the sendMessage function of the API with the prepared message.
SendMessageRequest smsMessage = SendMessageRequest.builder()
        .withSender(Address.phoneNumber("<phone number>"))
        .withReceiver(Address.phoneNumber("<phone number>"))
        .withMessage("<message text>")
        .build();

smsMessagingApi.sendMessage(smsMessage);
Receiving messages
You can use the API as follows to receive all SMS messages. Note that not every SMS provider supports receiving messages.
smsMessagingApi.getAllMessages(Address.phoneNumber("<phone number>"));
You can use the API as follows to receive a specific SMS message identified by message ID. Note that not every SMS provider supports receiving messages.
smsMessagingApi.getMessage(Address.phoneNumber("<phone number>"), "<message id>");
SMS management endpoints
The Rest API can be used to send and receive SMS messages.
Sending a message:
POST /service/messaging/smsmessaging/outbound/tel:<sender phone number>/requests
Host: ...
Authorization: Basic ...
Content-Type: application/json
{
    "outboundSMSMessageRequest": {
        "address": ["tel:<phone number>"],
        "senderAddress": "tel:<phone number>",
        "outboundSMSTextMessage": {
  	       "message": "<message text>"
        },
        "receiptRequest": {
  	       "notifyUrl": "<notify url>,
  	        "callbackData": "<callback data>"
        },
        "senderName": "<sender name>"
    }
}
Receiving all messages:
GET /service/messaging/smsmessaging/inbound/registrations/tel:<receiver phone number>/messages
Host: ...
Authorization: Basic ...

HTTP/1.1 200 OK
{
     "inboundSMSMessageList": [
        {
            "inboundSMSMessage": {
            "dateTime": "<date>",
            "destinationAddress": "<destination address>",
            "messageId": "<message id>",
            "message": "<message>",
            "resourceURL": "<resource url>",
            "senderAddress": "<sender address>"
        }
     ]
}
Receiving a specific message:
GET /service/messaging/smsmessaging/inbound/registrations/tel:<receiver phone number>/messages/<message id>
Host: ...
Authorization: Basic ...

HTTP/1.1 200 OK
{
    "inboundSMSMessage": {
        "dateTime": "<date>",
        "destinationAddress": "<destination address>",
        "messageId": "<message id>",
        "message": "<message>",
        "resourceURL": "<resource url>",
        "senderAddress": "<sender address>"
    }
}
Troubleshooting
Some common problems and their solutions have been identified and documented below.
SSL or certificate errors
You can use both HTTP and HTTPS from the Java client libraries. To use HTTPS, you may need to import the Cumulocity production certificate into your Java Runtime Environment. Download the certificate and import it using the following command:
$ $JAVA_HOME/bin/keytool -import -alias cumulocity -file cumulocity.com.crt -storepass changeit
Answer “yes” to the question “Trust this certificate? [no]:”.
Use the following argument to run Java:
-Djavax.net.ssl.trustStore=<home directory>/.keystore
If you use Eclipse/OSGi, open the Run Configurations… dialog in the Run menu. Double-click OSGi Framework, then open the Arguments tab on the right side. In the VM arguments text box, add the above parameter.
Since Java ships with its own set of trusted root certificates, you might still get the error message “java.security.cert.CertificateException: Certificate Not Trusted”. In this case, make sure that the Go Daddy Certificate Authority (CACert) is available for your JAVA environment using the following command:
$ keytool -import -v -trustcacerts -alias root -file gd_bundle.crt -keystore $JAVA_HOME/lib/security/cacerts
gd_bundle.crt can be downloaded directly from the GoDaddy repository.
When I install the SDK, Eclipse complains about compatibility problems
Make sure that you use the Target Platform preferences page to install the SDK as described in the instructions. Install New Software installs software into your running Eclipse IDE, but you need to install the SDK as a separate server software.
I get “Expected to find an object at table index” when running a microservice or application
This error occurs due to a bug in particular Eclipse versions. As a workaround, select Run from the main menu and then Run Configurations …. On the left, select the launch configuration that you have been using, e.g. OSGi Framework. On the right, click the Arguments tab. Append a " -clean" to the Program Arguments and click Apply.
The microservice or application won’t start
Verify that all required plug-ins are checked in your launch configuration. Go to Run > Run Configurations and select the OSGi Framework launch configuration. Click Select All and try running it again.
Check if the required plug-ins are started. While the application or microservice is running, type “ss” into the console and hit the return key. All listed plug-ins should be either in the ACTIVE or RESOLVED state.
Check if you are using the correct target platform. Go to the Target Platform page in the preferences and check if “Cumulocity runtime” is checked.
The microservice application does not compile. I get “Access Restriction” messages
This error may be caused because of a missing package import. Navigate to the Dependencies tab of the project manifest file and check if the package of the type that contains the method giving the access restriction is present in the Import-Package section.
You can find the package by opening the declaration of the method (right-click and select Open Declaration from the context menu).
When starting an application I get “address already in use” messages
Check if you are running another instance of the application. Click on the Display Selected Console icon in the console toolbar (the terminal icon) to browse through your consoles. Terminate other running instances by clicking the red Stop icon in the toolbar.
Under Unix/macOS you can also use the lsof command to see which process is using a particular port. For example, to see which process is using TCP port 8080 enter:
$ lsof -i tcp:8080
It will return something like:
COMMAND    PID  USER  FD   TYPE      DEVICE  SIZE/OFF  NODE  NAME
java     12985   neo  45u  IPv6  0x077c76d0       0t0   TCP  *:8080 (LISTEN)
This means that the process 12985 is using the 8080 port and it can be killed if necessary.