Property library
Custom properties are the parameters that define an asset type. One or more custom properties are used to define an asset types. Custom properties are created in the Property library.
To create a custom property
When you navigate to the Property library page following Configuration > Digital twin library > Property library for the first time, there will be no custom properties present in the system. To add your first custom property, click Add custom property at the top right.
If you use a tenant which already has custom properties defined, you find the list of defined custom properties on the left. The selected custom properties are listed on the right.
To create a custom property, click Add custom property on the bottom left. Enter the required data in the dialog box (see description below) and click Save.

Custom properties have the following parameters:
| Field | Description | Mandatory / Optional |
|---|---|---|
| Label | Refers to the name of the custom property. The custom property is further addressed using the information provided here. | Mandatory |
| Key | Used to uniquely identify and store the custom property in the DTM application. | Mandatory |
| Description | Provides a brief description of the custom property. | Optional |
| Complex property toggle | Used to create a complex custom property, that contains one or multiple key-value pairs. By default, the toggle is switched off. | Optional |
| Type | Defines the type of the custom property. It can be any of the following categories – Text, Number, File upload, Date picker, Enumeration, or Boolean. | Mandatory |
| Default value | Defines the default value for the parameter. You can modify the content when creating an asset using this custom property. | Optional |
Info
The Default value field is only shown if the selected Type is either “Text” or “Number”.
Once you have defined all necessary custom properties for your project, you must define the asset types.
Custom property types
To further define the custom property you can select one of the six following options listed under Type:
Text
Select Text if the custom property value is a string, for example, a building name. Enter a valid text.
If you select Text, the following fields appear:
- Min Length:
Enter the minimum length of the text that must be provided for this custom property during the asset creation. Any text below the minimum length is not accepted.
If not selected, no minimum length criteria is set for this custom property during the asset creation.
- Max Length:
Enter the maximum length of the text that must be provided for this custom property during the asset creation. Any text above the maximum length is not accepted.
- RegExp:
Enter a valid regular expression. During the asset creation, you must provide the custom property value, which adhers to the regular expression.
Example:
If the custom property is “Employee ID” with the regular expression “^SAGEMPID[a-zA-Z0-9]*$”, all employee IDs have to start with the prefix “SAGEMPID”.
Default value
Assigns a default value to the custom property. If this field is left empty in the custom property, you must enter a value during the asset creation.
Info
The default value has to adhere to all validations provided beforehand. If you have set the Min length, Max length and/or RegExp, the default value must fulfill all set validations.
Example:
If the custom property is “Employee ID” with a Min length of 5, a Max length of 20 and the RegExp defined as “^SAG[a-zA-Z0-9]*$”, the default value must fulfill all of these three criteria. If it does not, this results in a validation error. The respective field will be highlighted to modify its content to fit the criteria.
Number
For this type you must provide a numeric value for the asset creation, for example, the height of a building.
The type Number contains the following fields for additional information:
- Minimum:
If selected, enter a number in the field on the right. When you create the asset, the custom property value cannot be lower or less than the minimum provided.
Info
If you entered a default value beforehand, it needs to be greater than or equal to the minimum provided. By default, this box is not selected.
- Maximum:
If selected, enter a number in the field on the right. When you create the asset, the custom property value cannot exceed the Maximum provided.
Info
If you entered a default value beforehand, it needs to be lesser than or equal to the Maximum entered here. By default, this box is not checked.
- Default value: Assigns a default value to the custom property. If this field is left empty in the custom property, you must enter a value during the asset creation.
Info
If the Minimum and/or Maximum is checked, the given Default value is validated against one or both of these values.
Example:
If the custom property is “Building height” with a Minimum of 80 and a Maximum of 150, the Default value must be between 80 to 150.
Date Picker
If selected, you must select a date from the calendar displayed in the dialog window during the asset creation.
Example:
If “Project start date” is a custom property for the “Building” asset, then you must select the start date of the project when creating the asset.
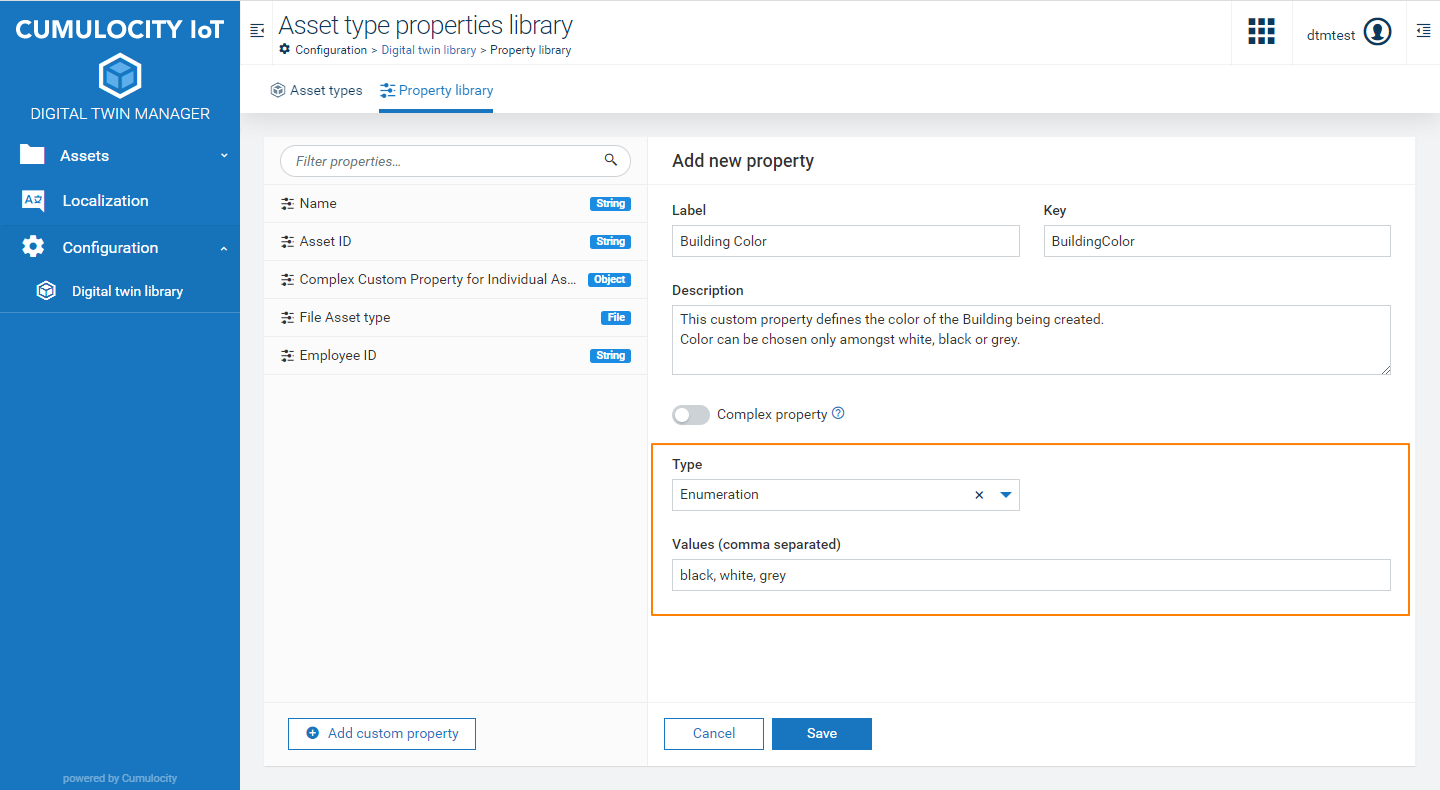
Enumeration
Select Enumeration to list several values that apply to this custom property.
If selected, a second field appears below. Here, enter all desired information separated by a comma.
During asset creating, these values appear as menu options in the dropdown menu. Select one of the options to initialize the custom property with that option.
Example:
If you create a custom property for “building color” and the color must be either black, white or grey, you have to provide these options separated by a comma when creating the custom property.
Boolean
If selected, the presence of the custom property can either be true or false during the asset creation.
An asset with this custom property shows a checkbox. Selecting this checkbox sets the custom property to true.
Example:
If you create a custom property called “Whiteboard” for a building which has rooms with a whiteboard and rooms without a whiteboard, then the custom property must be created with the type “Boolean”. When you create an asset for a room with a whiteboard, it is then initialized to “true”. If there is no whiteboard in the room, the asset is initialized to “false”.
File upload
This option allows you to upload a file to define the custom property.
If selected, enter the allowed file types separated by a comma in the Allowed file types field. When you create an asset with this custom property, you can only upload files of the allowed file types.
Example:
To upload the blueprint for a building, you must name the custom property “Building blueprint” and specify the file type of the blueprint file. Then upload the respective file. Once the asset is created, you can view this file for future reference.
To edit a custom property
- Select the desired custom property in the Property Library to see all the details on the right of the screen.
- Edit any content of the custom property.
- Click Save to save your changes.
To search and filter custom properties
- Navigate to the Property Library page.
- Enter the desired name in the search field on the top left.
- Click the search icon.
All custom properties matching the search values are displayed on the screen on the left. If the search entry does not match with any custom properties, you see a notification.
To delete a custom property
Select the respective custom property in the Property Library and click Delete on the bottom right.
Info
If the custom property you want to delete is part of an existing asset or an asset type, you see an error notification and the custom property is not deleted.
Types of custom properties
There are two types of custom properties, both fulfill different requirements:
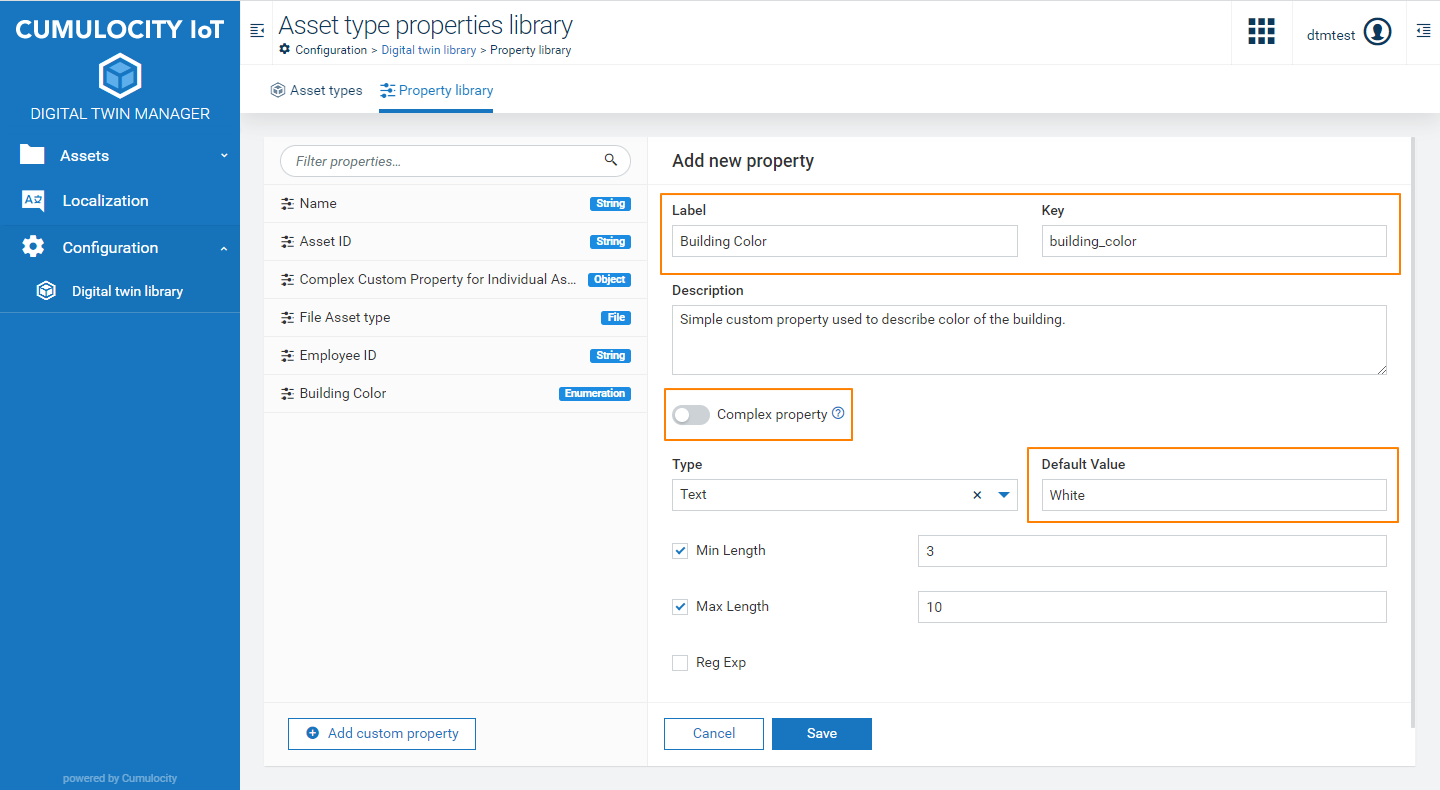
Simple custom property
A simple custom property consists of a single key value pair. This option is set by default when creating new custom properties.
In the Property Library simple custom properties are listed with the label “Type”.
Example:
If the custom property is called “Building color”, you must use the key “building_color” with the Default value being “white” (see image below).
Complex custom property
A complex custom property consists of multiple key value pairs, meaning it contains a root object followed by one or more key value pairs. You can select the complex custom property option by switching on the toggle. If you switch on the toggle, you must define each key value pair as well as providing a Type for each pair.
In the Property Library complex custom properties are listed with the label “Object”.
Example:
If the custom property is called “Building dimension” with the key “Building_dimension”, then building area, height and width are the multiple key value pairs defining the parameter “Building dimension”. Switch on the Complex property toggle (see image below). Enter the required information for all key value pairs and click Save.

Asset types
The asset type is a blueprint or template to create one or multiple assets. It defines how the asset will look like when created. An asset type consists of one or more custom properties.
To reach the Asset types page, navigate to Configuration > Digital Twin Library > Asset types.
By default only the asset type Group is available.
When you create an asset type, you see the details for this asset type in the Asset types overview.
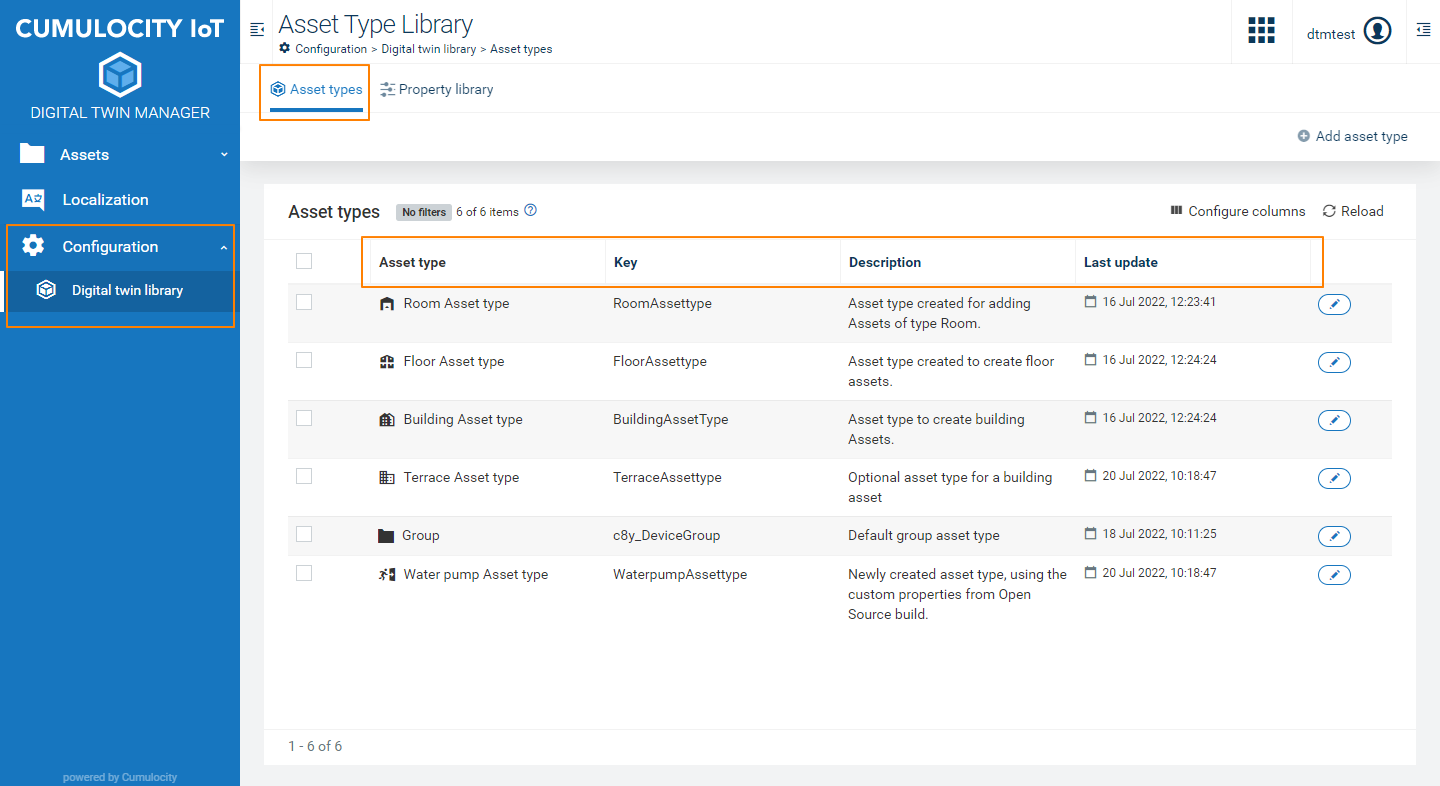
In the overview you see the following four categories:
- Asset type: Name of the asset type
- Key: Unique identifier for the asset type
- Description: Brief description of the asset type
- Last update: Date and time of when the asset type was last created or updated
Click Configure columns to configure the displayed columns.
Click Reload to reload the screen.
To create an asset type
Click Add asset type on the top right to add a new asset type. This opens the New Asset type page. Here, provide the following six parameters:
| Field | Description | Mandatory / Optional |
|---|---|---|
| Label | Refers to the name of the asset type. This name is used for the asset type throughout the application. |
Mandatory |
| Key | Used to uniquely identify and store the asset type in the DTM application. | Mandatory |
| Description | Provides a brief description of the asset type. | Optional |
| Icon | Displayed next to the label for each asset type. By default, no icon is selected. |
Optional |
| Child asset types | Restricts the asset assignment to the defined types. By default, no child assets are allowed if this field is not set. |
Optional |
| Custom properties | Parameters that define an asset type. By default, no custom properties are selected. |
Optional |
Once all required asset types are created, you can start creating assets using these asset types.
The total number of asset types is displayed on the bottom left of the page. Use the Items per page dropdown option to change the number of entries per page.
To select an icon
- Click the select icon on the left.
- In the following dialog window search or filter icons by type or select an icon from the predefined list.
- Select the desired icon.
- Click Save.
To add a child asset type
- Click Add child asset type to add a new child asset type.
- In the dropdown select one or multiple allowed child asset types.
- The selected child asset types are then displayed under Allowed child asset types with the checkbox Required on the right. If the asset type requires this child asset type, select the checkbox. By default, it is clear.
- Click the remove icon next to the checkbox to remove the child asset from the selected asset type.
Info
If you do not select and check a child asset type, then the asset cannot have any child assets.
If one or more child asset types are checked as required, an asset created with this asset type can have only child assets belonging to the selected child asset types.
Example:
If the asset type is “Building” and you select “Floor” as an allowed child asset type, then the newly created asset “SAG Building” can only have “Floor” assets as child assets.
To add a custom property to an asset type
- Click Add custom property to add a new custom property to the asset type.
- In the resulting dialog box, select one or multiple custom properties from the dropdown field. To search for specific custom properties type the respective name in the dropdown field.
- The selected custom properties are then displayed on the Custom properties segment with the checkbox Required on the right. If the asset type requires this custom property, select the checkbox. By default, it remains clear.
- Reorder the custom properties via drag and drop.
- To remove the custom property from the asset type, click the remove icon next to the checkbox.
- Click Save to save your settings.
Info
If there are any validation issues with a field, it is highlighted in red with a validation error message asking you to fill in the required information. Enter the necessary information and click Save.
If there is no custom property meeting your requirements, click New custom property. For more details on how to create a new custom property see Property Library > To create a custom property.
Root asset type
To create a root asset type follow a bottom-up approach by defining all subassets and custom properties in the provided templates first.
This root asset type can then be used to create an asset hierarchy, which then defines all the assets, subassets, custom properties and devices in the DTM application.
As a result you can use the asset hierarchy in other Cumulocity IoT applications, such as the Cumulocity IoT OEE or the Cumulocity IoT Machine Portal.
To create an asset type for the entire hierarchy
- Create all required custom properties.
- Then create the asset types in a bottom-up approach, that is, all the child asset types are created first, followed by the root asset type at the end.
- Create assets for the new asset hierarchy.
This approach, allows you to create the desired hierarchy including all asset types, subasset types and custom properties in one process.
To modify an asset type
- Click the edit icon on the right side of each asset type.
- Make your changes in the editor.
- Click Save.
To delete an asset type
There are two ways to delete an asset type:
Delete each asset type individually
On the Asset types page, hover over the desired asset type and click the delete icon on the right.
Delete the asset types in bulk
On the Asset types page, select the checkboxes next to the desired asset types. Click Delete to delete the selected asset types.
To sort asset types
To sort columns, hover over the respective column header and click the sort icon for an ascending or descending order.
To filter asset types
- Use the filter option to filter asset types based on text in the respective asset group.
- Hover over a column title for the filter icon to appear on the right.
- Click the icon to filter the assets in this column.
- To clear all applied filters click Clear filters at the top.