Registering the Sensor App in the platform
There are two ways of connecting your smartphone to Cumulocity, depending on the platform’s version. You can connect your smartphone via QR code. If that does not work, for example, because you are using an earlier Cumulocity version, follow the steps in Manual registration.
Registration using QR code
-
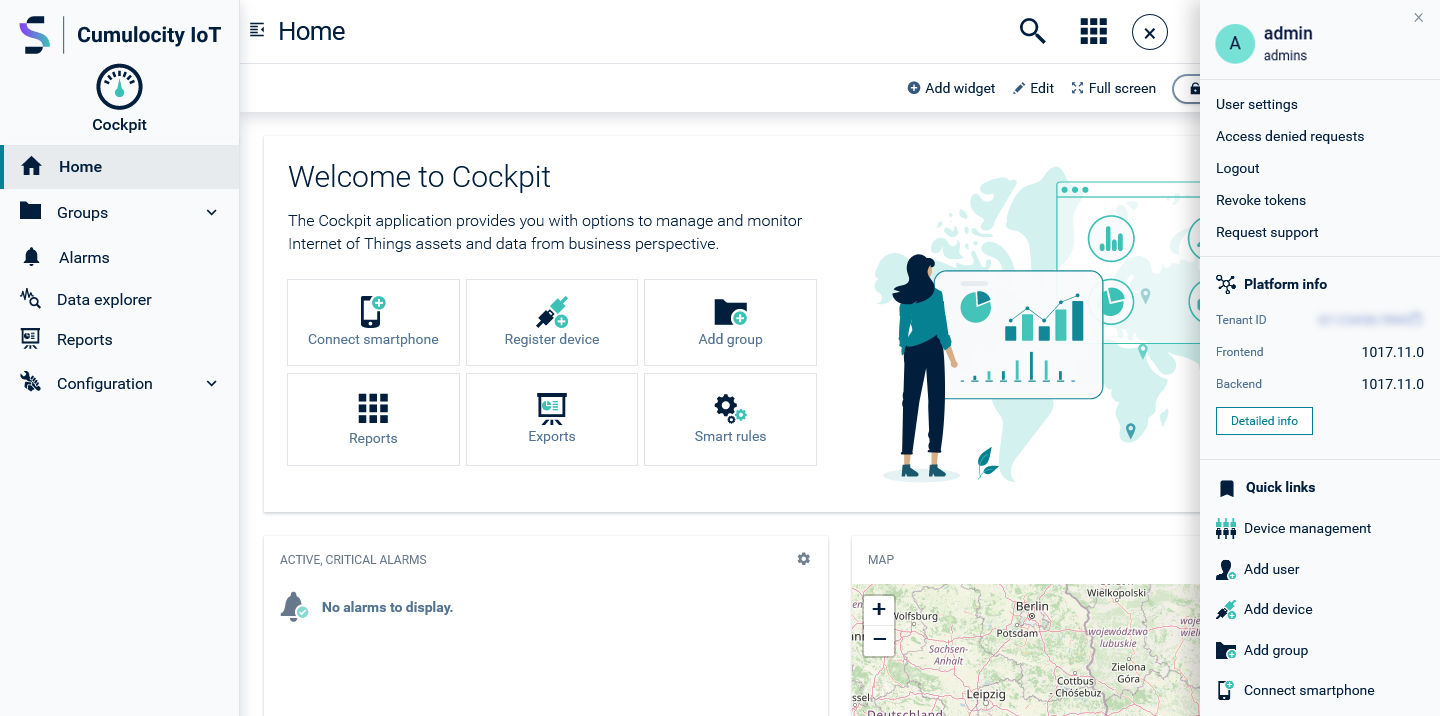
On a desktop or laptop computer, open a web browser and log in to your Cumulocity tenant. From the Cockpit application, click Connect Smartphone in the right drawer or in the Welcome widget.
-
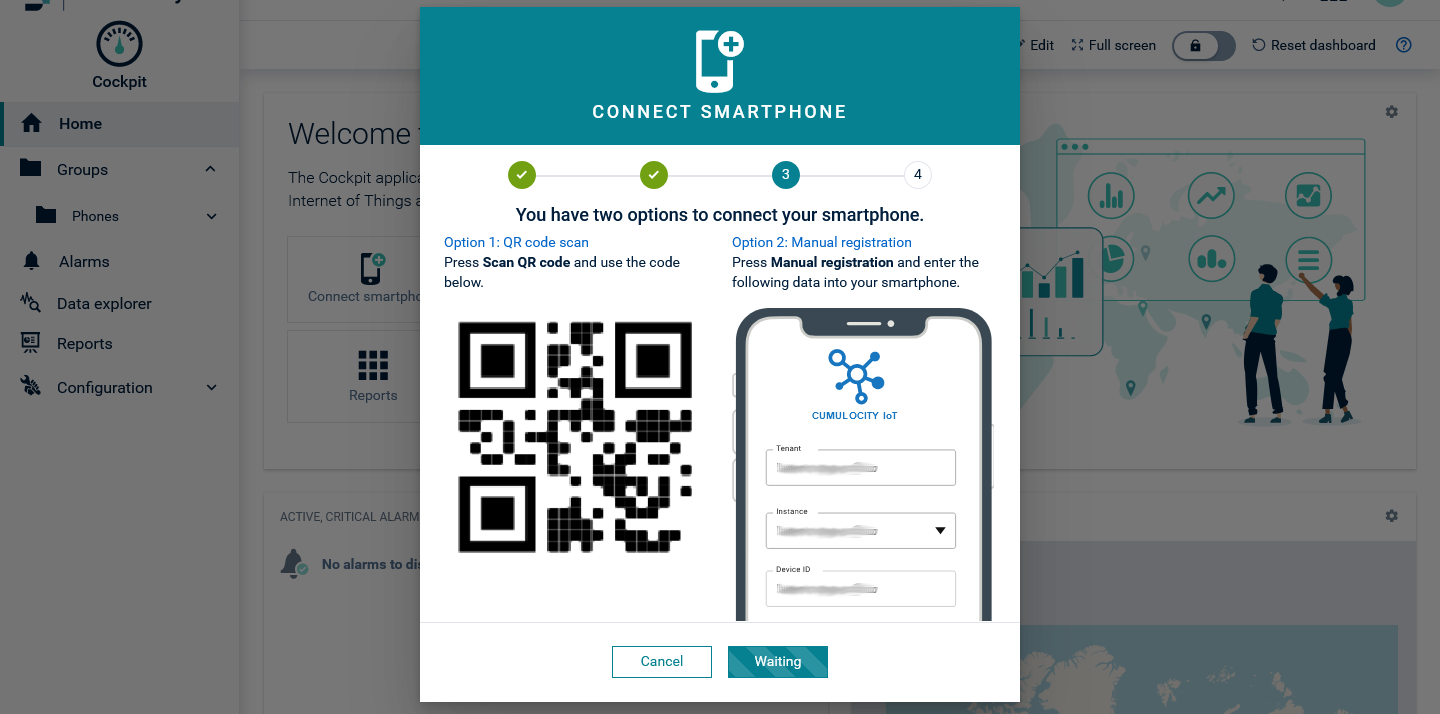
Follow the instructions in the wizard to step 3, ensuring that the app is installed on the smartphone.
-
From your smartphone, launch the app and tap Register in the top right corner of the screen.
-
Grant access to your camera if the app asks you for permission.
-
Scan the QR code shown on your PC’s web browser. If you can’t scan the QR code, tap Manual registration on your smartphone and fill in the details at the right side of the wizard screen.
-
Back on your smartphone, tap Done. Sensor measurements are sent to the server. They can be viewed in the device’s dashboard.
When using the Connect Smartphone wizard for device registration, your smartphone is automatically registered by Cumulocity and assigned to the “Phones” group. Tap Done on your smartphone to return to the main screen.
Manual registration
-
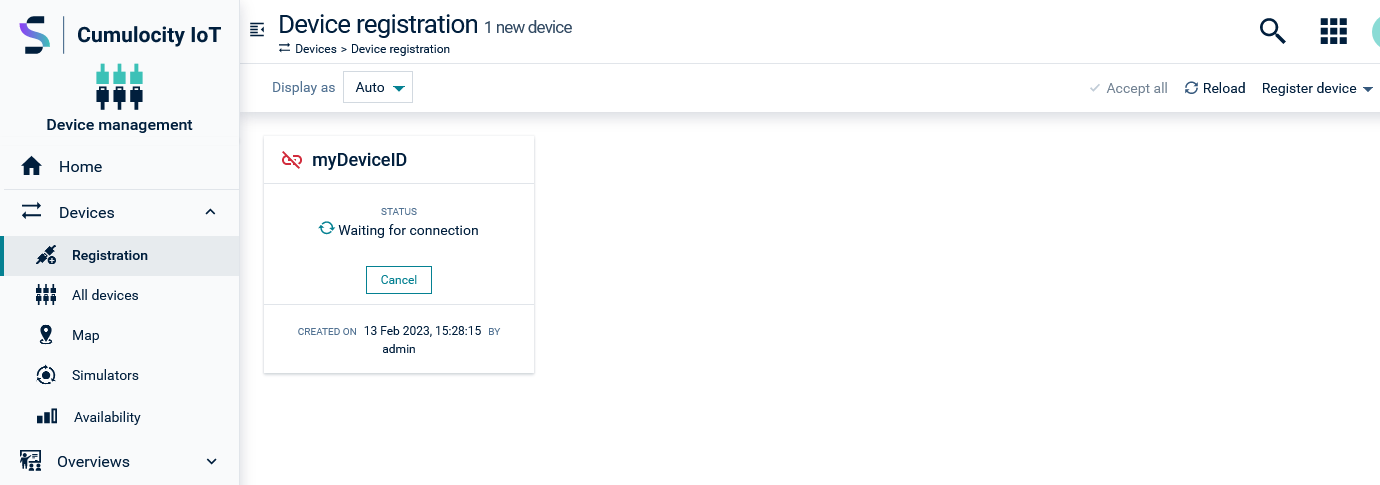
On a desktop or laptop computer, open a web browser and log in to your Cumulocity tenant. In the Device management application, select Devices > Registration from the navigator.
-
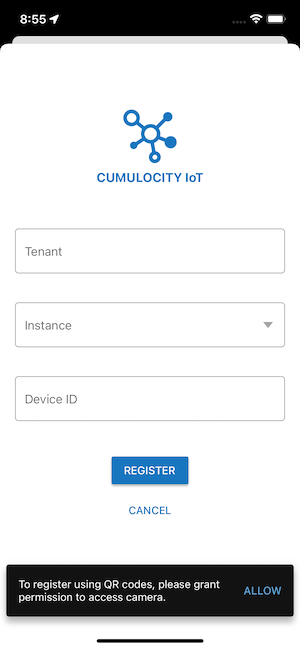
From your smartphone, launch the app and tap Register at the top right of the screen. When the camera opens, tap Register manually.
-
Back in your web browser, click Register device at the top-right of the page and select General. Choose a meaningful and unique device ID for your smartphone and a group to assign your device to. Click Next and then Complete. The server will notice the pending registration and wait for your smartphone to show up.
-
On your smartphone, fill in your tenant, for example, “companytenant01”, select your instance, for example, “cumulocity.com”, and enter your selected device ID. If your instance is not available in the list, you can enter it manually if you click Add other instance. Click Register for your device to contact the server and ask to be accepted.
-
Back on your web browser, your device’s card now shows the options to accept or reject the connection. Accept the connection. Your device will be registered with the server and assigned to the selected group.
-
Back on your smartphone, tap Done. Sensor measurements are sent to the server. They can be viewed in the device’s dashboard.
For further information about registering a device on the platform manually, refer to Registering devices.
If you want to deregister from Cumulocity, tap Deregister in the top right corner of the screen and approve the confirmation dialog. After that you can connect to the same or any other Cumulocity instance or tenant.