This documentation provides information about installing Cumulocity IoT Edge using the Edge Operator and accessing Cumulocity IoT Edge. Use the c8yedge.yaml file which includes Edge CR and the secrets necessary to deploy Cumulocity IoT Edge.
Prerequisites
Item
Details
Hardware
CPU: 6 cores RAM: 10 GB CPU Architecture: x86-64
Info: These are the minimum system requirements for deploying Edge. If a custom microservice requires additional resources, you must configure the system accordingly in addition to the minimum requirements. For example, if a custom microservice requires 2 CPU cores and 4 GB of RAM, then the Kubernetes node must have 8 CPU cores (6 cores for standard workloads + 2 cores for your microservice) and 14 GB of RAM (10 GB for standard workloads + 4 GB for your microservice).
Info: Edge on Kubernetes has undergone testing on the Kubernetes platforms mentioned above, using the Containerd, CRI-O, and Docker container runtimes.
Important
Edge on Kubernetes is tested and supported on single-node Kubernetes clusters.
Three static Persistent Volumes (PV) or a StorageClass configured with dynamic provisioning to bind. - 75 GB for the Persistent Volume Claim (PVC) made for MongoDB (configurable through the Custom Resource). - 10 GB for the Persistent Volume Claim (PVC) made for the Private Registry to host custom microservices. - 5 GB for the Persistent Volume Claim (PVC) made for application logs. For more information about configuring the storage, see Configuring storage.
You will receive the Edge Operator repository credentials along with the Edge license.
TLS/SSL key and TLS/SSL certificate
Optional. Use your internal or an external CA (Certification Authority) to generate these files. Ensure that the TLS/SSL certificate has the complete certificate chain in the right order.
Info: The .crt and .key files must be in the PEM format and the .key file must not be encrypted.
Edge cloud remote access
To connect and manage one (or multiple) Edge deployments to your Cumulocity IoT cloud tenant, you need an active Cumulocity IoT Standard tenant with the Data Broker and Cloud Remote Access extensions.
Info: The Edge cloud remote access is an optional feature in Edge.
Special instructions for K3s
To enable the proper functioning of the Edge Operator on K3s, you must install K3s with the following configuration options.
Run the command below to install Kubernetes version 1.25.13:
Added --disable=traefik in the install command to disable Traefik to avoid port conflicts between Traefik and cumulocity-core service, as both are LoadBalancer type services which expose port 443.
Added --kube-apiserver-arg=admission-control=ValidatingAdmissionWebhook,MutatingAdmissionWebhook to enable admission controllers. The flag is set to enable the ValidatingAdmissionWebhook and MutatingAdmissionWebhook admission controllers, as Edge requires them. See https://kubernetes.io/docs/reference/access-authn-authz/admission-controllers/.
Added --protect-kernel-defaults true to protect the default kernel settings on the host system. It prevents modifications to critical kernel parameters by container workloads running in Kubernetes. For more information, see https://docs.k3s.io/security/hardening-guide#host-level-requirements.
Info
To install a later version of Kubernetes, update the environment variable INSTALL_K3S_VERSION.
Configuring proxy
When Cumulocity IoT Edge is deployed behind a proxy, it must be configured to communicate with external endpoints over the internet through the proxy server.
To configure Edge to use a proxy, you must create or update a ConfigMap named custom-environment-variables in the c8yedge namespace (or the one you deployed Edge into) with the required proxy settings. The keys http_proxy, https_proxy and socks_proxy must be set to the URLs of the HTTP, HTTPS and Socks proxies, respectively. The key no_proxy must be set to specify a comma-separated list of domain suffixes, IP addresses, or CIDR ranges that Edge should bypass the proxy server for.
Here is an example of a ConfigMap with proxy settings:
apiVersion: v1 kind: ConfigMap metadata: name: custom-environment-variables data: http_proxy: http://proxy-server-ip:port https_proxy: http://proxy-server-ip:port socks_proxy: socks5://proxy-server-ip:port no_proxy: 127.0.0.1,::1,localhost,.svc,.cluster.local,cumulocity,<edge domain name, for example, myown.iot.com>,<Kubernetes cluster IP range, for example, 10.43.0.0/16>
By configuring Edge with the appropriate proxy settings, you ensure that it can seamlessly communicate with external endpoints through the proxy server, allowing it to function effectively in environments where proxy usage is mandated.
The table below provides more information:
Field
Required
Type
Default
Description
http_proxy
No
String
Specifies the URL of the HTTP proxy to be used for network connections.
https_proxy
No
String
Specifies the URL of the HTTPS proxy to be used for secure network connections.
socks_proxy
No
String
Specifies the URL of a SOCKS proxy.
no_proxy
No
String
Specifies a comma-separated list of addresses or domains for which the proxy will be bypassed. This is configured with the specified entries, Edge domain name, Kubernetes Pod CIDR (Cluster Pod IP Address Range), Kubernetes Service CIDR (Cluster Service IP Address Range) and any other domains, hosts or IPs you want to bypass the proxy when accessed.
Configuring storage
Kubernetes makes physical storage devices available to your cluster in the form of two API resources, PersistentVolume and PersistentVolumeClaim.
A Persistent Volume (PV) is a storage resource in Kubernetes that is provisioned and managed independently from the Pods that use it. It provides a way to store data in a durable and persistent manner, even if the Pod that uses it is deleted or restarted.
PVs are typically used to store data that must be preserved across Pod restarts or rescheduling, such as databases or file systems. They can be backed by various storage technologies, such as local disks, network-attached storage (NAS), or cloud-based storage services.
To use a PV in Kubernetes, you need to define a PersistentVolume object that describes the characteristics of the storage, such as capacity, access modes, and the storage-provider-specific details. Once the PV is created, you can create a PersistentVolumeClaim object that requests a specific amount of storage with specific access requirements. The Persistent Volume Claim (PVC) binds to a matching PV, and the Pod can then use the PVC to mount the storage and access the data.
By using PVs and PVCs, you can decouple the storage management from the application deployment, making it easier to manage and scale your applications in Kubernetes.
PVs represent cluster resources, while PVCs serve as requests for these resources and also serve as validation checks for the resource they request. Provisioning PVs can be done in two ways: statically or dynamically.
Static provisioning: In this method, a cluster administrator manually creates PVs, specifying details about the actual storage available for cluster users. These PVs are registered in the Kubernetes API and are ready for consumption.
Dynamic provisioning: When none of the statically created PVs match a PVC’s requirements, the cluster can automatically provision storage on-demand, specifically tailored for the PVC. This dynamic provisioning relies on StorageClasses. To trigger dynamic provisioning, the PVC must request a StorageClass, and the administrator must have set up and configured that class accordingly. Claims that request an empty string (“”) for the class effectively disable dynamic provisioning for themselves. If no StorageClass is specified in a claim, it falls back to using a default StorageClass if one is configured in the cluster. To enable a default StorageClass, the cluster administrator must activate the DefaultStorageClassadmission controller on the API server. This can be achieved, for instance, by ensuring that DefaultStorageClass is included in the comma-delimited, ordered list of values for the –enable-admission-plugins flag of the API server component. For more details on API server command-line flags, refer to the kube-apiserver documentation.
Persistent Volume Claims made by the Edge Operator
The Edge Operator requests three PVCs, as outlined in the table below. Each of these PVCs utilizes the StorageClass if specified within the spec.storageClassName field of the Edge CR.
In case you omit the spec.storageClassName, the Edge Operator requests PVCs without a StorageClass, thereby instructing Kubernetes to utilize the default StorageClass configured in the cluster.
If you explicitly specify an empty StorageClass as "", the Edge Operator requests PVCs with an empty StorageClass, thereby instructing Kubernetes to carry out static provisioning.
Finally, if you specify the name of an existing StorageClass for which dynamic provisioning is enabled, the Operator requests PVCs with that same class name, thereby instructing Kubernetes to utilize dynamic provisioning according to the specified class.
Persistent volume
Persistent Volume Claim
Description
75 GB
mongod-data-edge-db-rs0-0
Claimed by the MongoDB server to retain application data. The default size is 75 GB, but this value can be adjusted using the spec.mongodb.resources.requests.storage field in the Edge CR file.
10 GB
microservices-registry-data
Claimed by the private docker registry to store microservice images.
5 GB
edge-logs
Claimed by the Edge logging component to store the application and system logs.
To guarantee the retention of physical storage even after the PVC is deleted (for example, when Edge is deleted) and to enable future storage expansion if needed, it’s crucial to configure the StorageClass and/or the PVs with the following settings:
Reclaim Policy: Ensure that the reclaim policy is set to Retain. This setting preserves the storage even after the PVC deletion.
Volume Expansion: Set the volume expansion option to true. This setting enables the storage to be expanded when necessary.
If these recommended settings are not configured in the StorageClass, in the Edge CR status you receive the warnings below:
persistent volume reclaim policy of StorageClass [storage-class] is currently set to [Delete] instead of the recommended value [Retain]
allow volume to expand setting of the StorageClass [storage-class] is currently set to [false] instead of the recommended value [true]
These warnings serve as reminders to adjust these settings for optimal storage management.
Kubernetes provides a variety of persistent volume types, but two specific types enable Pod containers to access either a Network File System (NFS) or the cluster node’s local filesystem (often set up as a NFS drive mapped to a local folder). This configuration is especially prevalent in on-premises deployments.
Static provisioning of PVs
Info
You can skip this section if your Kubernetes cluster is already configured for dynamic provisioning of PVs.
This section outlines the steps for configuring the Kubernetes cluster to enable Edge to utilize NFS as a source for the PVs. For additional storage options, refer to the Kubernetes documentation.
Storage provisioning by connecting directly to the NFS server via PV configuration
Create and export the folders required for the 3 PVs defined in the c8yedge-pv-nfs.yaml file. Ensure that the user running Kubernetes server has read/write access to these folders.
Run the command below:
kubectl apply -f c8yedge-pv-nfs.yaml
Storage provisioning by mapping NFS drive to a local folder into the cluster node
Create the folders in the local file system or mount NFS folders required for the 3 PVs defined in the c8yedge-pv-local-path.yaml file. Ensure that the user running Kubernetes server has read/write access to these folders.
Run the command below:
kubectl apply -f c8yedge-pv-local-path.yaml
Info
Since you manually created the PVs, you must specify an empty StorageClass as "" in the spec.storageClassName field of the Edge CR for Kubernetes to carry out static provisioning, thereby binding PVC claims made by the Edge Operator.
Installing the Edge Operator
A Helm chart is available for installing the Edge Operator. To begin, create a new single-node Kubernetes cluster with the Kubernetes distribution of your choice, and configure kubectl to use that cluster. See Prerequisites for the supported Kubernetes distributions and versions.
To install the Edge Operator, run and enter the version (for example, 1018.0.0) you want to install, and the repository credentials you received along with the license.
By default, the Edge Operator is deployed within the c8yedge namespace. If you wish to install the Edge Operator and Edge in a different namespace, you can specify it using the -n option in the installation script.
Run the following command to follow the logs for the Edge Operator pod:
Substitute the namespace name c8yedge in the command above with the namespace name where you have installed the Edge Operator.
Installing Edge
Before you start the installation, ensure that you have fulfilled the prerequisites and configured the storage as described in Configuring storage.
Download and edit the Edge CR (c8yedge.yaml), before applying it to your Kubernetes cluster by running the command below:
kubectl apply -f c8yedge.yaml
For more information about the structure and configuration options available in the Edge CR, see the Edge Custom Resource section.
Verifying the Edge installation
To monitor the installation progress, run the command below:
kubectl describe edge c8yedge -n c8yedge
This command allows you to view the details about the installation of c8yedge in the c8yedge namespace.
Info
Substitute the Edge name and namespace name, which is currently c8yedge in the command, with the specific Edge name and namespace name you have specified in your Edge CR.
You can also follow the events raised for the Edge CR by running the command below:
watch kubectl get events -n c8yedge --field-selector involvedObject.name=c8yedge --sort-by=.metadata.creationTimestamp
The Events section in the output of the describe edge command specifies the installation progress and the Status section displays the generation of the Edge CR which is being installed and its current state. Once the installation succeeds, the Status section also displays the generation of the CR which is deployed, Edge version, last deployed time/age, validation warnings, if any and some help commands for downloading the diagnostic logs, extracting the Root CA of the Edge Operator generated TLS certificates.
Events:
Type Reason Age From Message
---- ------ ---- ---- -------
Normal Validating 15m cumulocityiotedge validating
Normal ValidationPassed 15m cumulocityiotedge validation passed
Normal Installing 15m cumulocityiotedge installing
…………
…………
Normal Installing 12m cumulocityiotedge finished installing mongo server
…………
…………
Normal Installing 8m cumulocityiotedge finished installing core
…………
…………
Normal Installing 5m cumulocityiotedge finished installing and updating microservices
…………
…………
Normal Installing 2m cumulocityiotedge finished installing thin-edge
…………
Normal Ready 1m cumulocityiotedge installed successfully
Before you continue, wait for the Edge CR status to reach the Ready state.
Accessing Edge
Before you can access Edge, you must first get the external IP address. The Edge Operator creates a load balancer service named cumulocity-core, which receives an external IP. Clients outside of the cluster can access the Edge through this external IP.
Assigning an external IP
To get the external IP to access Edge, run the command below:
kubectl get service cumulocity-core -n c8yedge
Info
Substitute the namespace name c8yedge in the command above with the specific namespace name you have specified in your Edge CR.
Sample output of the kubectl get service command:
NAME TYPE CLUSTER-IP EXTERNAL-IP PORT(S)
cumulocity-core LoadBalancer X.X.X.X **REDACTED X.X.X.X **REDACTED 443:31342/TCP,1883:32751/TCP,8883:32270/TCP
Sometimes the external IP displays as <pending> or <none>. The IP assignment process is dependent on the Kubernetes hosting environment. An external load balancer in the hosting environment handles the IP allocation and any other configurations necessary to route the external traffic to the Kubernetes service. Most on-premise Kubernetes clusters do not have external load balancers that can dynamically allocate IPs. The most common solution is to manually assign an external IP to the service. This can be done in the service’s YAML configuration. You can use the following command to manually assign an external IP to the cumulocity-core service (replace <EXTERNAL-IP> in the command below with the IP address you want to assign).
kubectl patch service cumulocity-core -n c8yedge -p '{"spec":{"type": "LoadBalancer", "externalIPs":["<EXTERNAL-IP>"]}}'
Info
Substitute the namespace name c8yedge in the command above with the specific namespace name you have specified in your Edge CR.
Info
When manually assigning the external IP, see the following Kubernetes API documentation:
“These IPs are not managed by Kubernetes. The user is responsible for ensuring that traffic arrives at a node with this IP.”
You can access Edge using a domain name in a web browser.
Accessing Edge using the domain name
Access Edge using the domain name configured as part of the installation. There are two ways of configuring the accessibility with the domain names:
Add an entry of the domain name and IP address mapping in the DNS servers.
For example, if your domain name is myown.iot.com, add an entry for both myown.iot.com and management.myown.iot.com.
Alternatively, Add the alias to access Edge through the domain name provided during installation. This must be performed on each client host on which Edge is accessed.
The first option is always preferable so that Edge is accessible over LAN.
Adding the alias
On Linux machines, add the following entry to /etc/hosts:
Use the external IP address fetched by running the command kubectl get service in the previous section.
On Windows machines, add the same entry to C:\Windows\System32\drivers\etc\hosts.
Ping the <domain_name> to verify it.
ping <domain_name>
ping management.<domain_name>
If the ping is successful, the DNS resolution is working properly.
To access Edge
Enter one of the following URLs in the browser:
To log in to the “edge” tenant, use the URL https://<domain_name>.
To log in to the Management tenant, use the URL https://management.<domain_name>.
The login screen appears.
Important
After a successful deployment, you must access both the Management tenant and “edge” tenant and change the respective admin credentials.
Change the password on first login.
Important
The email address to change the password on the first login is the one you specified in the Cumulocity IoT Edge CR (or myown@iot.com if you followed the Quickstart installation steps).
Alternatively, run the following command to retrieve the email address:
kubectl get edge c8yedge -n c8yedge -o jsonpath='{.spec.email}' && echo
Substitute the Edge name and namespace name, which is currently c8yedge in the command, with the specific Edge name and namespace name you have specified in your Edge CR.
If you are logging in for the first time, you will see a cookie banner at the bottom of the login screen:
Click Agree and Proceed to accept the default cookie settings (required and functional cookies enabled).
Click Reject all to reject all of the default cookie settings.
Click Preferences to select your individual cookie preferences:
Required - Required to enable core site functionality. They perform a task or operation without which a site’s functionality would not be possible. Required cookies cannot be disabled.
Functional - Used to track site usage and to process personal data to measure and improve usability and performance. Functional cookies must be actively enabled.
Click See also our Privacy Notice to open the Software AG privacy statement with details on the Software AG privacy policy.
Info
If you have enabled functional cookies you can opt out of the product experience tracking later on via the User settings dialog, see User options and settings.
Select the Remember me checkbox if you want the browser to remember your credentials, so that you do not have to enter them again when opening the application the next time. This is especially convenient if you frequently switch between Cumulocity IoT applications, as Edge requests you to authenticate each time when starting an application. You can make the browser “forget” your credentials by explicitly logging out.
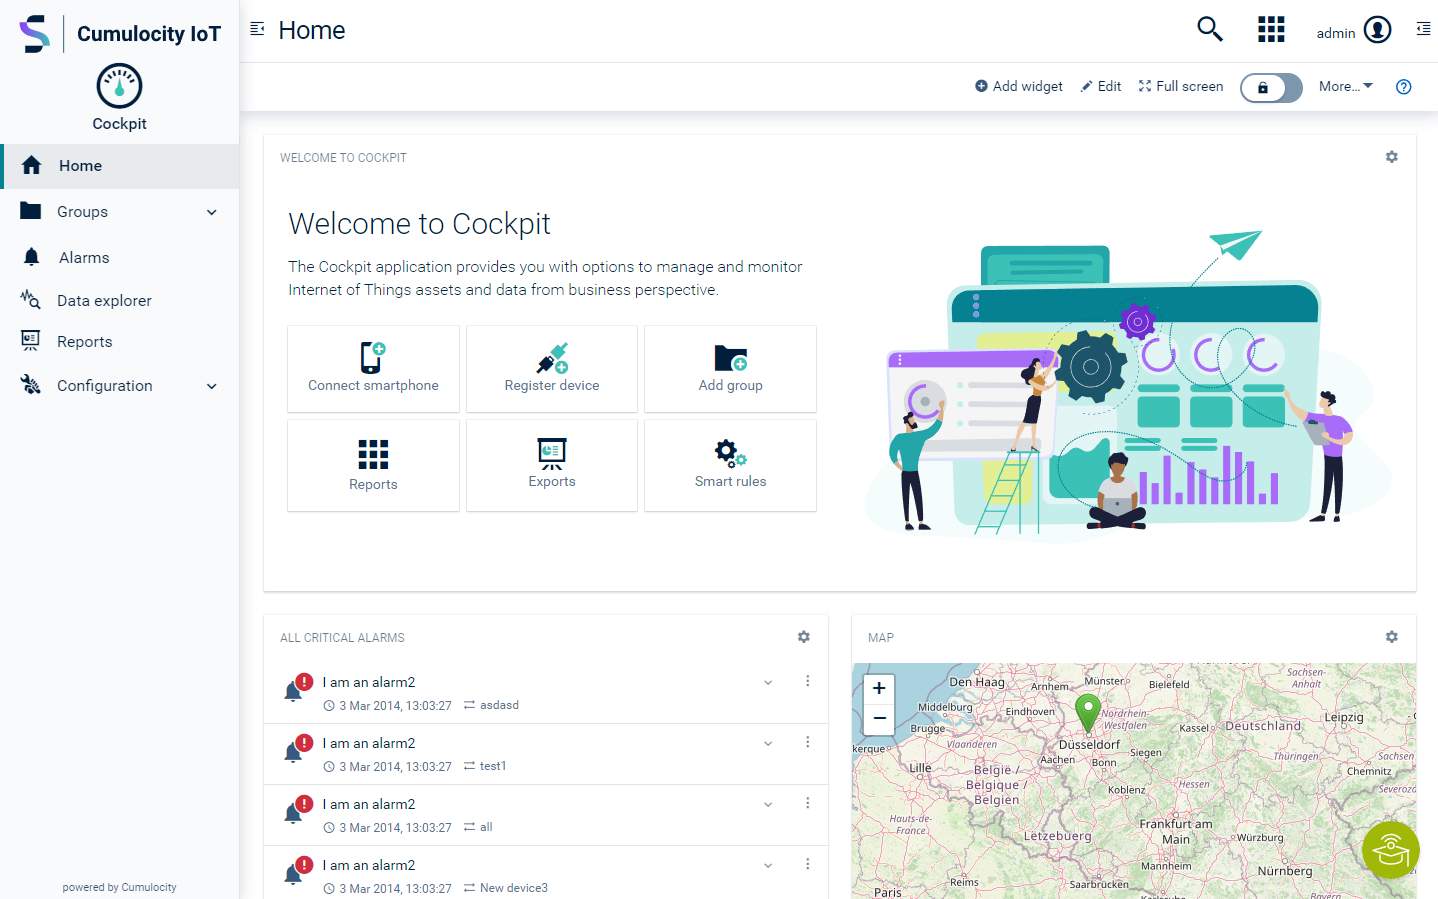
Finally, click Login to enter Edge. Initially, you will be taken to the Cockpit application (if not configured differently).
To explicitly log out, click the User button at the right of the top bar, then select Logout from the context menu.
Info
The maximum number of failed logins (due to invalid credentials), after which a user is locked, can be configured by the Management tenant on platform level, see Cumulocity IoT Core - Operations guide. The default value is 100.
How to reset your password
To reset your password, you must first configure the “reset password” template and email server settings in Edge. For information about configuring the email server, see Configuring the email server.
The Edge Operator deploys and configures a Fluent Bit daemonset on the Kubernetes node to collect the container and application logs from the node file system. Fluent Bit queries the Kubernetes API, enriches the logs with metadata about the pods (in the Edge namespace), and transfers both the logs and metadata to Fluentd. Fluentd receives, filters, and persists the logs in the persistent volume claim configured for logging.
To download the diagnostic log archive, run the command below. It generates a file named c8yedge-logs-{current date}.tar.gz in the current directory.
kubectl get edge c8yedge -n c8yedge --output jsonpath='{.status.helpCommands.downloadLogs}' | sh
Info
Substitute the Edge name and namespace name c8yedge in the command above with the specific Edge name and namespace name you have specified in your Edge CR.
Edge on Kubernetes supports extended offline operations with intermittent or no internet connection. This capability enables seamless operation in environments where continuous internet access is not guaranteed. In order to achieve seamless operation of Edge in offline environments, it is essential to ensure that all required artifacts, including Helm Charts and Docker images, are readily available. This can be accomplished by hosting these artifacts in a local Harbor registry.
Harbor is an open-source container image registry which can be installed and configured to host the Edge artifacts. This guide will walk you through the process of installing and configuring Harbor version 2.5, providing step-by-step instructions to help you set up the registry for Edge deployment. For more information on Harbor, refer to Harbor 2.5 Documentation
Harbor Installation and Configuration
This section describes how to install and configure Harbor on Kubernetes using Helm Chart for Harbor.
Prerequisites
Make sure that your target host meets the following prerequisites.
Item
Details
Hardware
CPU: 2 cores RAM: 4 GB CPU Architecture: x86-64
Info
These are the minimum system requirements for deploying Harbor. If you are deploying Harbor in the same cluster as you intend to deploy Edge, please note that these requirements are additional to those required for Edge.
Kubernetes
Version 1.25.x has been tested (with potential compatibility for subsequent versions)
Helm plugin to push chart package to ChartMuseum. Refer to Installing cm-push plugin for the installation instructions.
Disk space
Four static Persistent Volumes (PV) or a StorageClass configured with dynamic provisioning to bind. - 5 GB each for the Persistent Volume Claims (PVC) made for the registry (storing container images) and the chartmuseum (storing Helm Charts). - 1 GB each for the Persistent Volume Claims (PVC) made for the harbor database and the jobservice.
TLS/SSL key and TLS/SSL certificate
Optional. Use your internal or an external CA (Certification Authority) to generate these files. Ensure that the TLS/SSL certificate has the complete certificate chain in the right order.
Info
The .crt and .key files must be in the PEM format and the .key file must not be encrypted.
Install Harbor using Helm Charts
You can download and edit the Harbor configuration file c8yedge-harbor-values.yaml if necessary.
After making any required edits, execute the following commands to install Harbor in the c8yedge-harbor namespace:
You can verify if the Harbor server has started by checking the status of the pods using the following command:
NAMESPACE_NAME=c8yedge-harbor # Change namespace name if necessary
kubectl get pods -n $NAMESPACE_NAME
This command will display the status of all pods in the specified namespace (c8yedge-harbor in this case), allowing you to confirm whether the Harbor server pods are running successfully.
Update /etc/hosts to resolve the domain
Run the below commands to update the /etc/hosts file to resolve the harbor domain:
# Update /etc/hosts to resolve the Harbor domainNAMESPACE_NAME=c8yedge-harbor # Change namespace name if necessaryLOCAL_HARBOR_DOMAIN=c8yedge.harbor.local # Change harbor domain if necessary
sudo sed -i "/$LOCAL_HARBOR_DOMAIN/d" /etc/hosts && \
echo"$(kubectl get service -n $NAMESPACE_NAME c8yedge-harbor-lb -o jsonpath='{.status.loadBalancer.ingress[0].ip}')$LOCAL_HARBOR_DOMAIN" | sudo tee -a /etc/hosts
After completing this step, you should be able to sign into the Harbor registry at https://c8yedge.harbor.local:5001 with the username admin and password admin-pass.
Trust the self-signed Harbor server certificates
Run the below commands to trust the self-signed Harbor server certificates:
sudo sh -c '
LOCAL_HARBOR_DOMAIN=c8yedge.harbor.local # Change harbor domain if necessary
LOCAL_HARBOR_PORT=5001 # Change harbor port if necessary
C8Y_LOCAL_HARBOR_REGISTRY_CA_CERT=$(echo quit | openssl s_client -showcerts -servername $LOCAL_HARBOR_DOMAIN -connect $LOCAL_HARBOR_DOMAIN:$LOCAL_HARBOR_PORT) && \
if command -v "update-ca-certificates" > /dev/null 2>&1; then
mkdir -p /usr/local/share/ca-certificates
echo "$C8Y_LOCAL_HARBOR_REGISTRY_CA_CERT" > /usr/local/share/ca-certificates/c8yedge-harbor-registry-ca.crt
update-ca-certificates
elif command -v "update-ca-trust" > /dev/null 2>&1; then
mkdir -p /etc/pki/tls/certs
echo "$C8Y_LOCAL_HARBOR_REGISTRY_CA_CERT" > /etc/pki/tls/certs/c8yedge-harbor-registry-ca.crt
update-ca-trust extract
fi'
You should restart the container runtime and Kubernetes cluster after running the above commands for the changes to take effect. For example, you can restart k3s using sudo systemctl restart k3s or sudo service k3s restart commands.
Download and publish Edge artifacts to local Harbor registry
This section outlines the steps to download the Edge artifacts from the Cumulocity registry and publish them to the local Harbor registry. You need to run a Python script to achieve this.
Install reposiotry sync script
To install Edge repository synchronization script run the commands below:
To download and publish the Edge artifacts to local Harbor registry, run the command below:
EDGE_REPO_USER=EDGE-REPO-USER # Edge repository credentialsEDGE_REPO_PASSWORD=EDGE-REPO-PASS # Edge repository credentialsLOCAL_HARBOR_DOMAIN=c8yedge.harbor.local # Change harbor domain if necessaryLOCAL_HARBOR_PORT=5001# Change harbor port if necessaryLOCAL_HARBOR_USER=admin # Change if you used different credentails while installing the Harbor registryLOCAL_HARBOR_PASSWORD=admin-pass # Change if you used different credentails while installing the Harbor registry
edge_repository_sync sync -v 1018.0.0 -sr registry.c8y.io -sru "$EDGE_REPO_USER" -srp "$EDGE_REPO_PASSWORD" -tr "$LOCAL_HARBOR_DOMAIN:$LOCAL_HARBOR_PORT" -tru "$EDGE_REPO_USER" -trp "$EDGE_REPO_PASSWORD" --dryrun False
Info
To request the Edge repository credentials, contact the logistics team for your region:
To install the Edge Operator, run and enter the version (for example, 1018.0.0) you want to install, and the local Harbor registry credentials.
EDGE_NAMESPACE=c8yedge # Change namespace name if you want to deploy Edge in a different namespace
kubectl create namespace $EDGE_NAMESPACE && \
kubectl apply -n $EDGE_NAMESPACE -f https://cumulocity.com/guides/files/edge-k8s/custom-environment-variables.yaml && \ LOCAL_HARBOR_DOMAIN=c8yedge.harbor.local # Change harbor domain if necessaryLOCAL_HARBOR_PORT=5001# Change harbor port if necessary
curl -sfL https://cumulocity.com/guides/files/edge-k8s/c8yedge-operator-install.sh -O && bash ./c8yedge-operator-install.sh -n $EDGE_NAMESPACE -r $LOCAL_HARBOR_DOMAIN:$LOCAL_HARBOR_PORT
Provide the local Harbor registry credentials in the prompt:
Enter username to access Edge Operator repository:
Enter password to access Edge Operator repository:
By default, the Edge Operator is deployed within the c8yedge namespace. If you wish to install the Edge Operator and Edge in a different namespace, you can specify it using the -n option in the installation script.
Run the following command to follow the logs for the Edge Operator pod:
EDGE_NAMESPACE=c8yedge                  # Change namespace name if you want to deploy Edge in a different namespace
kubectl logs -f -n $EDGE_NAMESPACE deployment/c8yedge-operator-controller-manager manager
Info
Substitute the namespace name c8yedge in the command above with the namespace name where you have installed the Edge Operator.
Installing Edge
Continue with installing Edge by following the instructions in Installing Edge section.