Working with Cumulocity IoT Edge
Important: The tenant in the Edge instance is always named as “edge“.
Important: The tenant in the Edge instance is always named as “edge“.
Cumulocity IoT Edge comes with three built-in applications - Device Management, Cockpit and Application.
Since Cumulocity IoT Edge is based on the same software as the cloud-based Cumulocity IoT Core version, the above applications are the same in both versions, with minor restrictions.
Below find an overview on the functionalities of these applications in Cumulocity IoT Edge.
DataHub Edge is an optional component of Cumulocity IoT Edge, which can be used for storage and analytics over historical data.
For general information on functionalities and features of the GUI refer to GUI functionalities and features.
For information on how to change the user settings of your account refer to User settings.
The Device Management application provides functionalities for managing and monitoring devices and enables you to control and troubleshoot devices remotely.
The following functionalities are available in Cumulocity IoT Edge and described in detail in these sections:
| SECTION | CONTENT |
|---|---|
| Connecting devices | How to register one or more devices manually and how to bulk-register devices in order to connect devices to your account. |
| Viewing devices | What is displayed in the device list and how to sort devices by searching for devices and filtering devices. |
| Grouping devices | Why and how to group devices into top-level groups, subgroups and smart groups. |
| Device details | Detailed description of the various kind of information available for various types of devices. |
| Monitoring and controlling devices | How to monitor the connection quality and service status of devices, how to handle alarms from devices, how to remote control and how to troubleshoot devices. |
| Managing device types | How to process data from various device types by using device protocols. |
| Managing device data | How to retrieve and manage firmware and software for devices and how to handle configuration snapshots. |
| Using SmartREST templates | How to work with SmartREST templates, a collection of request and response templates used to convert CSV data and Cumulocity IoT Rest API calls. |
The Cockpit application provides you with options to manage and monitor Internet of Things (IoT) assets and data from a business perspective.
The following functionalities are available in Cumulocity IoT Edge and described in detail in these sections:
| Section | Content |
|---|---|
| Managing assets | Organize assets in hierarchies by creating groups and assigning devices. |
| Visualizing data using the Data Explorer | Interactively explore, compare and visualize IoT data. Describes how to access and use the data explorer, add data points to the data explorer, customize data point properties, modify the visualization, store the data explorer as widget, and export the data. |
| Working with dashboards | Create your own analytics and monitor pages by adding and arranging widgets. Share dashboards among all devices of the same type. |
| Widgets collection | Use various types of widgets from the Widgets collection that comes with Cumulocity IoT and configure them according your needs. |
| Working with alarms | Monitor problems of your assets using severities and workflows. Since working with alarms in the Cockpit application is actually the same as working with alarms in Device Management, refer to Working with alarms in Device Management. |
| Managing reports | Handle reports based on dashboard layouts, create reports for exporting data in CSV or excel format and schedule the export. |
| Using the Data Point Library | Manage default settings (“profiles”) of your devices and apply them automatically using the Data Point Library. |
| Working with Smart Rules | Create and manage business rules to work on incoming data in realtime and to perform actions based on this data. |
| Smart Rules collection | Use pre-defined global Smart Rules to configure rules for geofencing, thresholds or alarm escalation and notifications (SMS/email/voice). Describes each SmartRule and its configurable parameters in detail. |
The Administration application enables account administrators to manage their users, roles, tenants and applications and lets them configure a number of settings for their account.
The following functionalities are available in Cumulocity IoT Edge and described in detail in these sections:
| SECTION | CONTENT |
|---|---|
| Home Screen | Providing information on your capacity usage and subscribed applications. |
| Managing Users | How to create users, edit, disable or delete them. |
| Managing Permissions | How to create and edit global roles and inventory roles, how to assign them to users, and how to grant application access. |
| Managing own applications | How to manage and configure own applications in your Cumulocity IoT account. |
| Changing settings | How to change account settings like application settings or password policy settings and how to manage the properties library. |
| Managing data retention | How to manage and configure retention rules for your data and how to manage stored files in the file repository. |
Cumulocity IoT uses REST and MQTT as protocols for external communication. Both protocols may be used to interface devices with Cumulocity IoT . For more information, see Device integration using REST and Device integration using MQTT in the Device SDK guide.
Additionally, Cumulocity IoT Edge offers Cloud Fieldbus functionality to collect data from fieldbus devices and remotely manage them. To do so, various protocols are provided, e.g. Modbus and OPC UA. For details on how to integrate devices using Modbus and OPC UA, refer to Optional Services > Cloud Fieldbus in the User guide.
Info: Currently, only the Modbus and OPC UA protocols are supported.
Modbus is a serial communications protocol originally published by Modicon and used to establish primary-replica/client-server communication between devices.
Before you connect a Modbus device
Use the following command to check if the agent is running in Cumulocity IoT Edge (running on port 6670):
[admin@server ~]$ systemctl status cumulocity-agent
If the agent is not running, start it with the following command:
[admin@server ~]$ systemctl start cumulocity-agent
The Modbus agent is pre-registered in the post-installation phase. In the Device Management application, click All devices in the navigator and find the Modbus agent (called “linux-agent”) in the device list.

For further information on connecting and managing Modbus devices, refer to Optional services > Cloud Fieldbus in the User guide.
Important: While configuring the OPC UA server, ensure that the server is reachable from the Edge VM. If you are using a hostname, configure DNS accordingly.
To connect an OPC UA device in Edge, follow the steps below.
OPC UA Management service
Check if the OPC UA management service is running in Cumulocity IoT Edge (running on port 8083):
[admin@server ~]$ sudo service opcua-mgmt-service status
If the agent is not running, start it with the following command:
[admin@server ~]$ sudo service opcua-mgmt-service start
OPC UA Device Gateway
Check if the OPC UA device gateway is running in Cumulocity IoT Edge (running on port 1099):
[admin@server ~]$ sudo service opcua-device-gateway status
If the agent is not running, start it with the following command:
[admin@server ~]$ sudo service opcua-device-gateway start
Next, you need to register a device in the Device Management application with the name opcua-gateway

Follow the description in Device Management > Connecting devices in the User guide to register a device.
In the Device Management application, click All devices in the navigator and find the OPCUA device in the device list.
For further information about managing and configuring OPCUA devices, see OPC UA section in the User guide.
The Cumulocity IoT tenant allows you to remotely manage your Edge VM by registering the Edge VM in the tenant account. To do so, you must first configure the Cumulocity IoT tenant account in the Edge agent and then register your Edge VM in the tenant account.
To configure the tenant account in your Edge VM, run the post-installation script and select Configuring Edge Agent. For more information, see Configuring the Edge server.
The Cumulocity IoT tenant uses the SSH protocol to access the remote Edge VM through a web browser.
Before performing these steps, ensure that you have provided the URL for the Cumulocity IoT tenant in the post-installation procedure.
Log in to your Cumulocity IoT tenant.
Go to Device Management.
Click Registration in the Devices menu and then click Register device.
Select General device registration.
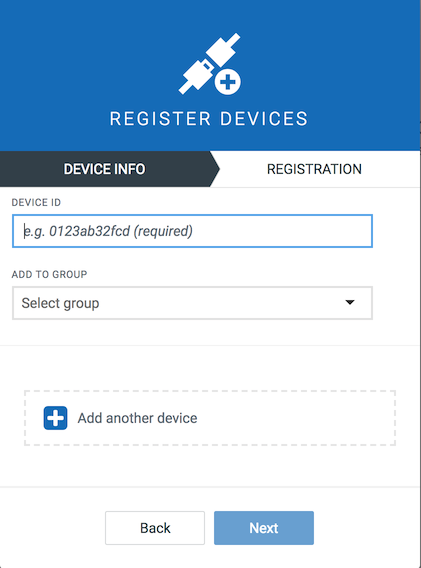
In the Device ID field, enter the Edge device ID. The Edge device ID is available at /usr/edge/properties/edge-agent/device-id in your Edge VM.
Click Next.
Click Complete to register your Edge VM.
After successful registration, the Edge VM appears in the Device registration page with the status Waiting for connection.
Turn on the Edge VM and wait for the connection to be established.
Once the device is connected, the device status changes to Pending acceptance.
Click Accept to confirm the connection. The status of the device changes to Accepted.
The Cumulocity IoT Cloud Remote Access microservice allows you to remotely access the Edge VM through a web browser. The remote Edge VM is represented as a device in the Device Management application of Cumulocity IoT.
The following protocols are supported to connect to the Edge VM through remote access from the Cumulocity IoT tenant:
For more information about remote access, see Cloud Remote Access in the User guide.
You can access the Edge VM from the Cumulocity IoT tenant by installing the VNC components on your Edge VM.
Info: Ensure that you have registered your Edge VM with the Cumulocity IoT tenant. See Registering the Edge device with the Cumulocity IoT tenant.
Info: The Edge VM must be connected to the internet to install the VNC components.
Run the script vnc-setup.sh.
[admin@server ~]$ sudo /opt/c8y/utilities/vnc-setup.sh
The vnc-setup.sh script installs the VNC components. After installing the VNC components, you should configure the VNC server for each user.
To configure the VNC server, run the vnc-user-setup.sh script. Each user should run this script to set up VNC components and be able to connect to the Edge VM. The vnc-user-setup.sh script enables the current user to use VNC functionality and set a VNC password for the current user.
Run the script vnc-user-setup.sh.
[admin@server ~]$ /opt/c8y/utilities/vnc-user-setup.sh
Provide and verify the password.
Select Y or N to enter a view-only password.
Record the allocated port number. This port number will be used to connect to the VNC server on your Edge VM.
Info: You can also get the allocated port number from the /opt/c8y/utilities/vnc-display-mapping file. In this file, you will find the VNC display number allocated for each user. For example, admin:1. You must add 5900 to the number associated with the user. In this example, the port number for the user admin is 5901.
To access and connect to the Edge VM, you must create a remote access point.
In the Cumulocity IoT tenant for your registered Edge VM, add a remote access endpoint. See Adding remote access endpoints. You must use the same port number that is allocated for you.
Connect to the endpoint. See Connecting to endpoints.
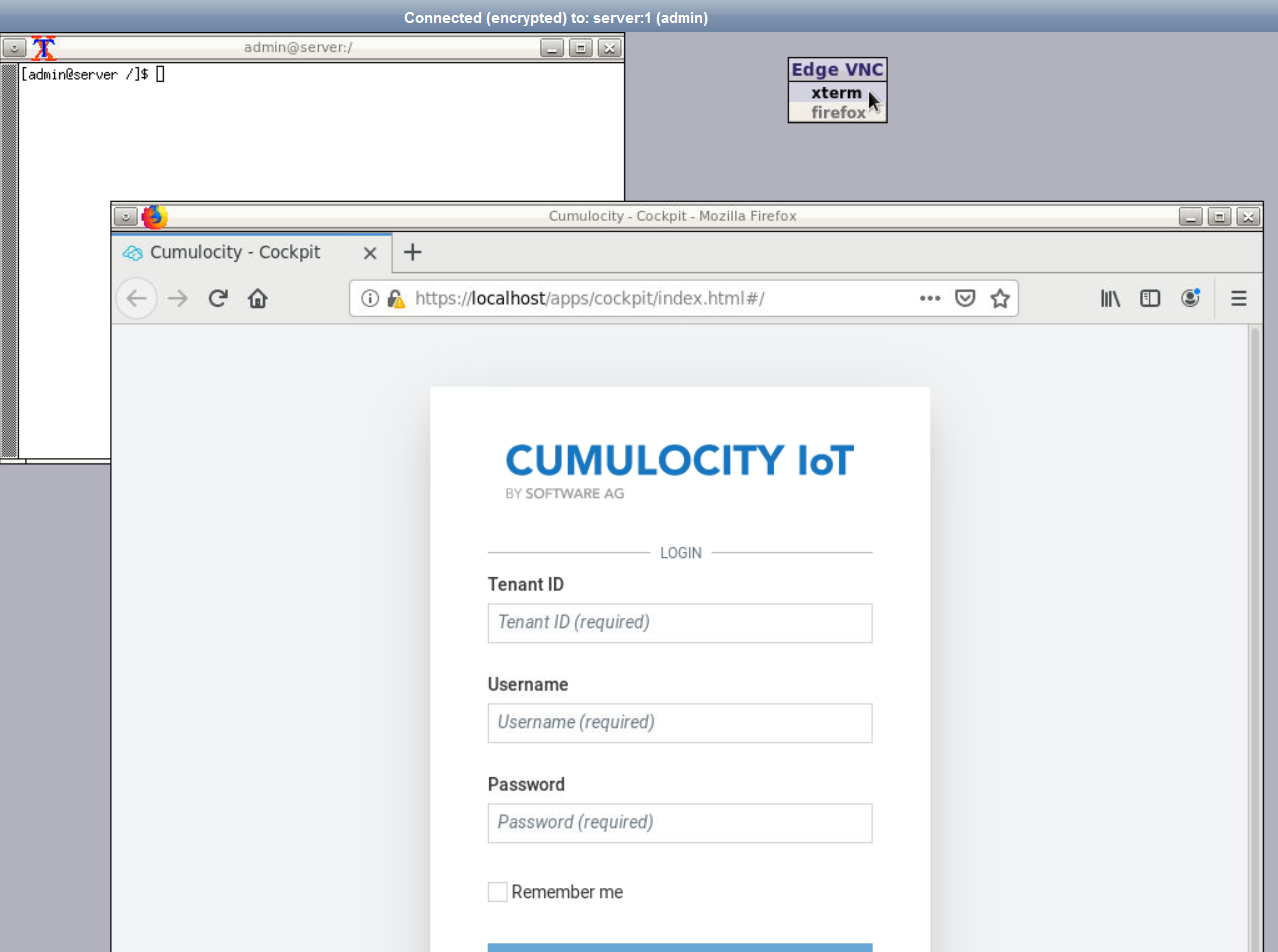
The connection to the Edge VM is established and the GUI appears for the Edge VM. Right-click in the screen to open the desktop components xterm and firefox.
Important: Do not use the Send Ctrl+Alt+Del button in the VNC interface. If you do so, you will lose the VNC connection and not be able to reconnect until you restart the Edge VM.
You can change the VNC password for the current user by running the vnc-user-setup.sh script. After changing the password, you must update the password in the remote access endpoint.
Cumulocity IoT Edge provides the option to upload Edge data to a Cumulocity IoT tenant account selectively. Note that you must first create a Cumulocity IoT tenant account.
You can share the following data:
Important: Data Broker in Cumulocity IoT Edge does not support synchronization of the operations.
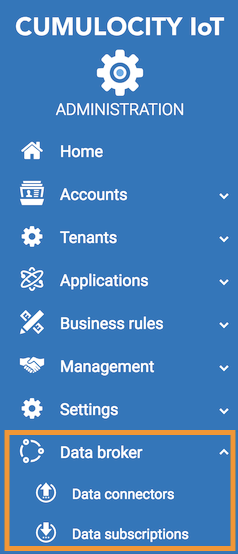
Go to Data Broker > Data connectors if you would like to send data to the tenant account.
Go to Data Broker > Data subscriptions in your tenant account to receive the data from Edge.
For details about sending and receiving data in Cumulocity IoT, see Enterprise Tenant > Using the Data Broker.
DataHub Edge is an optional component of Cumulocity IoT Edge. DataHub Edge complements the ad-hoc querying of recent device data with analytical querying over long periods of time. For that purpose, data is moved from the internal database of Cumulocity IoT Edge to a local data lake, with the data being stored in a concise and query-efficient format. DataHub Edge allows you to run SQL queries against the data lake contents so that you can gain more insights into your device data.
DataHub Edge is the counterpart of DataHub, the variant for cloud deployments. To learn more about DataHub in general, see section DataHub overview. To learn more about DataHub Edge, see section Running DataHub on the Edge.
Microservices are server-side applications which may be used to extend the Cumulocity IoT Edge platform with customer-specific functionality. For more information, see Microservices SDK.
To enable or disable the microservice hosting feature, see Enabling or Disabling microservice hosting feature. The Device Simulator microservice is pre-installed with Edge VM and is enabled only if the microservice hosting feature is enabled.
In Cumulocity IoT Edge, you can customize the appearance of your tenant to your own preferences.
Info: Use the domain name to access the Cumulocity IoT Edge platform to properly apply the branding and see the effects after branding.
To access the branding feature:
Log in to the management tenant as sysadmin user using the domain name.
Switch to the Administration application using the application switcher at the right of the top bar ![]() .
.
Go to Settings > Enterprise Tenant.
For information about branding configuration, see Branding in the User guide.