User options and settings
Clicking the User button at the top right opens the right drawer which provides access to various actions and information.
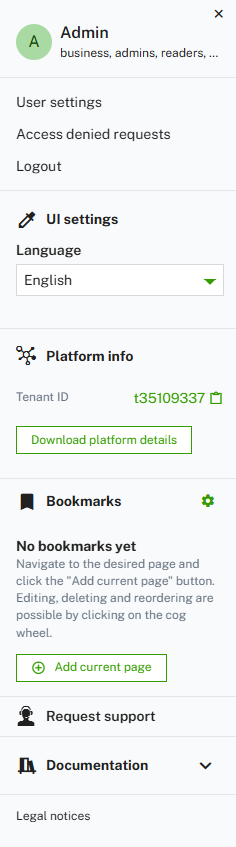
At the top you find the following items:
| Menu item | Description |
|---|---|
| User settings | Provides access to the user settings, see To change user settings for more details. |
| Access denied requests | Shows a list of data requests which could not be accessed due to missing permissions, if any. |
| Logout | Logs you out from your Cumulocity account. |
| Activate support | Allows support users to access your account. Note that this option is only available if support user access is not set globally for subtenant users in the Management tenant, for details see Support user access. After the support user access has been activated, the menu item switches to Deactivate support. If your support request has been resolved but the duration for the support user access is not expired (24 hours by default) you can actively disable an active support user request here. |
In the UI settings section change the language of the UI, see To change the language of the UI.
In the Platform info section, you find information on the infrastructure of your platform:
- The ID of your tenant, which might be required if you request support. Click the clipboard icon next to the tenant ID to copy it to the clipboard.
- Version information for both the backend and the UI.
Moreover you can click Detailed info to download more detailed platform information.
The Bookmarks section provides links to the most common pages and processes in the platform.
In the Support section, the request support item redirects you to the Cumulocity Customer Service Desk https://cumulocity.com/support while the Documentation section provides links to the most relevant guides.
To change user settings
Several account settings can be changed by the user.
- Click the User button at the right of the top bar and then click User Settings.
- In the Edit user dialog box, make the relevant changes.
- Use the Enable personalized product experience tracking toggle to opt-out of sending Personally Identifiable Information to Gainsight, which is enabled by default if you accepted functional cookies.
- Use the Enable in-product information & communication toggle to opt-out from the Knowledge Hub and all forms of engagements, which is enabled by default.
- Click Change password to change your current password, see To change your password for details.
- Click Set up two-factor authentication to set up two-factor authentication and increase tenant security.
- Click Save to apply your settings.
To change your password
- Click the User button at the right of the top bar and then click User settings.
- In the Edit user dialog box, click Change Password.
- Enter a password and confirm it.
- Click Save to apply your settings.
Make sure to select a strong password. To support you in doing so, a password strength indicator is displayed along with a password change.
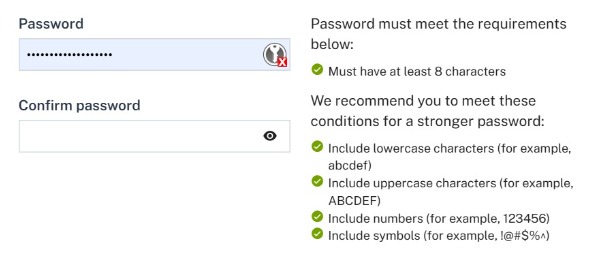
By default, the password must meet the following conditions:
- Consist of at least eight characters (this parameter can be configured by the Management tenant. Contact your Operations team on how to configure this setting according to your needs.
- Include each of the following character types:
- uppercase letters:
[A-Z], for exampleABCDEF. - lowercase letters:
[a-z], for exampleabcdef. - numbers:
[0-9], for example:123456. - any other symbol from following list
`~!@#$%^&*()_|+-=?;:'",.<>{}[]\/as a special character, for example!@#$%^.
- uppercase letters:
To change the language of the UI
The user interface language is selected along the following criteria, in the order listed below:
- The language selected in the UI settings.
- The language selected in the browser preferences.
- The operating system language.
Change the language in the UI settings section by selecting a language from the dropdown list. Reload the page to apply the new language setting.
The UI is available in the following languages:
| Language | Language code |
|---|---|
| English (default) | en |
| Brazilian Portuguese | pt_BR |
| Chinese | zh_CN |
| Chinese, traditional | zh_TW |
| Dutch | nl |
| French | fr |
| German | de |
| Japanese | ja_JP |
| Korean | ko |
| Polish | pl |
| Spanish | es |