This document describes how to set up the hypervisor infrastructure for Cumulocity IoT Edge.
Ensure that you keep the virtualization platform updated and free from vulnerabilities by following the security advisories provided by the vendors of the hypervisor.
Example setup for VMware ESXi
Setting up ESXi
To set up an ESXi virtual machine, follow these steps:
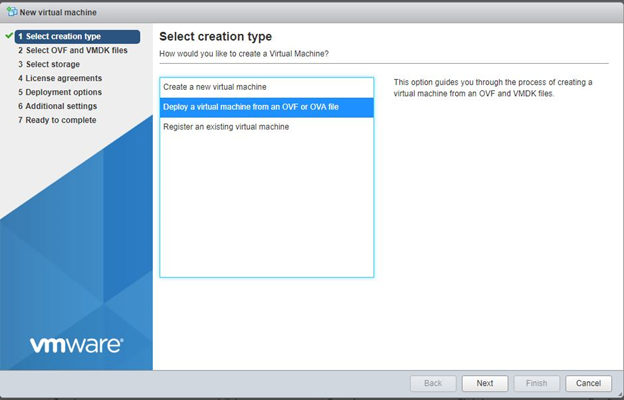
Click Create/Register VM to open a window to select the creation type.
Under Select creation type, select Deploy a virtual machine from OVA or OVF template and click Next.
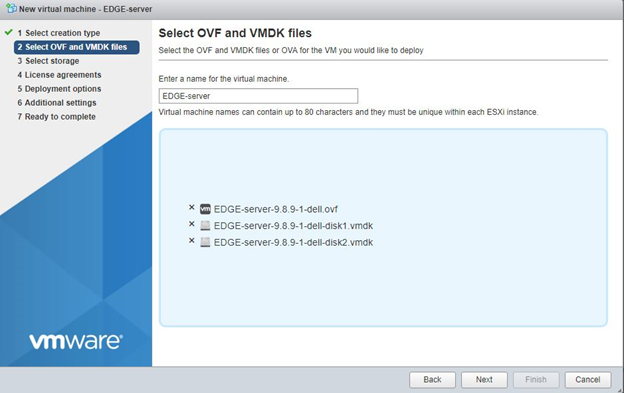
In the next window, provide a name for the VM, for example, EDGE-server, and drag and drop the required files (ovf, vmdk1, vmdk2) and click Next.
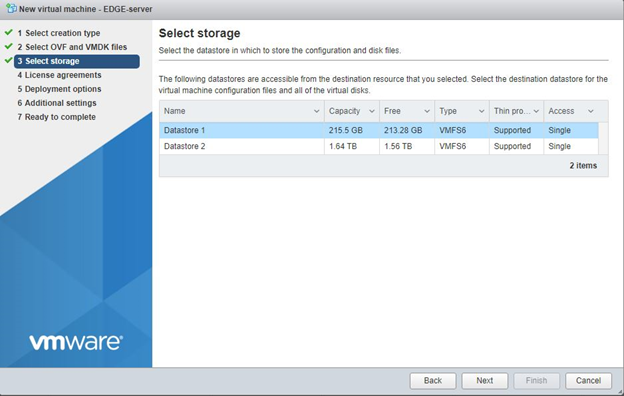
Under Select storage, select the datastore where the VM will reside and click Next.
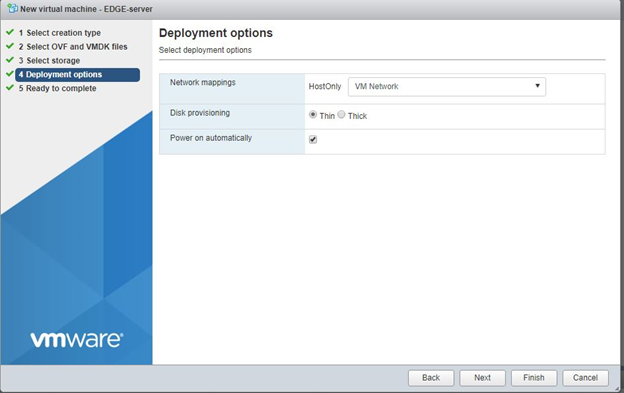
Under Deployment options, select options like thin/thick provisioning and click Next.
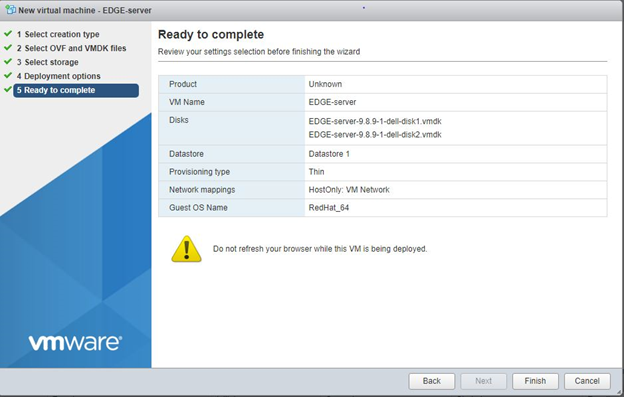
Review the machine settings and click Finish to complete the setup.
A VM with the provided name, for example, “EDGE-server”, should now show up in the Virtual Machines section. Notifications will appear accordingly in the Recent tasks pane.
VM hardware configuration
Change VM compatibility to the latest ESXi version.
Make sure that only one network interface is configured. Use VMXNET3 as type.
Edit VM Settings -> VMware Tools: Check time synchronization
Edit VM Settings -> General Options: Set guest OS to CentOs 7 (64bit)
Next, perform the Edge appliance installation. See, Installing Edge.
Example setup for VMware Workstation Player
Setting up for VMware
To set up the Edge appliance in VMware Workstation Player, follow the steps below.
Info
The following steps show a reference example. Refer to the VMware documentation for the exact setup. The final configuration also depends on the end user setup.
In VMware, navigate to Player > File > Open to import the Edge appliance.
Navigate to the folder where the Edge appliance files are located, select the OVF file and click Open.
Change the Edge appliance name if required and click Import. You can also change the storage path of the Edge appliance here.
Important
On VMware Workstation, you must use UTC on your host machine. If you choose not to use UTC, you may have time sync issues. Set rtc.diffFromUTC=0 in the .vmx file to avoid the time sync issues.
Start the Edge appliance by clicking Play virtual machine.
Next, perform the Edge appliance installation. See, Installing Edge.
Setting up for vmnetcfg utility
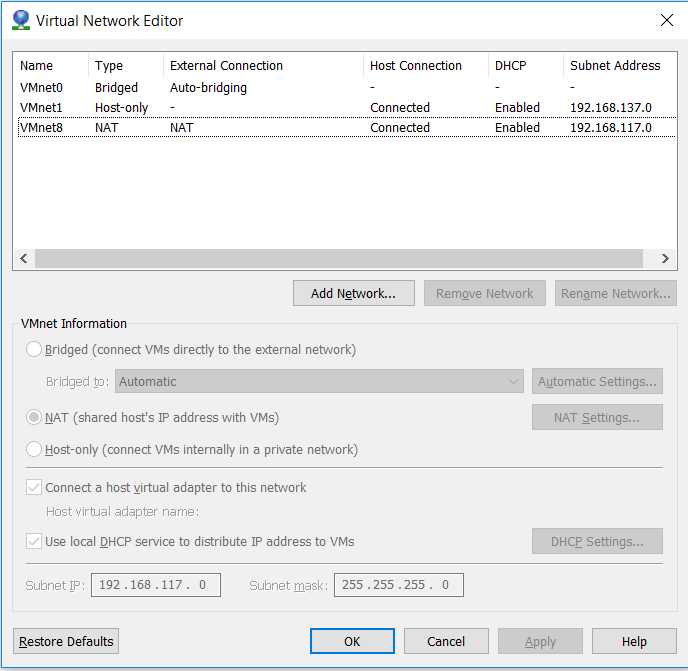
You can use the VMware vmnetcfg utility to get the necessary details like the subnet mask and gateway IP required to configure the network.
The following example illustrates the network configuration on a Windows platform. For instructions on Linux platform, see VMware Knowledge Base.
Download the correct version of the vmnetcfg utility. It can also be extracted from the VMware Workstation Pro installer.
Save the vmnetcfg binary file (vmnetcfg.exe) in the VMware Workstation Player installation directory. In a Windows environment, this is usually C:\Program Files (x86)\VMware\VMware Player.
Open the file with the appropriate rights.
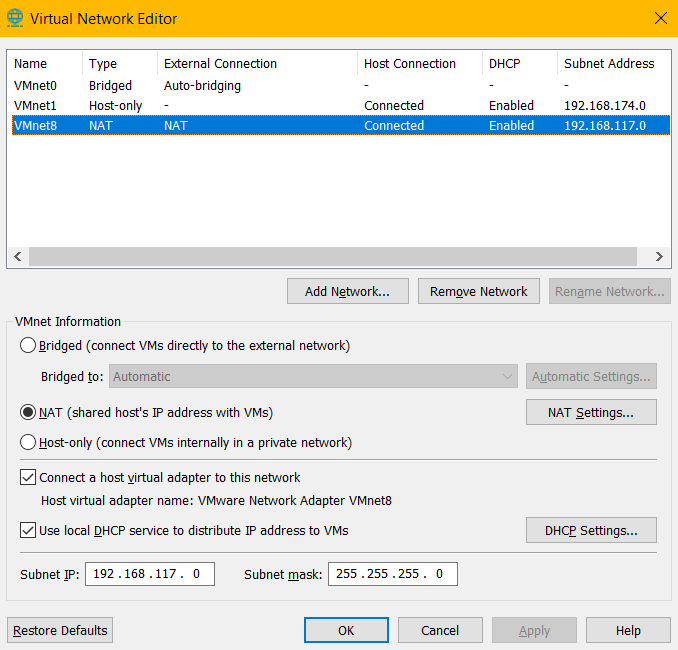
Select “NAT” as external connection.
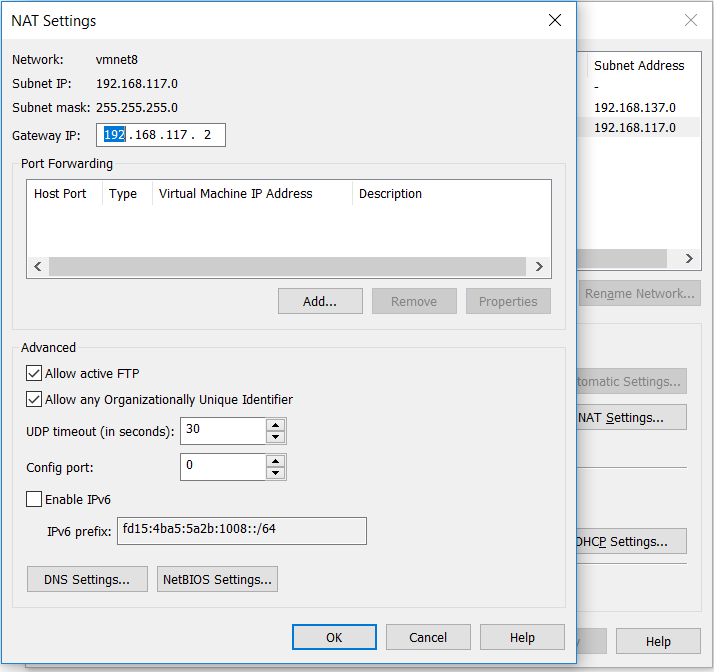
Click NAT settings to open the NAT Settings window.
Note down the gateway IP address and close the NAT settings window.
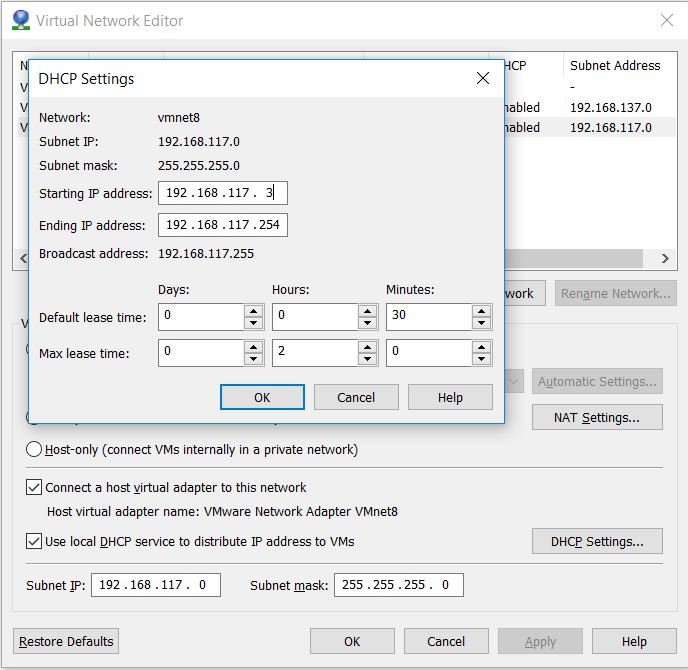
Click DHCP Settings to open the DHCP Settings window.
In the fields Starting IP address and Ending IP address, change the IP range from 3 to 254, that means, if your gateway IP is 192.168.117.2, set the IP range from 192.168.117.3 to 192.168.117.254.
Click OK to save your settings.
Port forwarding on a VMware platform
To perform port forwarding on a VMware platform, follow the steps below.
Important
The IP addresses used in the screenshots are sample IP addresses, for the purpose of example only. The IP addresses may vary in your set up.
Run the vmnetcfg.exe utility as an administrator.
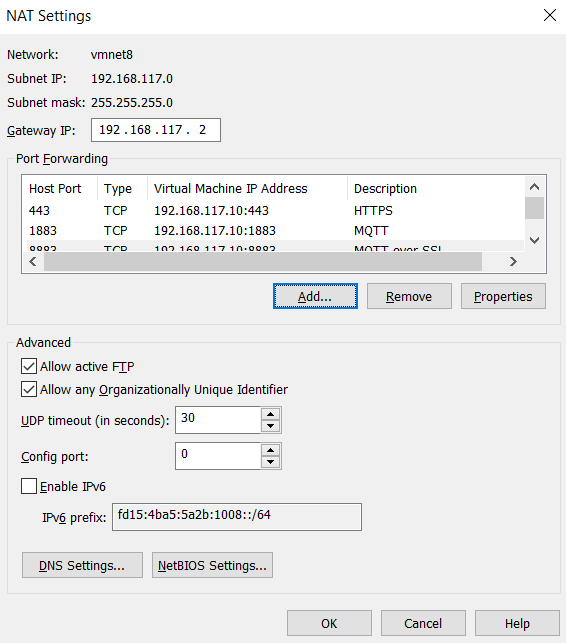
Select the NAT adapter and click NAT Settings.
Click Add to add the port forwarding rules. Enter the port forwarding rules for HTTPS, MQTT and MQTT over SSL protocols as described in the table below:
Info
Ensure that the Virtual machine IP address is the same as the IP address that you have configured for the Edge appliance.
Host Port
Type
VM IP Address
VM Port
Description
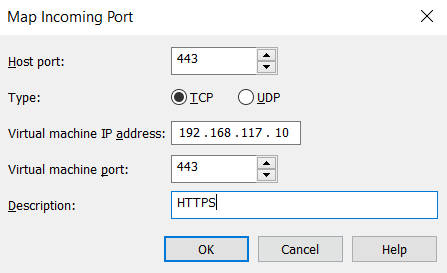
443
TCP
192.168.117.10
443
HTTPS
1883
TCP
192.168.117.10
1883
MQTT
8883
TCP
192.168.117.10
8883
MQTT over SSL
Click OK in the Map Incoming Port window after entering the port forwarding rules for each port.
Click OK in the NAT Settings window.
Click Apply > OK.
Example setup for Hyper-V
To set up Hyper-V, you must first enable Hyper-V on your system, and create Network Address Translation (NAT) adapter. For enabling Hyper-V, see the Microsoft documentation.
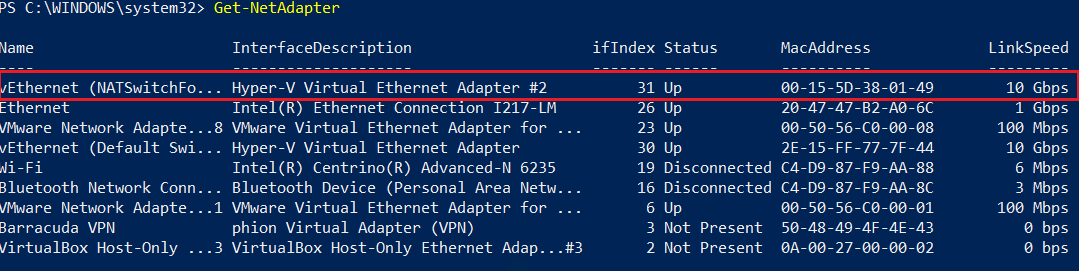
Note down the ifIndex of the adapter. The ifIndex in the above screenshot is 31. The ifIndex may vary in your system and the same ifIndex should be used in the next step.
Creating a NAT adapter using user-defined settings
You can define the adapter name and configure the IP address for your Edge appliance. In this example, the adapter name is EdgeAdapter1 and the IP address is 10.20.30.40.
Info
The following steps show a reference example. The final configuration also depends on the end user setup.
Open Windows PowerShell with administrative privileges.
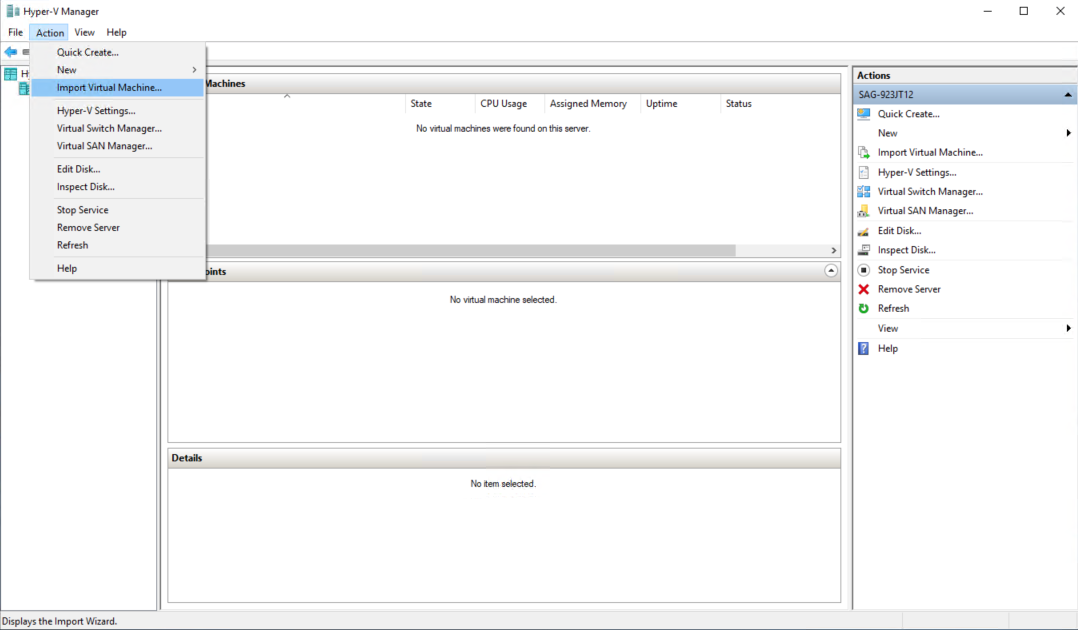
After creating a NAT adapter, you must import the Edge appliance image into Hyper-V.
In Hyper-V Manager, go to Action > Import Virtual Machine.
In the Before You Begin wizard, click Next.
Provide the location of the Edge appliance image and click Next.
Select the Edge appliance and click Next.
In the Choose Import Type wizard, select Register the virtual machine in-place (use the existing unique ID) and click Next.
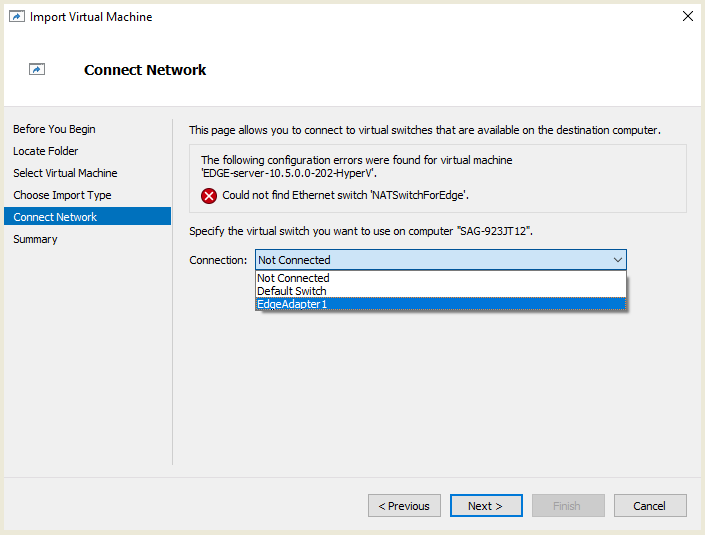
If you have used the default NAT adapter name, skip this step and proceed with step 7.
If you have used a different NAT adapter name, you will see the following screen:
Select the adapter from the Connection drop down list and click Next.
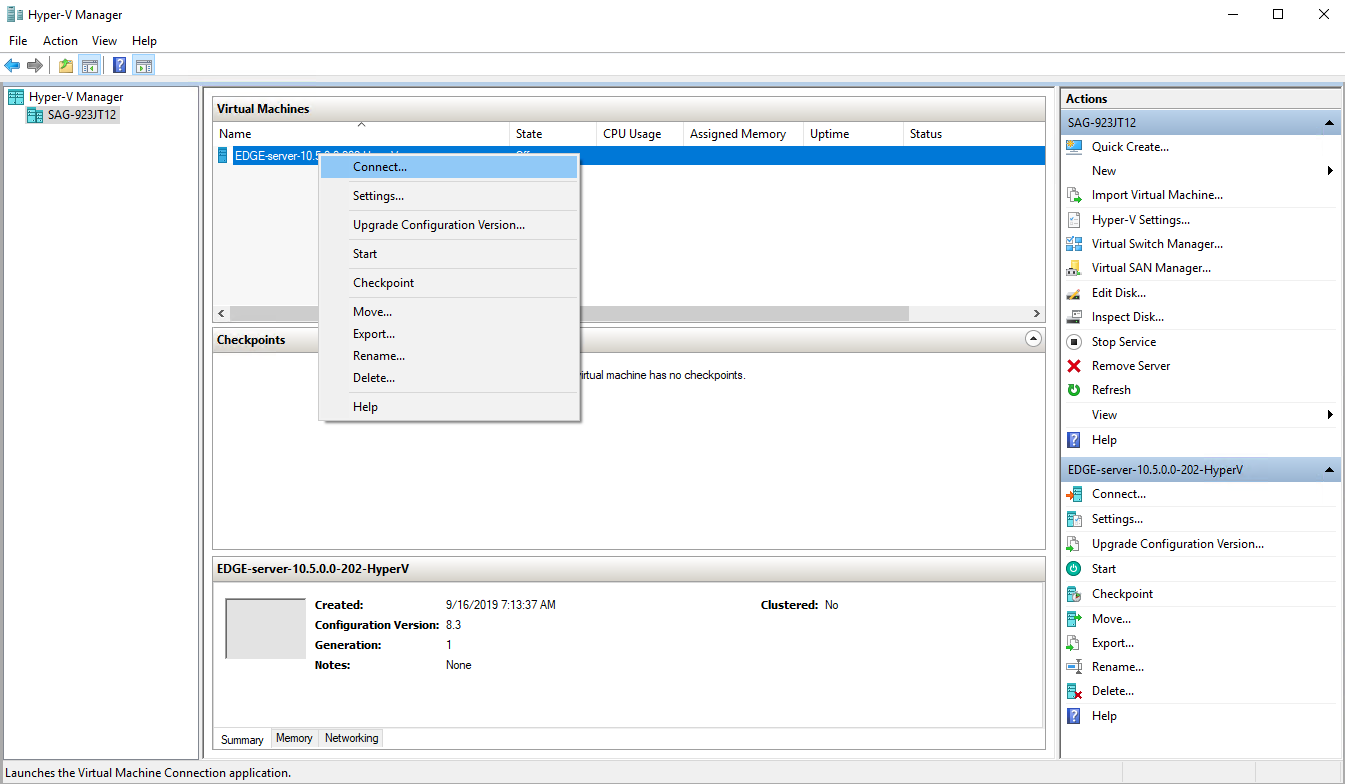
Click Finish. The Edge appliance image appears in the Hyper-V Manager.
Right-click the Edge appliance image and click Connect.
Info
By default, the NTP servers are configured to Europe NTP servers. You can configure the NTP server as per your requirements.
 Select the adapter from the Connection drop down list and click Next.