Overview
The SmartREST C++ library is a Software Development Kit (SDK) written in C++. It facilitates device integration to the Cumulocity IoT platform. SmartREST is Cumulocity IoT’s innovative communication protocol specifically designed for the IoT world. It incorporates the highly expressive strength of the REST API, whereas at the same time replaces JSON with comma-separated values (CSV) to avoid the complexity of JSON parsing for embedded devices. Additionally, the terseness of CSV renders it highly efficient for IoT communication via mobile networks. It can save up to 80% mobile traffic compared to other HTTP APIs.
The SmartREST C++ library is designed for a wide range of devices which are powered by embedded Linux. It implements iterator-style lazy CSV lexer and parser, sophisticated request aggregation and robust request sending, as well as functionality for Cumulocity IoT integration, e.g., device registration, real-time device control, SmartREST template registration. The library employs an event-driven design which supports periodical timer callbacks and message-based callbacks, which will greatly reduce the development process of integrating your IoT devices to the Cumulocity IoT platform.
The C++ library supports both HTTP and MQTT as the underlying communication protocol. HTTP is a well-established, widely-adopted application protocol. For the IoT world, HTTP is considerably bloated and traffic heavy. Oppositely, MQTT is an emerging lightweight messaging protocol based on publish and subscribe mechanism; this renders it very suited for IoT use cases. The library is designed in such a way that any agent software based on the library can transit from HTTP to MQTT with very little effort.
In the following sections, we will first provide you guidelines about how to successfully build the library for your target environment. Then we explain how to use the library by walking you through a series of example agents, ranging from a simple “Hello world” to complex agents which uses Lua plugins for sending measurements and handle operations. Subsequently, we also explain how to transit one complete example from using HTTP to use MQTT as underlying communication layer. At the end, we provide a reference of all build macros for further tailoring and tuning the build to suit your needs in case you have special target devices.
Building the C++ library
Before starting developing your C++ agents for Cumulocity IoT, you need to build the library. The prerequisites for building it are listed in the table below.
| Software | Minimal Version | Comment |
|---|---|---|
| Linux | 2.6.32 | |
| gcc (clang) | 4.7 (3.3) | both gcc and clang are supported |
| libcurl | 7.26.0 | older versions might work, but not tested |
| Lua | 5.0 | optional, for Lua plugin support only |
Compiling the library
Download a copy of the library from the Bitbucket repository and change to the directory.
$ git clone https://bitbucket.org/m2m/cumulocity-sdk-c
$ cd cumulocity-sdk-c
Initialize and update your submodule dependencies – the library depends on the paho.mqtt.embedded-c library for MQTT support.
$ git submodule init
$ git submodule update
Create an init.mk file and define the specific macros CPPFLAGS, CXXFLAGS and LDFLAGS, LDLIBS and CXX if cross-compiling.
CXX:=/usr/bin/g++
CPPFLAGS:=-I/usr/include
CXXFLAGS:=-Wall -pedantic -Wextra
LDFLAGS:=-L/usr/lib
LDLIBS:=-lcurl
This is a typical init.mk file example. In essence, it defines the search path for the required C++ header files, preferred warning levels, search path for the required C++ library files, and the necessary linking flags.
When you do host compiling, many of these settings can be omitted; these are more relevant for cross-compiling, which shall be the prevalent use case for the library. Later we will explain that the init.mk file is also very important for another purpose, i.e., build customization to tailor the library to your needs.
With the init.mk being defined, it’s time to define your makefile.
$ cp Makefile.template Makefile
The default Makefile.template can be used unchanged in most cases. In case some settings are not suitable for your use case, e.g., you may want -Os optimization level instead of the default -O2, simply edit the copied Makefile.
Now that we have done all the preparation work, it’s time to build the library for your target device.
$ make
If everything is configured correctly, this should compile the library and output the final binary into the lib/ directory, and a watchdog daemon srwatchdogd into the bin/ directory in the root directory.
The build system supports both “debug” and “release” modes. The above command calling make without any target defaults to “debug” build. The “debug” build produces a much larger binary, more verbose output, etc; which is suitable for development phase. When releasing your software, you will likely want a “release” build. You can clear all intermediate build files and re-build the library in “release” mode when you want to release your software.
$ make clean
$ make release
C++ Device integration
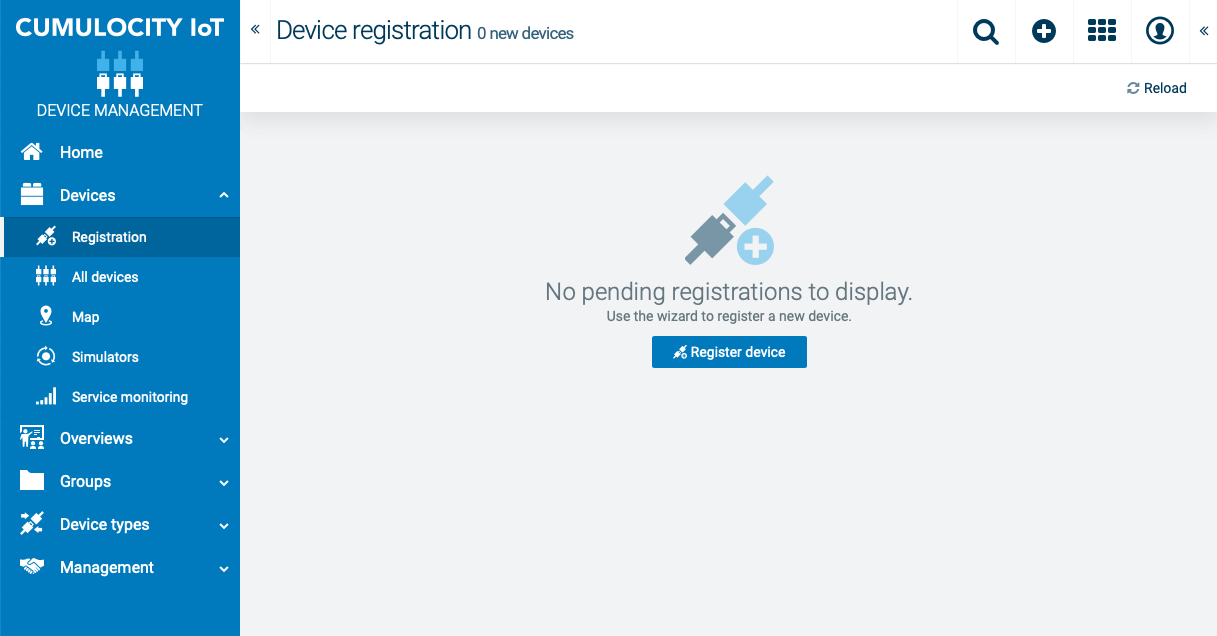
Before we really get started, we need a Cumulocity IoT account. Go to https://cumulocity.com and apply for a free trial. Click Try for free on the top-right corner. After signing-up and logging to your tenant, you can find the device registration page in the Device Management application. Later we will show how you may register a device in Cumulocity IoT using the library.
Without any further ado, let’s write the customary Hello world example. Create a main.cc file with the following code:
// ex-01-hello: examples/ex-01-hello/main.cc
#include <iostream>
#include <sragent.h>
#include <srlogger.h>

using namespace std;

int main ()
{
    const char *server = "http://developer.cumulocity.com";
    const char *credentialPath = "/tmp/helloc8y";
    const char *deviceID = "myID_1234";          // unique device identifier

    srLogSetLevel(SRLOG_DEBUG);                 // set log level to debug
    SrAgent agent(server, deviceID);            // instantiate the SmartREST agent

    if (agent.bootstrap(credentialPath))        // bootstrap to Cumulocity IoT
        return 0;

    cout << "Hello world of Cumulocity IoT!" << endl;

    return 0;
}
Info: It is strongly encouraged that you pick a different random value for
deviceIDas this is the unique identifier of your device.
For convenience, let’s define a shell variable C8Y_LIB_PATH to hold the library root path and use it to feed the compiler, so it can find all the necessary C++ header files and shared library (.so file).
$ export C8Y_LIB_PATH=/library/root/path
$ g++ -std=c++11 -I$C8Y_LIB_PATH/include main.cc -L$C8Y_LIB_PATH/lib -lsera
Info: You can define the variable
C8Y_LIB_PATHin your .bashrc file, so you don’t need to define it every time when launching a new terminal. From now on, let’s assume you have done it, so it won’t be mentioned in later examples.
Finally, it’s time to run our first program.
$ LD_LIBRARY_PATH=$C8Y_LIB_PATH/lib ./a.out
...
Hello world of Cumulocity IoT!
Type the deviceID into the text field in your registration page as shown in the image below.
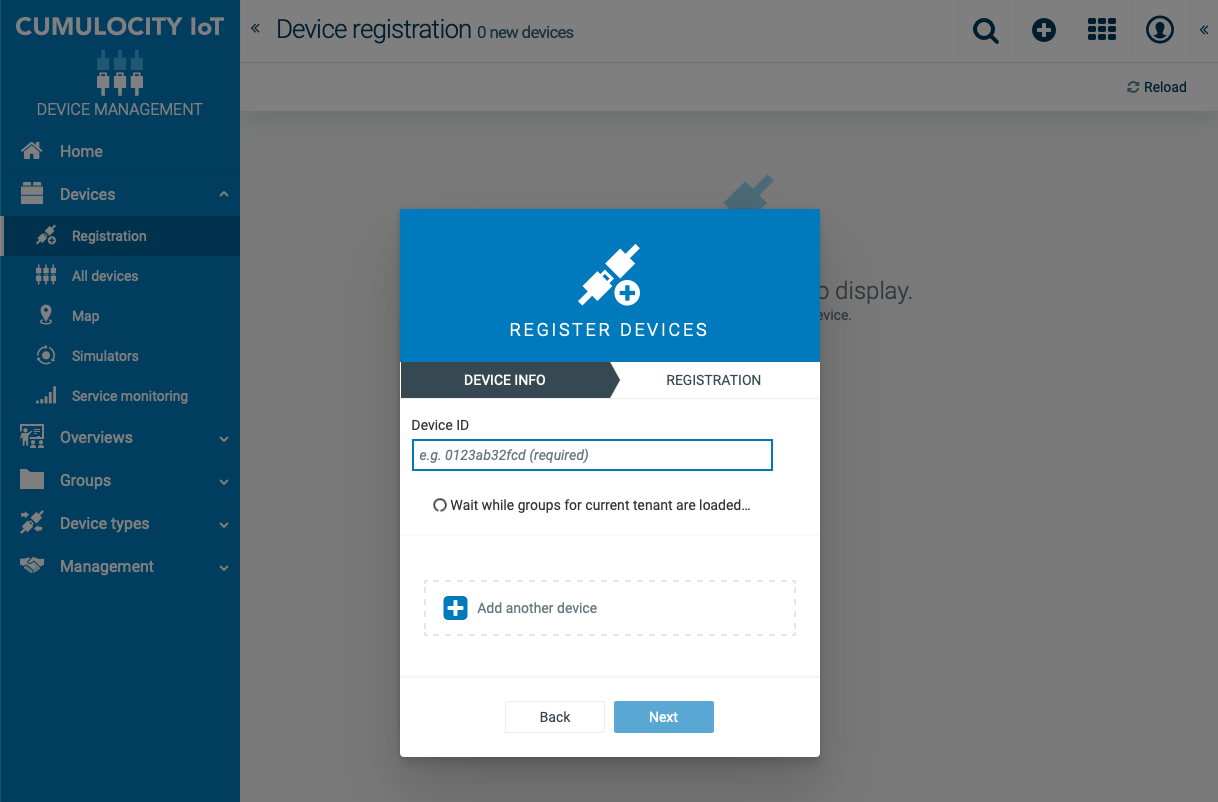
Click Next to continue with the registration. After the program has run, click Accept and your device will be registered and shown in your tenant.
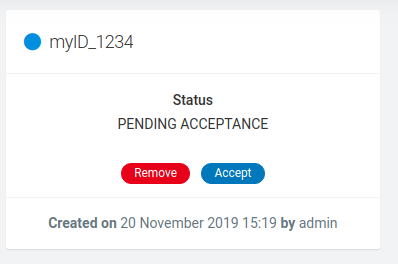
As illustrated previously, the program will print to the standard output Hello world of Cumulocity IoT! and then exit. Voila! That’s all we need to register a device to Cumulocity IoT.
The obtained device credential is stored in the folder /tmp/helloc8y as defined in the variable credentialPath. You can also find the credential in Management > Device credentials in the Device Management application.
Info: If you re-run the program a second time, it will print Hello world of Cumulocity IoT! and exit immediately. This is because the program has loaded the available credential from the given credential file. You can manually delete the credential file if you want the program to request a new credential.
Integrating to Cumulocity IoT
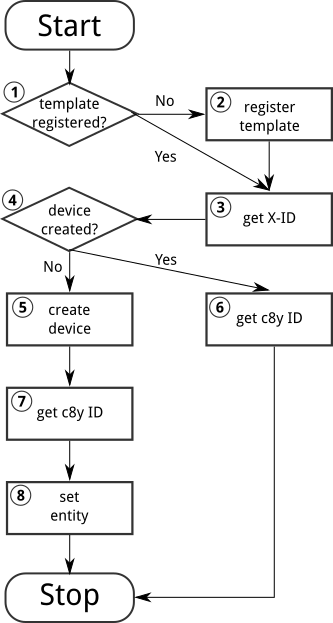
Device integration is a bit more complex as illustrated in the flow diagram below. Refer to Device SDK for REST > Device integration for a detailed explanation. Steps 1, 2 and 3 are specific to the SmartREST protocol as SmartREST requires predefined templates, see Using the REST interface > Using SmartREST in the Microservice SDK guide and the SmartREST reference in the Reference guide for more information. Step 4 checks if the device is already stored in Cumulocity IoT’s database and only creates it when it’s not found. Steps 6 and 7 get the ID of the device from the Cumulocity IoT’s database. Step 8 sets the Cumulocity IoT ID as an alias for the device ID, so that the device can find its Cumulocity IoT ID next time by querying with its device ID.
The code snippet below shows the required API interface by SrAgent when implementing your own integrate process. Basically, you need to subclass the pure virtual class SrIntegrate and implement its virtual function integrate with your particular integrate process. This is a callback function, which will be called by SrAgent when you call the integrate method of the SrAgent. By convention, the function shall return 0 for success, and a non-0 value for failure.
// ex-02-integrate: examples/ex-02-integrate/integrate.h
#ifndef INTEGRATE_H
#define INTEGRATE_H
#include <sragent.h>

class Integrate: public SrIntegrate
{
public:
    Integrate(): SrIntegrate() {}
    virtual ~Integrate() {}
    virtual int integrate(const SrAgent &agent, const string &srv,
                          const string &srt);
};
#endif /* INTEGRATE_H */
The following code snippet implements the flow diagram depicted above. You may have noticed that all requests are comma-separated values (CSV) since we are using SmartREST instead of REST APIs directly. It is important to mention that you must store the correct SmartREST X-ID and device’s Cumulocity IoT ID in the inherited member variables xid and id respectively. They will be used by SrAgent after the integrate process for initializing the corresponding internal variables.
// ex-02-integrate: examples/ex-02-integrate/integrate.cc
#include <srnethttp.h>
#include <srutils.h>
#include "integrate.h"
using namespace std;

int Integrate::integrate(const SrAgent &agent, const string &srv, const string &srt)
{
    SrNetHttp http(agent.server()+"/s", srv, agent.auth());
    if (registerSrTemplate(http, xid, srt) != 0) // Step 1,2,3
        return -1;

    http.clear();
    if (http.post("100," + agent.deviceID()) <= 0) // Step 4
        return -1;
    SmartRest sr(http.response());
    SrRecord r = sr.next();
    if (r.size() && r[0].second == "50") { // Step 4: NO
        http.clear();
        if (http.post("101") <= 0) // Step 5
            return -1;
        sr.reset(http.response());
        r = sr.next();
        if (r.size() == 3 && r[0].second == "501") {
            id = r[2].second; // Step 7
            string s = "102," + id + "," + agent.deviceID();
            if (http.post(s) <= 0) // Step 8
                return -1;
            return 0;
        }
    } else if (r.size() == 3 && r[0].second == "500") { // Step 4: YES
        id = r[2].second;                               // Step 6
        return 0;
    }
    return -1;
}
The corresponding SmartREST templates can be found in the snippet below, which extends the code presented above. The only addition inside the main function is the call to SrAgent’s member function integrate for integrating to Cumulocity IoT and loop for executing the agent loop. Above the main function is the definition of the SmartREST template version number and actual template content.
// ex-02-integrate: examples/ex-02-integrate/main.cc
#include <sragent.h>
#include <srlogger.h>
#include "integrate.h"

using namespace std;

static const char *srversion = "helloc8y_1"; // SmartREST template version
static const char *srtemplate =              // SmartREST template collection
    "10,100,GET,/identity/externalIds/c8y_Serial/%%,,"
    "application/json,%%,STRING,\n"

    "10,101,POST,/inventory/managedObjects,application/json,"
    "application/json,%%,,\"{\"\"name\"\":\"\"HelloC8Y-Agent\"\","
    "\"\"type\"\":\"\"c8y_hello\"\",\"\"c8y_IsDevice\"\":{},"
    "\"\"com_cumulocity_model_Agent\"\":{}}\"\n"

    "10,102,POST,/identity/globalIds/%%/externalIds,application/json,,%%,"
    "STRING STRING,\"{\"\"externalId\"\":\"\"%%\"\","
    "\"\"type\"\":\"\"c8y_Serial\"\"}\"\n"

    "11,500,$.managedObject,,$.id\n"
    "11,501,,$.c8y_IsDevice,$.id\n";

int main ()
{
    const char *server = "http://developer.cumulocity.com";
    const char *credentialPath = "/tmp/helloc8y";
    const char *deviceID = "13344568"; // unique device identifier

    srLogSetLevel(SRLOG_DEBUG);        // set log level to debug

    Integrate igt;
    SrAgent agent(server, deviceID, &igt); // instantiate SrAgent

    if (agent.bootstrap(credentialPath))   // bootstrap to Cumulocity IoT
        return 0;
    if (agent.integrate(srversion, srtemplate)) // integrate to Cumulocity IoT
        return 0;

    agent.loop();
    return 0;
}
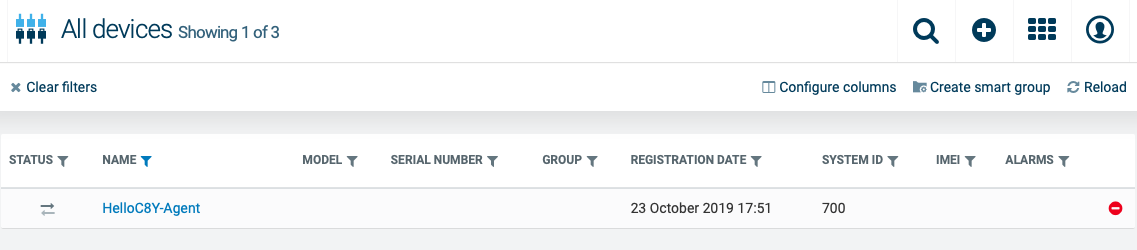
After running this example, you will see a device named HelloC8Y-Agent in the devices list under Devices > All devices in the Device Management application.
Sending measurements
Now that we have successfully integrated a demo device to Cumulocity IoT, we can indeed do something more interesting. Let’s try sending CPU measurements every 10 seconds.
As shown in Integrating to Cumulocity IoT, first we need to add a new SmartREST template for CPU measurement and also increase the template version number. Then we subclass the pure virtual class SrTimerHandler and implement the () operator. CPUMEasurement is a callback functor which generates bogus CPU measurements using the rand function from the standard library. It will be called by the SrAgent at a defined interval of the registered SrTimer.
In the main function, we instantiate a CPUMEasurement and register it to a SrTimer in the class constructor. SrTimer supports millisecond resolution, so 10 seconds are 10,000 milliseconds.
The library is built upon an asynchronous model. Hence, the SrAgent class is not responsible for any networking duty, rather it is essentially a scheduler for all timer and message handlers. SrAgent.send merely places a message into the SrAgent.egress queue and returns immediately after. For actually sending SmartREST requests to Cumulocity IoT, we need to instantiate a SrReporter object and execute it in a separate thread.
// ex-03-measurement: examples/ex-03-measurement/main.cc
#include <cstdlib>

static const char *srversion = "helloc8y_2";
static const char *srtemplate =
// ...
    "10,103,POST,/measurement/measurements,application/json,,%%,"
    "NOW UNSIGNED NUMBER,\"{\"\"time\"\":\"\"%%\"\","
    "\"\"source\"\":{\"\"id\"\":\"\"%%\"\"},"
    "\"\"type\"\":\"\"c8y_CPUMeasurement\"\","
    "\"\"c8y_CPUMeasurement\"\":{\"\"Workload\"\":"
    "{\"\"value\"\":%%,\"\"unit\"\":\"\"%\"\"}}}\"\n"
// ...

class CPUMeasurement: public SrTimerHandler {
public:
    CPUMeasurement() {}
    virtual ~CPUMeasurement() {}
    virtual void operator()(SrTimer &timer, SrAgent &agent) {
        const int cpu = rand() % 100;
        agent.send("103," + agent.ID() + "," + to_string(cpu));
    }
};

int main ()
{
    // ...
    CPUMeasurement cpu;
    SrTimer timer(10 * 1000, &cpu); // Instantiate a SrTimer
    agent.addTimer(timer);          // Add the timer to agent scheduler
    timer.start();                  // Activate the timer
    SrReporter reporter(server, agent.XID(), agent.auth(),
                        agent.egress, agent.ingress);

    if (reporter.start() != 0)      // Start the reporter thread
        return 0;
    agent.loop();

    return 0;
}
Info: If you add a
SrTimerto theSrAgent, you must ensure its existence throughout the program lifetime since there is no way to remove aSrTimerfrom theSrAgent. Alternatively, you can useSrTimer.connectto register a different callback or deactivate it bySrTimer.stop. This is a design choice for encouraging timer reuse, instead of dynamically creating and destroying timers.
Handling operations
Besides sending requests, e.g., measurements to Cumulocity IoT, the other important functionality is to handle messages; either responses from GET queries or real-time operations from Cumulocity IoT. The following example shows how to handle the c8y_Restart operation. Again, first we will need to register the necessary SmartREST templates. Then we define a message handler for handling the restart operation.
// ex-04-operation: examples/ex-04-operation/main.cc
static const char *srversion = "helloc8y_3";
static const char *srtemplate =
// ...
    "10,104,PUT,/inventory/managedObjects/%%,application/json,,%%,"
    "UNSIGNED STRING,\"{\"\"c8y_SupportedOperations\"\":[%%]}\"\n"

    "10,105,PUT,/devicecontrol/operations/%%,application/json,,%%,"
    "UNSIGNED STRING,\"{\"\"status\"\":\"\"%%\"\"}\"\n"
// ...
    "11,502,,$.c8y_Restart,$.id,$.deviceId\n";
// ...

class RestartHandler: public SrMsgHandler {
public:
    RestartHandler() {}
    virtual ~RestartHandler() {}
    virtual void operator()(SrRecord &r, SrAgent &agent) {
        agent.send("105," + r.value(2) + ",EXECUTING");
        for (int i = 0; i < r.size(); ++i)
            cout << r.value(i) << " ";
            cout << endl;
            agent.send("105," + r.value(2) + ",SUCCESSFUL");
    }
};

int main()
{
    // ...
    // Inform Cumulocity IoT about supported operations
    agent.send("104," + agent.ID() + ",\"\"\"c8y_Restart\"\"\"");
    RestartHandler restartHandler;
    agent.addMsgHandler(502, &restartHandler);
    SrDevicePush push(server, agent.XID(), agent.auth(), agent.ID(), agent.ingress);

    if (push.start() != 0)      // Start the device push thread
        return 0;
    agent.loop();

    return 0;
}
In the main function, we register the RestartHandler for SmartREST template (502), which is the template for the restart operation. We also need to instantiate a SrDevicePush object and start executing device push in another thread. From now on, as soon as you execute an operation from your Cumulocity IoT tenant, device push will receive the operation immediately and your message handler will be invoked by the SrAgent.
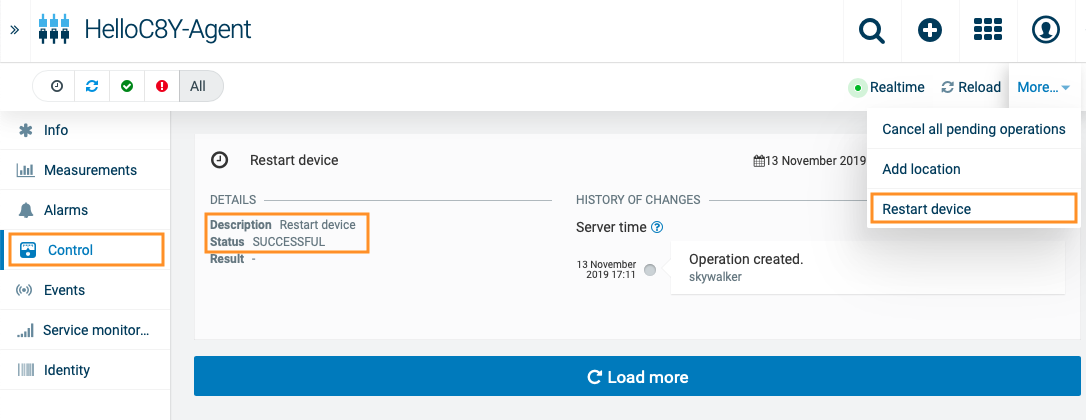
Now run the program and go to your Cumulocity IoT tenant, execute a restart operation as shown in the image below.
Afterwards, you should see the message printed in the standard output cout and the operation status set to SUCCESSFUL in your control tab.
Storing SmartREST templates in a file
Your template collection could grow large over time. Hence, you would like to store them in a text file instead of hard coding them in your source code. The benefits are two-fold: you don’t need to recompile the code every time only because the templates change, and there is no need to escape special characters which is error-prone.
An utility function readSrTemplate is provided for reading a template collection from a text file. The following example shows the usage of this function.
It reads the file srtemplate.txt from the current directory and stores the version number and template content into arguments srversion and srtemplate respectively.
// ex-05-template: examples/ex-05-template/main.cc
#include <srutils.h>
// ...

int main ()
{
    // ...
    string srversion, srtemplate;
    if (readSrTemplate("srtemplate.txt", srverision, srtemplate) != 0)
        return 0;
    // ...
}
The file format required by readSrTemplate is as simple as follows:
- The first line contains only the template ID.
- Every template must be in a separate line.
- A line starting with
#as first character (with no leading spaces or tabs) is considered a comment line and will be ignored. - A complete empty line (with no spaces and tabs) will be ignored.
- No trailing spaces or tabs are allowed for any line except comment lines.
See below an example of a template file.
helloc8y_3

10,100,GET,/identity/externalIds/c8y_Serial/%%,,application/json,%%,STRING,

10,101,POST,/inventory/managedObjects,application/json,application/json,%%,, "{""name"":""HelloC8Y-Agent"",""type"":""c8y_hello"", ""c8y_IsDevice"":{},""com_cumulocity_model_Agent"":{}}"

10,102,POST,/identity/globalIds/%%/externalIds,application/json,,%%,STRING STRING,"{""externalId"":""%%"",""type"":""c8y_Serial""}"

10,103,POST,/measurement/measurements,application/json,,%%,NOW UNSIGNED NUMBER,"{""time"":""%%"",""source"":{""id"":""%%""}, ""type"":""c8y_CPUMeasurement"", ""c8y_CPUMeasurement"":{""Workload"":{""value"":%%,""unit"":""%""}}}"

10,104,PUT,/inventory/managedObjects/%%,application/json,,%%,UNSIGNED STRING, "{""c8y_SupportedOperations"":[%%]}"

10,105,PUT,/devicecontrol/operations/%%,application/json,,%%,UNSIGNED STRING, "{""status"":""%%""}"

11,500,$.managedObject,,$.id

11,501,,$.c8y_IsDevice,$.id

11,502,,$.c8y_Restart,$.id,$.deviceId
Lua plugin
Instead of using C++ for development, the library also supports rapid development in Lua. For this, you must build the library explicitly enabling Lua support as it is disabled by default. Refer to Customizing the build for more details.
The following example shows how to load the Lua plugin and add the path lua/ into Lua’s package.path for library search path.
// ex-06-lua: examples/ex-06-lua/main.cc
#include <srluapluginmanager.h>
// ...

int main()
{
    // ...
    SrLuaPluginManager lua(agent);
    lua.addLibPath("lua/?.lua");  // add given path to Lua package.path
    lua.load("lua/myplugin.lua"); // load Lua plugin
    // ...

    return 0;
}
It is feasible to send CPU measurements and handle operations in Lua instead of C++. All Lua plugins are managed by SrLuaPluginManager, and it is exposed to all Lua plugins as an opaque object named c8y. The only requirement for a Lua plugin is to have an init function, which will be called by SrLuaPluginManager at load time to initialize the Lua plugin.
The following example shows how to send CPU measurements, define your own Lua library and share its variable myString in your Lua plugins.
-- ex-06-lua: examples/ex-06-lua/lua/mylib.lua
myString = "Hello, Cumulocity IoT!"

----------------------------------------

-- ex-06-lua: examples/ex-06-lua/lua/myplugin.lua
require('mylib')
local timer

function restart(r)
   c8y:send('105,' .. r:value(2) .. ',EXECUTING')
   for i = 0, r.size - 1 do     -- index in C++ starts from 0.
      srDebug(r:value(i))
   end
   c8y:send('105,' .. r:value(2) .. ',SUCCESSFUL')
end

function cpuMeasurement()
   local cpu = math.random(100)
   c8y:send('103,' .. c8y.ID .. ',' .. cpu)
end

function init()
   srDebug(myString)            -- myString from mylib
   timer = c8y:addTimer(10 * 1000, 'cpuMeasurement')
   c8y:addMsgHandler(502, 'restart')
   return 0                     -- signify successful initialization
end
Info: If you encounter an error saying “Package lua was not found in the pkg-config search path.” when building this example, then you need to modify the expression
$(shell pkg-config --cflags lua)to add a proper version number to Lua. The proper version number depends on your installed Lua version and your Linux distribution.
Using MQTT instead of HTTP
MQTT is a publish and subscribe based light-weight messaging protocol, and it renders very suitable for IoT communication. It solves two major issues inherit to HTTP: 1) HTTP header predominantly overweights SmartREST payload since SmartREST messages are generally very short. 2) MQTT has built-in support for real-time notification via subscribe and publish mechanism, hence, there is no need for a separate connection for device push.
All the previous examples are using HTTP as the transportation layer. Besides HTTP, SrReporter also supports MQTT as the transportation layer. The following example shows the modification needed for using MQTT instead of HTTP.
// ex-07-mqtt-legacy: examples/ex-07-mqtt-legacy/main.cc

int main()
{
    // ...
    SrReporter reporter(string(server) + ":1883", deviceID, agent.XID(),
                        agent.tenant() + '/' + agent.username(),
                        agent.password(), agent.egress, agent.ingress);

    // set MQTT keep-alive interval to 180 seconds.
    reporter.mqttSetOpt(SR_MQTTOPT_KEEPALIVE, 180);
    if (reporter.start() != 0)      // Start the reporter thread
        return 0;

    agent.loop();
    return 0;
}
As you can see, the modification needed is to construct SrReporter with a different constructor, so SrReporter now uses MQTT as underlying communication protocol, and removes SrDevicePush in the code since MQTT has built-in support for real-time notification. Optionally, you can set the keep-alive interval for MQTT to prevent the underlying TCP connection from being interrupted.
Final remarks
- All examples can be found in the cumulocity-sdk-c/examples folder in the Bitbucket repository.
- The API reference is located in relative path doc/html/index.html in the library repository.
- The agent loop is an infinite loop, so it will never really return.
- Consult the SmartREST reference about how to define SmartREST templates.
- The code excerpts only include the added part. Check the examples folder for the complete example code.
- This is especially important when you dynamically allocate a timer on the heap: you must not destroy it while the program is running.
- Check the Lua API reference in doc/lua.html for a complete list of all available APIs.
Customizing the build
In Building the C++ library we briefly explained how to build the library. In this section we will go into depth about how to customize the build options to tailor an optimal build for your particular use case.
All the following customization options shall be added in your init.mk file.
| Option | Description |
|---|---|
| SR_PLUGIN_LUA | Switch for Lua plugin support. Defaults to 0, which disables Lua support. Setting it to 1 will enable Lua plugin support. Also remember to provide the necessary Lua’s C library, and add to your CPPFLAGS, CXXFLAGS, LDFLAGS and LDLIBS the required compile and link flags, etc. |
| SR_PROTO_HTTP_VERSION | HTTP version, defaults to 1.1. Set it to 1.0 for environments when HTTP/1.1 is not supported. |
| SR_SOCK_RXBUF_SIZE | Maximum receive buffer size for SrNetSocket, defaults to 1024 bytes. This number dictates the maximum number of bytes the recv method of SrNetSocket can block waiting for response. This parameter only affects the receive buffer of SrNetSocket. |
| SR_AGENT_VAL | Polling interval for SrAgent, defaults to 5 milliseconds. Internally SrAgent schedules all SrTimerHandler and SrMsgHandler by constantly polling for expired SrTimer and arrived messages from ingress SrQueue. This parameter dictates the interval between two consecutive pollings. When this parameter is set too high, the agent may appear to be sluggish, whereas when it is set too low, many CPU cycles are wasted. This is a trade-off parameter that needs to be fine-tuned for any particular device. |
| SR_REPORTER_NUM | Maximum number of aggregated requests, defaults to 512. For saving traffic use, SrReporter has a mechanism to aggregate many messages into one request and send them all at once. This number dictates the maximum number of messages that can be aggregated. |
| SR_REPORTER_VAL | Maximum waiting time between two consecutive requests for aggregation, defaults to 400 milliseconds. When aggregating requests, SrReporter will wait for consecutive messages with a defined timeout. If the next messages come after the timeout, SrReporter will stop the waiting loop and starts sending the already aggregated messages. When set to a higher number, higher aggregation can be expected, therefore, results in lower traffic use, whereas when set to a lower number, the agent will be more responsive since it will not wait for aggregating the next message. This is a trade-off parameter that needs to be fine-tuned for any particular use case. |
| SR_REPORTER_RETRIES | Maximum number of retries when sending fails, defaults to 9 times. For counteracting temporary network failures, SrReporter implemented an exponential wait and multi-trials measure. When the first trial fails, it waits 1 second and retries again; when the second trial fails, it waits 2 seconds; when the third trial fails, it waits 4 seconds, and so on, until the defined number of retries are exhausted. Note when SrReporter enters the retry loop, messages sent via SrAgent will be queued up in the egress SrQueue, until the SrReporter successfully sends the aggregated requests so far or exhausts all retries. |
| SR_CURL_SIGNAL | Whether allows libcurl from installing any signal handlers, defaults to 1, which allows libcurl to install signal handlers. Certain versions of libcurl contains a bug that when built with a synchronous DNS resolver, randomly crashes when the DNS lookup timed out. When you experience this issue, you can workaround this bug by disabling libcurl from installing signal handlers. As a side effect, libcurl will not be able to terminate DNS lookup.The recommended approach is to re-built libcurl with an asynchronous DNS resolver. |
| SR_SSL_VERIFYCERT | Whether to verify server’s certificate when using HTTPS, defaults to 1. Many embedded devices have no CA certificates installed and thus not be able to verify server’s certificate when communicating via HTTPS. As a workaround, you can disable certificate verification by setting this macro to 0. |
| SR_FILEBUF_PAGE_SCALE | Set scale of page size for file backed buffering, default is 3. When filebuf feature is enabled for SrReporter, messages are managed at a minimum unit of one page, instead of single message, for easy and efficient buffer managing. Therefore, larger page size will buffer more messages, but messages are also discarded in bigger chunks. In contrary, smaller page size buffers less messages, but messages are also discarded in smaller chunks. |
The following table has the page scale and its corresponding page size for filebuf.
| Page Scale | Page Size |
|---|---|
| 0 | 512 B |
| 1 | 1 KB |
| 2 | 2 KB |
| 3 | 4 KB |
| 4 | 8 KB |
| 5 | 16 KB |
| 6 | 32 KB |
| 7 | 64 KB |
Agent software reference
The following list presents the existing agent software implemented on the C++ SDK.
-
NetComm agent
Smartrest agent is an agent software implemented for NetComm NTC-6200 and NTC-140w routers, which is used in many production projects. -
Linux agent
Linux agent is a reference agent implementation, which can be used on any devices that are powered by a generic Linux distribution, e.g., Ubuntu, Fedora, etc.