Overview
The INSYS icom Smart Devices with icom OS support automatic data transmission from monitored PLCs or other devices to the Cumulocity Cloud. This is realised by the icom Data Suite, a Device App for icom OS based devices. The Device App allows an easy and efficient monitoring of PLCs and Modbus TCP/RTU devices or the I/Os of an INSYS Smart Device. Measurement values, conditions, events and alarms can be transmitted to the Cumulocity Cloud. All available data can be set-up directly in the icom Data Suite and are automatically provided to the cloud account for (automatically self-scaling) charts and lists. Several PLCs can be monitored in parallel with one INSYS Smart Device. The transmission of data to several cloud accounts is also possible. If the cloud service or transmission path is (temporarily) not available, data can be buffered on the INSYS Smart Device or transmitted via redundant transmission paths in the meantime. Cloud Control enables the modification of values (e.g. for using them as set points) of data handled from the icom Data Suite by means of the Cumulocity Cloud. Please contact INSYS icom to use the Cloud Control plugin.
The following icom OS Smart Devices support Cumulocity with installed icom Data Suite:
- MRX series: compact all-in-one routers
- MRO series: fully modular industrial router platform
Cumulocity support for INSYS Smart Devices with INSYS OS is described here.
How to Setup an icom OS-based INSYS Smart Device for Cumulocity
The following example for a simple monitoring application (monitoring input 1 of the Smart Device and displaying the status in Cumulocity) is broken up in two steps:
It is necessary to make the following settings in both web interfaces, of Cumulocity and the icom Data Suite of the Smart Device.
Prerequisites
- You have a functional icom Data Suite with one of above INSYS Smart Devices.
- The icom Data Suite is installed on the INSYS Smart Device and the required Cumulocity Device Connector package is licensed.
- The INSYS Smart Device has Internet connection.
Device Registration
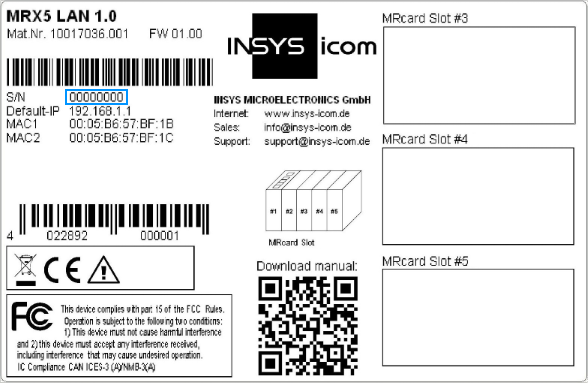
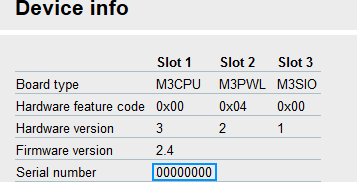
You need to register the INSYS Smart Device in your Cumulocity Cloud account first. The self-registration functionality of Cumulocity uses the serial number of the INSYS Smart Device as unique identifier. The serial number is indicated on the device label and can also be displayed in the System menu on the System data page in the web interface of the INSYS Smart Device.
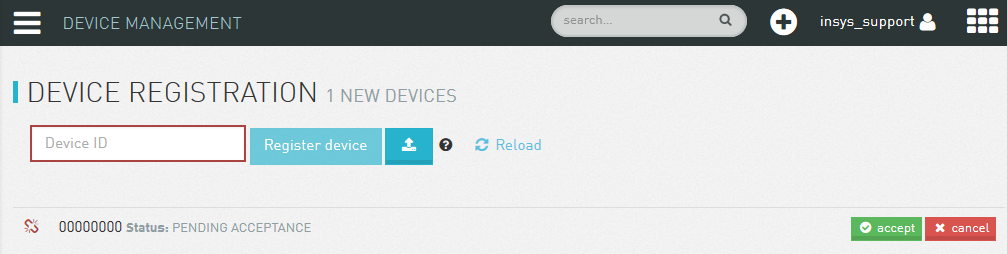
Registering the device in Cumulocity
Enter the serial number of the INSYS Smart Device in the Device Management menu on the Registration page of Cumulocity and click on Register Device.
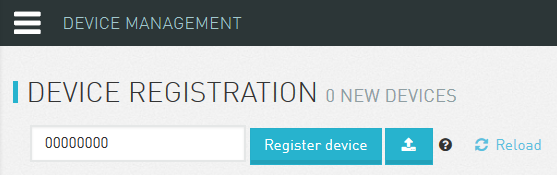
The device is registered in Cumulocity with this. Cumulocity is waiting for the first connection of this device.
Now you need to go to the web interface of the icom Data Suite to proceed.
Adding the Cumulocity server
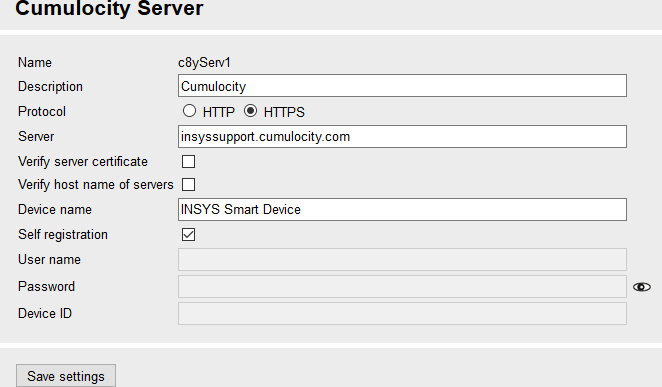
It is necessary to add the Cumulocity Cloud as a server for receiving messages in the icom Data Suite. To do so, proceed as follows:
- In the Messages menu, open the Cumulocity page and click on the plus symbol behind Add server
- Click on Edit (pen symbol) to configure the server
- Enter the Server-URL of your Cumulocity account
- Enter a Description for the server
- Select the Protocol HTTPS
- Enter the Server URL
- Check the Self registration checkbox
- Enter a descriptive Device name for the monitored device
- Click on Save settings
Activating the profile
After adding the server, it is necessary to activate the profile that the configuration changes become effective. To do so, click on Activate profile in the title bar to activate the opened profile.

The icom Data Suite will now establish the connection to Cumulocity. You’ll then need to accept the registration as outline in the following section.
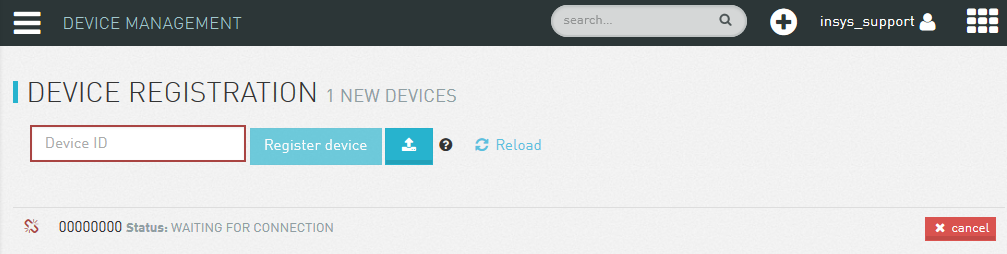
Accepting the registration
The icom Data Suite has configured the server now and will connect to Cumulocity via the INSYS Smart Device. This is indicated by the pending acceptance message. You only need to accept the registration in the Devices menu on the Registration page of Cumulocity now and the device is available in Cumulocity.
Application Configuration
The following simple exemplary application monitors input 1 of an INSYS MRX or MRO router and transmits the condition of input 1 to Cumulocity every time it changes. The following configuration steps in the web interface of the icom Data Suite are necessary for this (adding the Cumulocity server has already been done in the previous steps):
- Adding Input 2.1 as a data point
- Adding the Cumulocity message
- Adding the event
- Activating the profile
- Checking the result
Adding Input 2.1 as a data point
It is necessary to add Input 2.1 as a data point in the icom Data Suite. To do so, proceed as follows:
- Click on ? (Display help text) to aid setup with inline help text
- In the Datapoints menu, open the Digital I/Os page and click on the plus symbol in the Inputs section
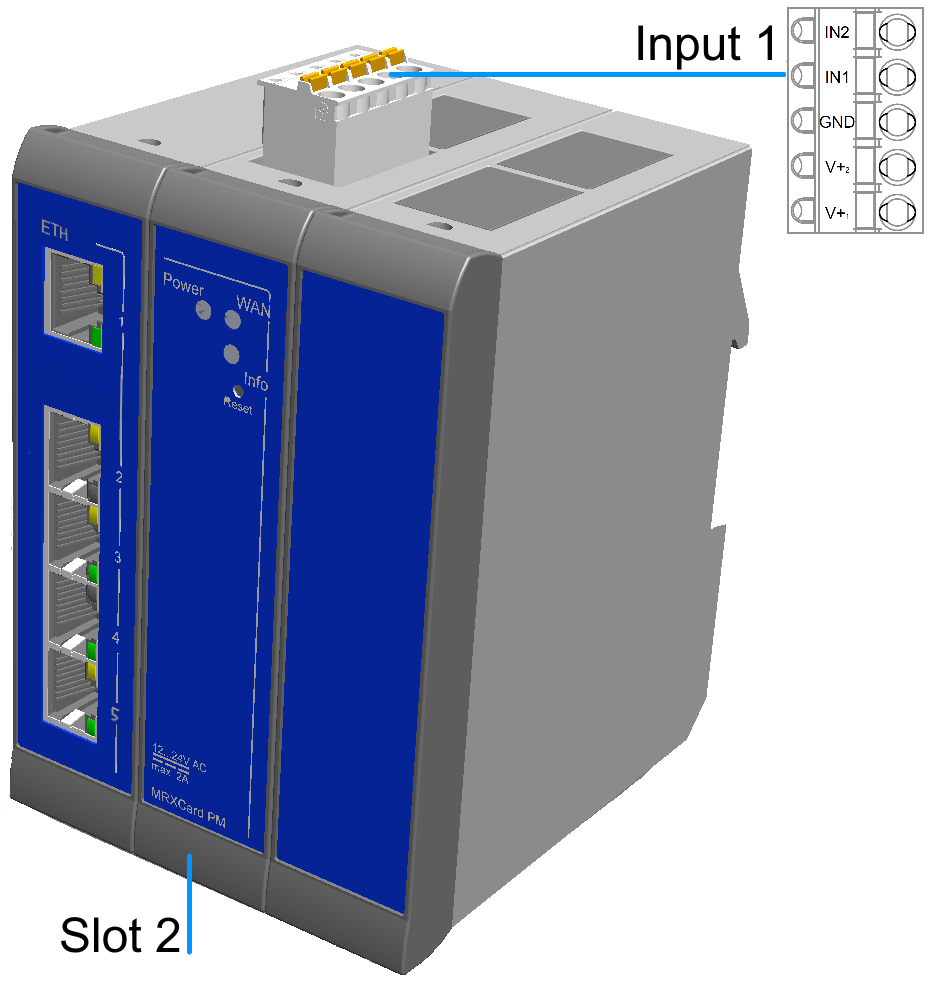
- Enter a Description for the data point and select the Input 2.1 (Input 2.1 means that this is Input 1 on the card in slot 2)
- Click on Save settings
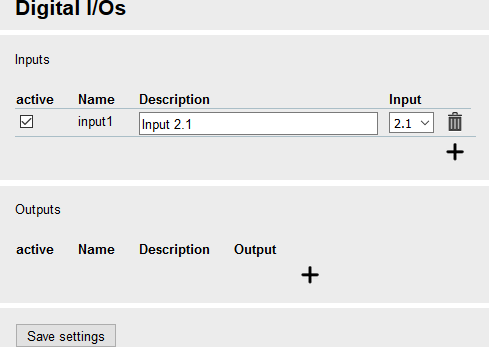
Example for Input 1 on the card in Slot 2 of an MRX LAN (similar on other devices):
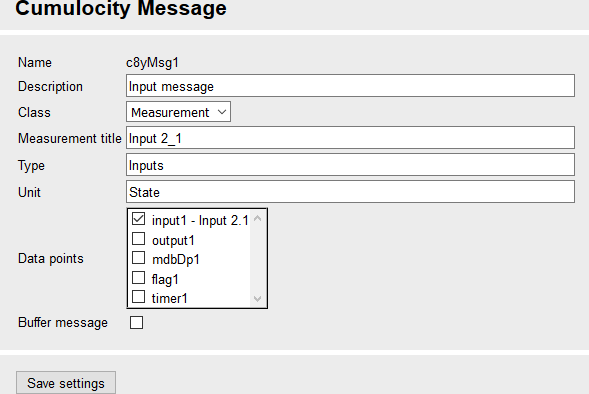
Adding the Cumulocity message
It is necessary to add a message that will be sent to the Cumulocity server when triggered. To do so, proceed as follows:
- In the Messages menu, open the Cumulocity page and click on the plus symbol in the Messages section
- Click on Edit (pen symbol) to configure the message
- Enter a Description for the message
- Select the Class Measurement
- Enter a descriptive Measurement title
- Enter a Type that can be used by downstream applications
- Enter a Unit for the value
- Check the desired data point
- Click on Save settings
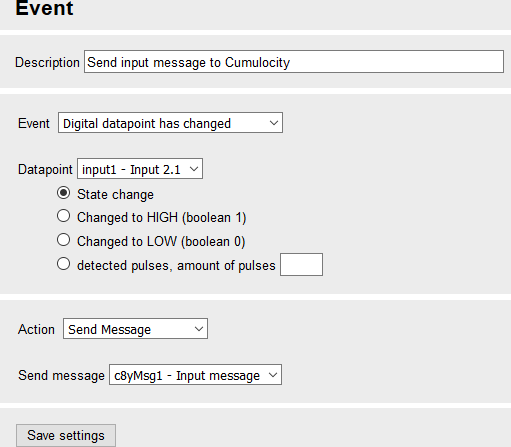
Adding the event
It is necessary to create an event that sends the message when the condition of the monitored input changes. To do so, proceed as follows:
- In the Events menu, click on the plus symbol to add an event
- Click on Edit (pen symbol) to configure the event
- Enter a Description for the event
- Select the Event Digital datapoint has changed
- Select the respective input as Datapoint
- Select the option State change
- Select the Action Send message
- Select the respective message
- Click on Save settings
Activating the profile
After completing the configuration, it is necessary to activate the profile in order for the configuration changes be applied. To do that, click on Activate profile.
The INSYS Smart Device will now establish the connection to Cumulocity and start to transmit the input state every time it changes.
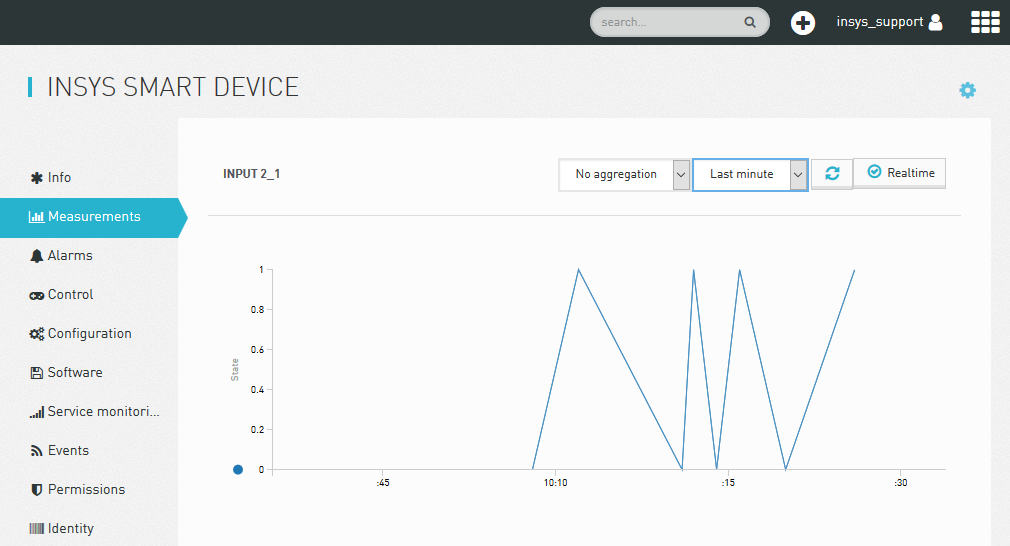
Checking the result
Connect a switch to the configured input and toggle it a few times to generate messages to Cumulocity.
Open in the Devices menu the All Devices page of Cumulocity and click on the device name to open the device page. Click on Measurements to view the chart.
Refer to the INSYS website for further information.