Overview
The Cumulocity IoT Sensor App is a free smartphone application available for iOS and Android smartphones. It is the successor of the previous Cloud Sensor App.
The app is designed to collect measurements from your smartphone, nearby Bluetooth device sensors, and vehicle On-board Debug (OBD) sensors, and send them to the Cumulocity IoT platform. It has a straightforward registration workflow to get you up and running quickly and provides an easy way to get data into Cumulocity IoT.
If you are using the Cumulocity IoT free trial available via Software AG Cloud, the app ideally helps you to quickly get familiar with the platform as it provides an easy way to connect devices and sensors. Capturing data from Bluetooth devices with Cumulocity IoT moreover saves a lot of implementation effort.
Besides sending data to the platform, the Cumulocity IoT Sensor App can also send commands to the smartphone directly from the phone dashboard. Commands currently available in the dashboard include alert messages and vibration.
Supported smartphone sensors include:
- Accelerometer and motion sensor
- Gyroscope
- Barometer
- Magnetometer and compass
- GPS location
- Microphone and voice
- WiFi strength (selected Android devices only)
The latest list of supported Bluetooth devices is provided in the app. A button to take you to this page can be found when scanning for new devices. Currently the app supports the following devices:
- Texas Instruments Sensor Tag
- Acaia Lunar Scale
- Cinco Scale
- CirrusSense Pressure Sensor
- Blebricks
More devices will be supported in the future and made available in the app.
Reading vehicle sensors comes with the use of an additional OBD dongle, which exposes the vehicles sensors to the phone via WiFi or Bluetooth (Note: iOS is WiFi only). There are two supported diagnostic connectors, both based on the ELM327 microcontroller:
- Kungfuren OBD2 Diagnostic Device Bluetooth 4.0 Adapter
- Kungfuren OBD2 Reader WiFi Adapter
Installing the Sensor App
To get started with the Cumulocity IoT Sensor App, download it from the Apple App Store, or Google Play Store as appropriate.
The app is compatible with Android devices running Android 5.0 or higher, and iOS devices running iOS 13.0 or higher.
Using these links from your smartphone takes you to the app’s install page:
- iOS: http://onelink.to/g39r8w
- Android: https://play.google.com/store/apps/details?id=com.softwareag.cumulocity.iotcloudsensor
Alternatively, you can open the Apple App Store or Google Play Store from your smartphone, search for Cumulocity IoT Sensor App and install the app.
You need a Cumulocity IoT account to send measurements to the platform. If you don’t have one yet, you can create a free trial account at Software AG Cloud. Click the Login button at the top right of the page and follow the instructions to create a new account. There are no limitations within a Cumulocity IoT free trial.
Registering the Sensor App in the platform
There are two ways of connecting your smartphone to Cumulocity IoT, depending on the platform’s version. For Cumulocity IoT versions starting with release 10.6.6, you can connect your smartphone via QR code. For earlier versions of Cumulocity IoT, follow the steps in Manual registration.
Registration using QR code
-
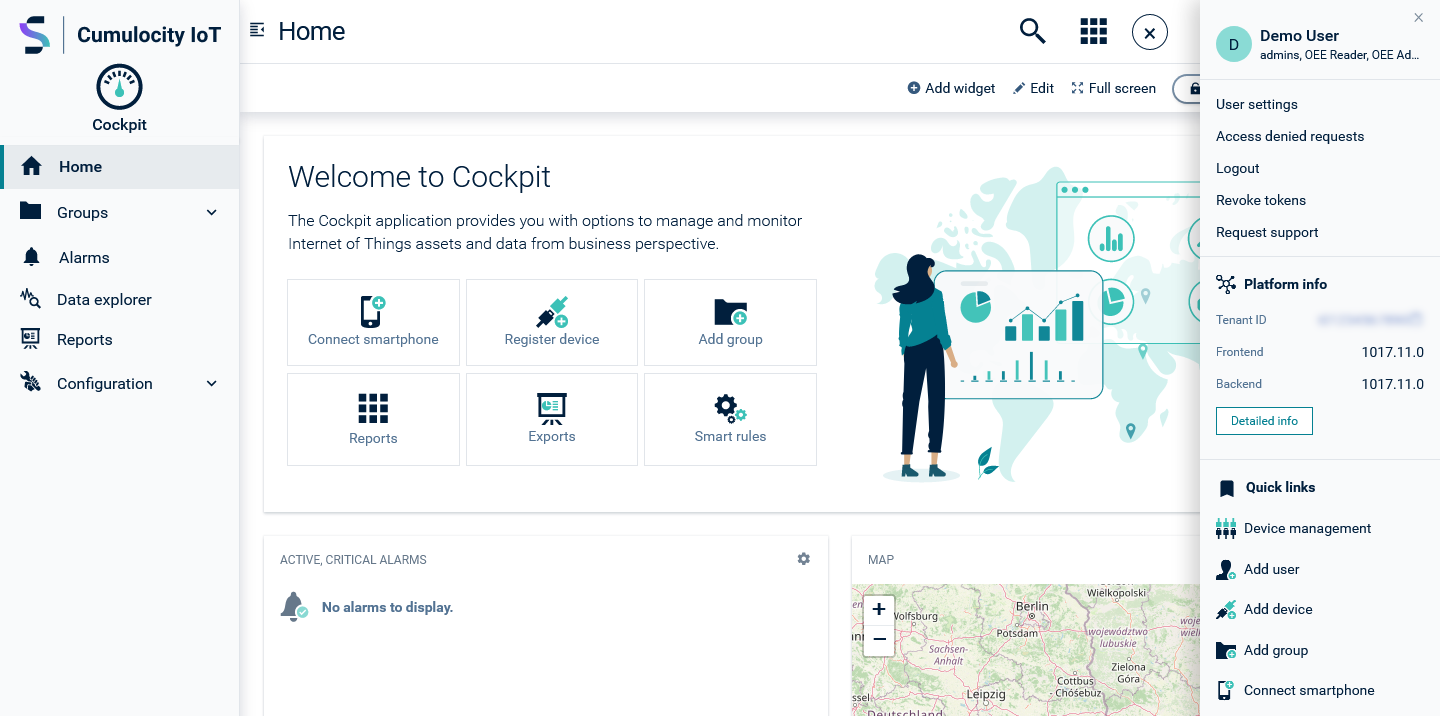
On a desktop or laptop computer, open a web browser and log in to your Cumulocity IoT tenant. From the Cockpit application, click Connect Smartphone in the right drawer or in the Welcome widget.
-
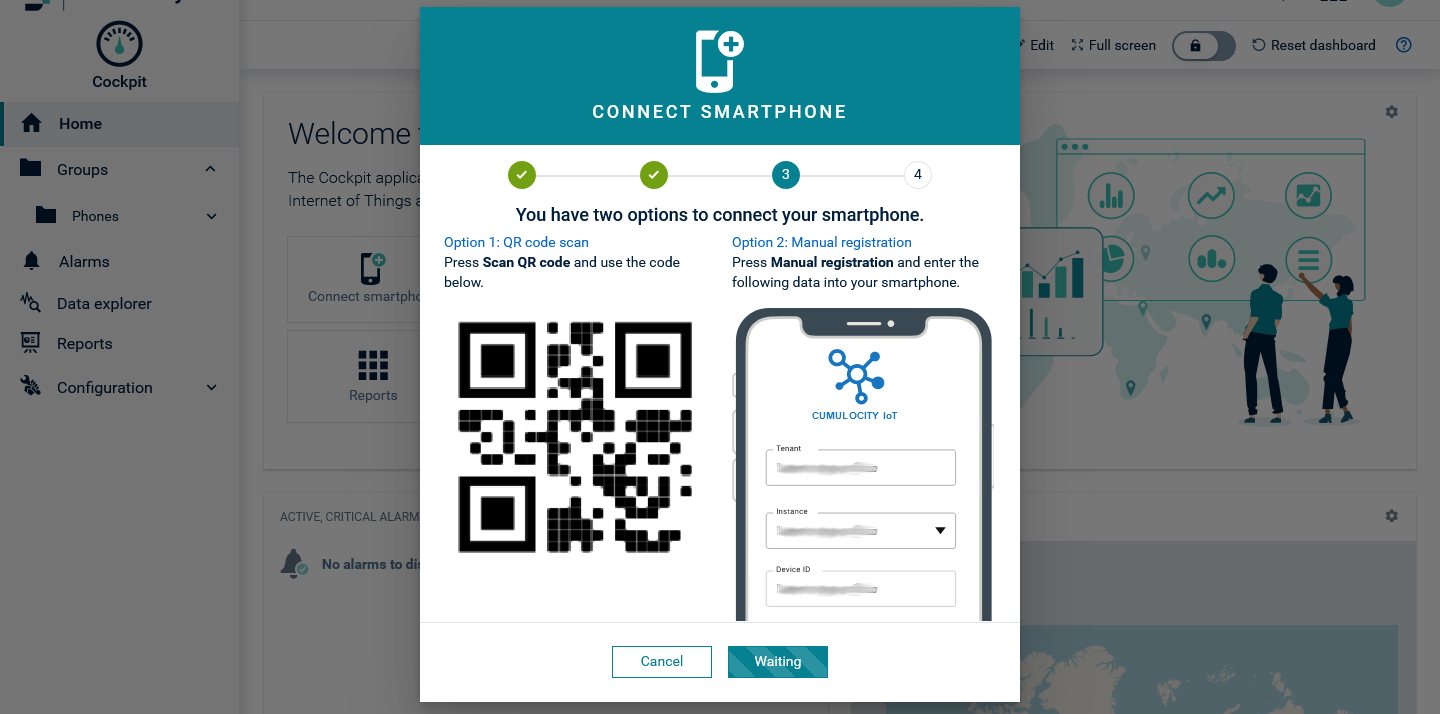
Follow the instructions in the wizard to step 3, ensuring that the app is installed on the smartphone.
-
From your smartphone, launch the app and tap Register in the top right corner of the screen.
-
Grant access to your camera if the app asks you for permission.
-
Scan the QR code shown on your PC’s web browser. If you can’t scan the QR code, tap Manual registration on your smartphone and fill in the details at the right side of the wizard screen.
-
Back on your smartphone, tap Done. Sensor measurements are sent to the server. They can be viewed in the device’s dashboard.
When using the Connect Smartphone wizard for device registration, your smartphone is automatically registered by Cumulocity IoT and assigned to the “Phones” group. Tap Done on your smartphone to return to the main screen.
Manual registration
-
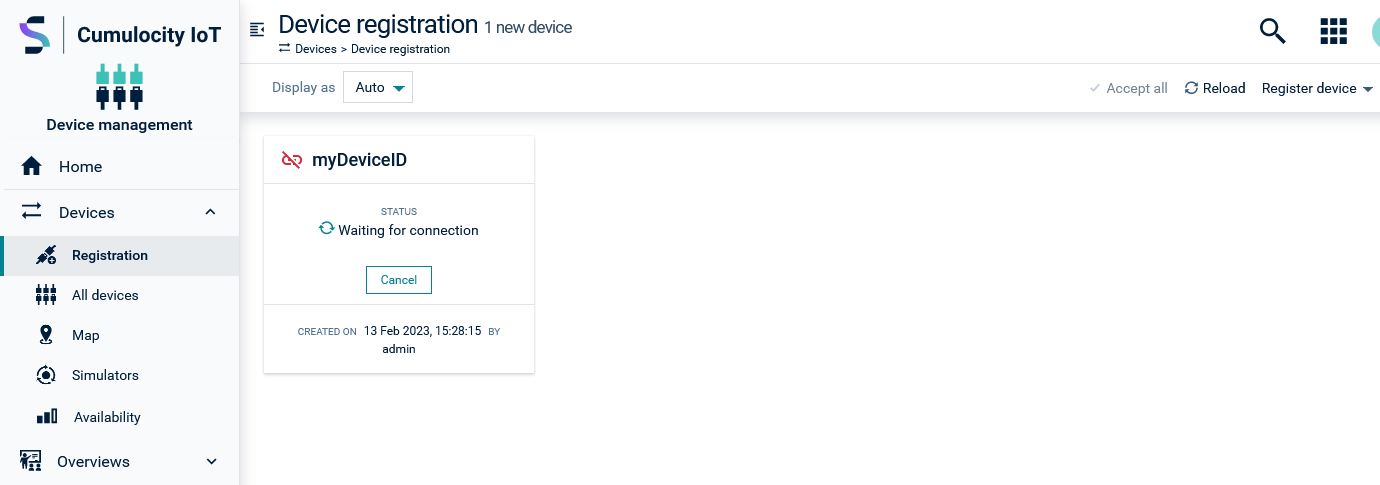
On a desktop or laptop computer, open a web browser and log in to your Cumulocity IoT tenant. In the Device Management application, select Devices > Registration from the navigator.
-
From your smartphone, launch the app and tap Register at the top right of the screen. When the camera opens, tap Register manually.
-
Back in your web browser, click Register device at the top-right of the page and select General. Choose a meaningful and unique device ID for your smartphone and a group to assign your device to. Click Next and then Complete. The server will notice the pending registration and wait for your smartphone to show up.
-
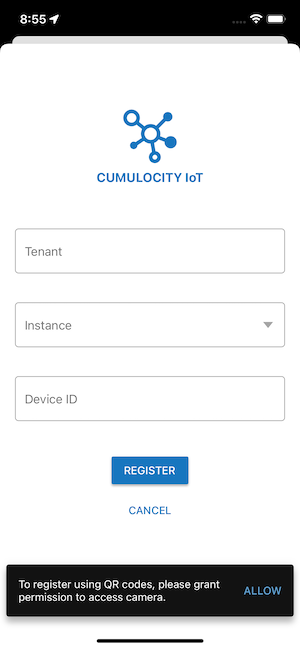
On your smartphone, fill in your tenant, for example, “companytenant01”, select your instance, for example, “cumulocity.com”, and enter your selected device ID. If your instance is not available in the list, you can enter it manually if you click Add other instance. Click Register for your device to contact the server and ask to be accepted.
-
Back on your web browser, your device’s card now shows the options to accept or reject the connection. Accept the connection. Your device will be registered with the server and assigned to the selected group.
-
Back on your smartphone, tap Done. Sensor measurements are sent to the server. They can be viewed in the device’s dashboard.
For further information about registering a device on the platform manually, refer to Device Management > Connecting devices.
If you want to deregister from Cumulocity IoT, tap Deregister in the top right corner of the screen and approve the confirmation dialog. After that you can connect to the same or any other Cumulocity IoT instance or tenant.
Sending sensor data to the platform
Measurements from your smartphone, OBD devices and connected Bluetooth sensors are sent to Cumulocity IoT automatically as soon as the device is connected or started and as long as the app is in foreground. All measurements of the smartphone sensors are displayed automatically in the device dashboard in Cumulocity IoT.
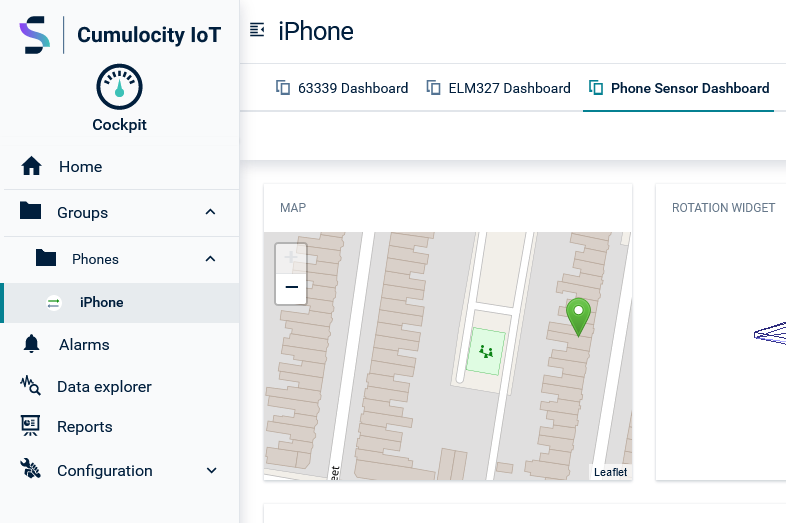
Various widgets may be used to display the data points. If your smartphone has a gyroscope sensor, a 3D rotation widget depicts the current sensor data for your smartphone’s orientation.
The app sends sensor data to Cumulocity IoT at regular intervals. By default, the interval is 2 seconds. This interval can be configured from the app itself for the accelerometer, location, and other sensors.
Tap the 3 vertical dots on a sensor’s card, then Edit or drag the page up from the bottom to reveal additional settings.
Every time a measurement is sent to Cumulocity IoT the pulse indicator in front of the device name will animate.
Using device details, it is also possible to disable sending measurements for the device. The sensor measurements is still displayed, but not sent to Cumulocity IoT. When disabled, the pulse indicator is shown as “striked through”.
Viewing sensor data
You can find an overview of all sensor data on the main page of the app. Your smartphone’s internal sensors, such as its gyroscope, barometer, location and magnetic field, are shown in cards at the top of the page. Swipe left and right to inspect them.
Some sensors are only available if the permission is granted (for example microphone) and the sensor is enabled (for example location). Tap Allow in the first sensor card to grant these permissions or enable the sensors.
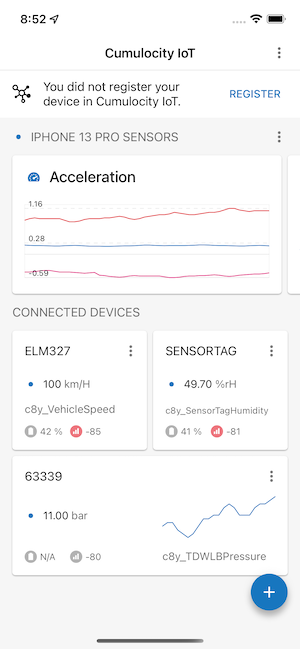
Some supported Bluetooth devices provide more than one sensor. In these cases, the card for this device also reacts to left and right swipes, changing the sensor that is displayed.
Tap a card to show some sensor details, including when the last measurement was last updated.
Most sensors provide new measurements within a second. Others, such as location, might provide updates only on a significant change. Use the update time to find out if measurements are received.
Connecting new Bluetooth devices to the Sensor App
The Cumulocity IoT Sensor App connects to a range of Bluetooth sensor devices. Additional devices will be added in the future.
To connect a device, click the plus button at the bottom right of the screen. If Bluetooth is enabled and all required permissions are granted, your smartphone starts scanning for any new supported Bluetooth devices in the area that are not already paired. If Bluetooth is not enabled, select Enable Bluetooth on the scanning screen and follow the instructions.
New devices will be added to the list as the smartphone discovers them.
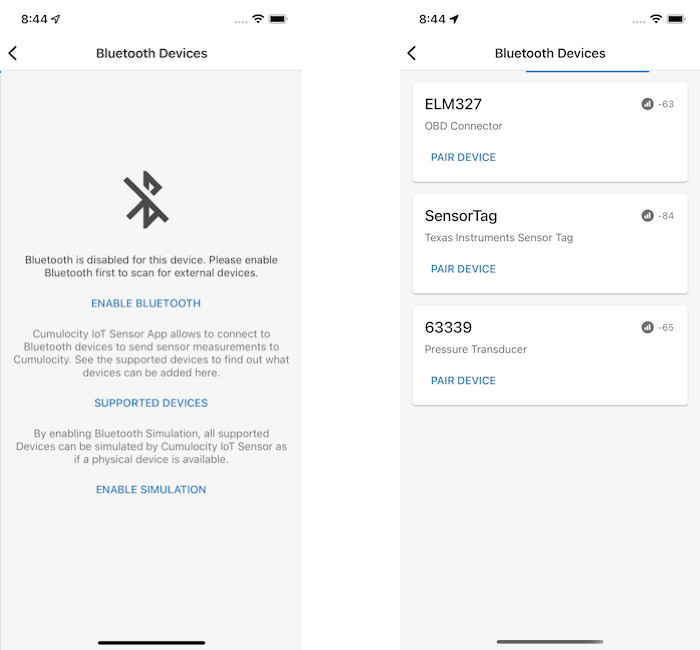
Ensure that the device you wish to connect to is switched on and in pairing mode. For most devices, this automatically happens when they are switched on and not paired with any other device. Refer to the manufacturer’s instructions if you are unsure.
Bring the device close to your smartphone, 30cm or less is ideal.
When the Bluetooth device appears in the list, tap Pair Device to start pairing. The Bluetooth device will then be connected to your smartphone and start sending data to Cumulocity IoT if you are currently connected.
To enable or disable the simulation in Cumulocity IoT Sensor App, follow the instructions at the beginning of the section to scan for connected Bluetooth devices. During the scan use the Enable simulation button to enable the simulation mode. Once enabled, Cumulocity IoT Sensor App will present devices supporting the simulation mode. Continue from here as with real physical devices.
There are two ways to disable the simulation:
- Click Disable simulation to end the simulation for all connected simulated devices.
- End the simulation via the Cumulocity IoT Sensor App settings. On Android the settings are available via the main menu. On iOS, find Cumulocity IoT Sensor App in the System Preferences app, select Connectivity and disable Simulate devices. By disabling the simulation mode, you disconnect and remove all simulated devices.
Connecting new OBD devices to the Sensor App
Connections to OBD devices work in a slightly different way than normal Bluetooth sensors. They must be connected to the phone directly before the device can be added to the Sensor App.
In case of WiFi based OBD devices, the procedure is as follows:
- Plug the OBD dongle into the vehicle’s diagnostic port. Ensure that the power LED is illuminated.
- On the phone, navigate to the WiFi settings in the Settings application.
- Search for new networks, and join the “WiFi_OBDII” network (or other name as specified in the device’s documentation), to pair directly with the dongle.
- If a password is required to do this, refer to your device’s documentation.
- Once the device is connected, return to the Sensor App, and click the plus ("+") button at the bottom right of the screen.
- The OBD device should then become available in the list of available devices and can be added as any other Bluetooth sensor.
For Bluetooth-based OBD devices, the device must be paired with the phone before the Sensor App will recognize it:
- Plug the OBD dongle into the vehicle’s diagnostic port. Ensure that the power LED is illuminated.
- On the phone, navigate to the WiFi settings in the Settings application.
- Scan for new Bluetooth devices and connect to the device named “ODBII” (or other name as specified in the device’s documentation).
- The pairing process will ask for a PIN, consult your device’s documentation to find this value.
- Once the device is connected, return to the Sensor App, and click the plus ("+") button in the bottom right of the screen.
- The OBD device should then become available in the list of available devices and can be added as any other Bluetooth sensor.
Configuring, disabling or removing devices
If you want to make changes to the settings of the smartphone or a connected Bluetooth device, simply tap the 3 dots at the top right of the card for this device. Various options will be displayed at bottom of the screen. For Bluetooth devices, the options Disconnect, Disable and Edit are available. The smartphone itself only has the Disable and Edit options.
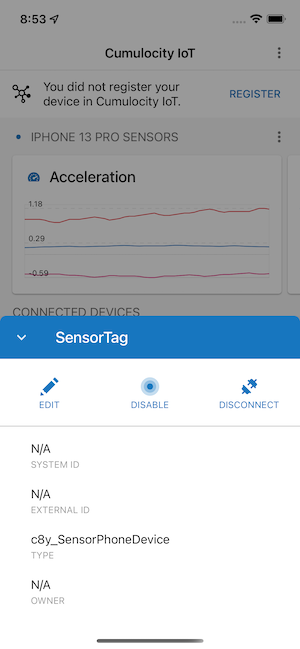
Tapping Disconnect removes a Bluetooth device from your smartphone entirely.
Tapping Disable still allows the smartphone to monitor measurements from this device, but stops sending sensor measurements to Cumulocity IoT.
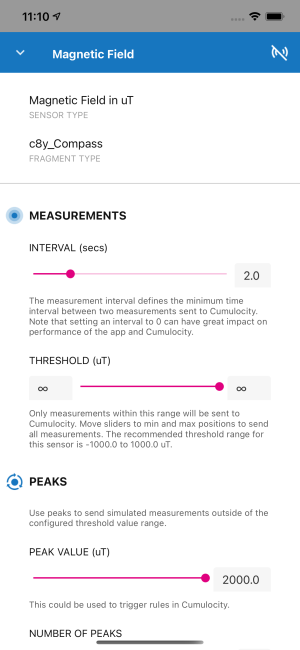
Tapping Edit, or swiping upwards, reveals further settings that allow you to adjust various properties about this sensor, such as its name and update intervals.
Adjusting sensor properties
When editing sensor properties, it is possible to change the following settings:
- The interval in seconds between measurements sent to Cumulocity IoT.
- The minimum and maximum thresholds for data values to be sent.
- The size and number of simulated peak values to be sent.
The update interval determines how often the sensor is queried by the phone, as well as how often data is sent to Cumulocity IoT. Altering the value here will also affect the speed at which charts are redrawn in the application. The minimum value for the update interval is 0.1 seconds. Note that at shorter update intervals, both the sensor device and the phone itself will consume more power.
Minimum and maximum thresholds affect the handling of the incoming data. By default, both the minimum and maximum values are infinite - that is, any recorded value from the sensor will be sent directly to Cumulocity IoT. You can drag the slider to adjust these values, or type new values directly into the text boxes at each end of the slider. To change the slider between adjusting minimum and maximum values on iOS, tap in the text box on the respective side. Although there is a recommended range for sensor measurements, it is possible to type values outside of this range if desired.
To return to unlimited values, simply drag the slider all the way to the end of the range again.
With non-infinite minimum or maximum threshold values configured, measurements sent to Cumulocity IoT will be capped to the minimum and maximum threshold values. No measurement values outside the threshold will be sent to Cumulocity IoT.
Simulated peaks can be useful for sending data values outside of the expected range on demand. These can be used for testing rules, alarms and other such functionality in a controlled and repeatable manner. The application allows you to specify the peak value to be used, as well as the number of times the sensor will be simulated at that value.
Simulating peaks and sending alarms and events
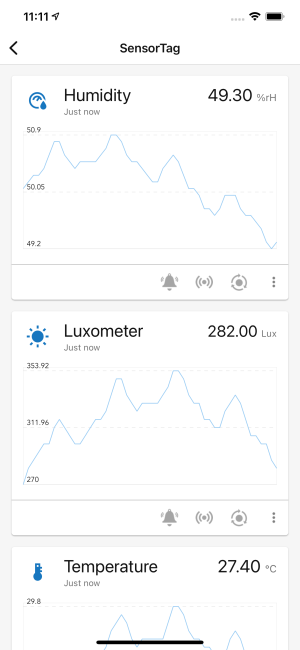
In order to simulate peak values, tap the 3rd button on the card for that sensor. The application will ask if you wish to start simulating peak values. Select Simulate to begin. If the phone is connected to Cumulocity IoT, then it will send these values to the platform instead of the measurements coming from the selected sensor.
Sending alarms and events requires the phone to be connected to Cumulocity IoT. If the device is not connected, the icons are greyed out. Tap the bell icon to send an alarm.
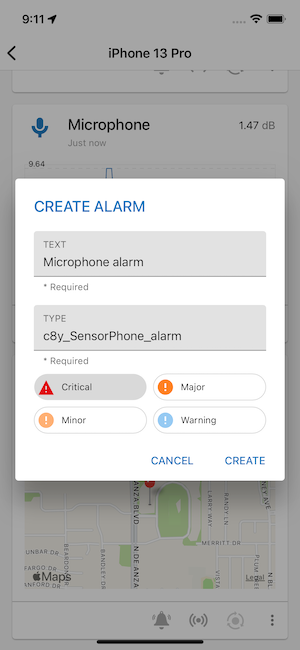
This will open a dialog in which you can select the alarm text, its type, and its severity. Tap Create to generate the alarm and send it to the Cumulocity IoT platform.
To generate an event, tap the 2nd button on the card for that sensor.
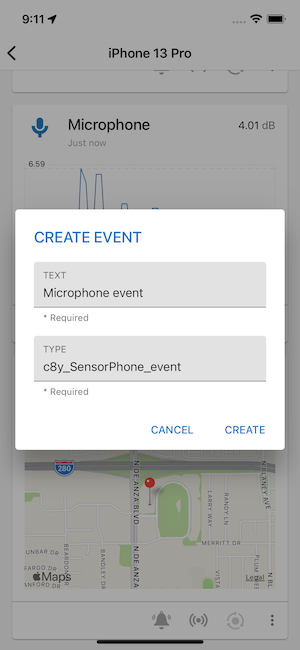
This will open a dialog where the user can set the event text and type. Tap Create to generate the event and send it to Cumulocity IoT platform.
Controlling devices
The Cumulocity IoT Sensor App can receive real-time control commands from Cumulocity IoT.
You can create a dashboard for your smartphone device as described in Cockpit > Working with dashboards.
For details on how to add new widgets to the dashboard, see Cockpit > Widgets collection.
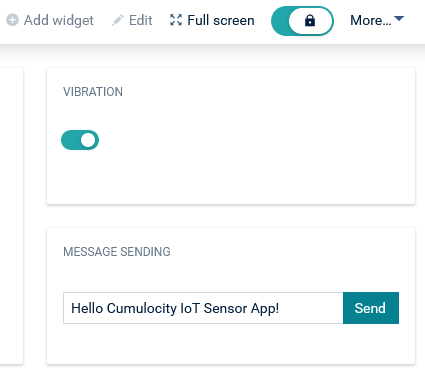
The “Message sending” widget can be used to send simple text notifications to a smartphone. Simply enter the required text into the widget and click Send. The message will appear as a pop-up alert on the device.
The “Vibration” widget can be used to activate and deactivate the vibration motor on the device. When the vibration switch is activated, the smartphone continuously vibrates until it is switched off again.
