# Customizing your platform
Source: https://cumulocity.com/docs/enterprise-tenant/customization/
Sector: Platform administration
Release: Latest
With the Enterprise tenant of Cumulocity, you can customize your platform in various aspects and according to your requirements.
Apart from various [configuration](https://cumulocity.com/docs/enterprise-tenant/customization/#configuration) settings, you can use your individual [branding](https://cumulocity.com/docs/enterprise-tenant/customization/#branding) and your individual [domain name](https://cumulocity.com/docs/enterprise-tenant/customization/#domain-name).
Click **Enterprise tenant** in the **Settings** menu to access these settings.
## Configuration
On the **Configuration** tab, you can configure various properties for your tenant.
> **Requirements:**
> APPLICATION ACCESS:
>
> Users must have access to the Administration application of the Enterprise tenant.
>
> ROLES & PERMISSIONS:
>
> * To view settings: READ permission for the "Options management" permission type
> * To manage (create, edit, update) all existing settings: ADMIN permission for the "Options management" permission type
>
>
> On tenant creation, there are default roles available that can be used as a sample configuration for the above-mentioned permissions:
> * Tenant Manager - manages tenant-wide configurations like applications, tenant options and retention rules
> **Info:**
> In some of the properties you can configure email templates for various purposes. Be aware that the corresponding emails are send with "text/html" as content type.
### Placeholders {#placeholders}
The following placeholders can be found in the **Configuration** tab:
|Placeholder|Description|
|:---|:---|
|{host}|The value of this placeholder is "https://" + "<<tenantId>>" + "<<base-domain>>". For example, if "tenantId" is auto-generated, the host will be `https://t12345678.cumulocity.com`.|
|{tenant-domain}|This is the location in which a tenant can be accessed. It is equal to "https://" + "<<tenantDomainName>>". For example, {tenant-domain} can be `https://myTenant.cumulocity.com`. In case of an Enterprise tenant, the {tenantDomain} placeholders can have different values. An example tenant domain is `https://myTenant.myhost.com`.|
|{token}|An automatically generated system token for password reset purposes. When a user requests a password reset, a new random token will be generated. This token will be associated only with the particular user and will allow for a single password reset action. The standard way of using this placeholder is along with the {tenant-domain} property as "{tenant-domain}?token={token}".|
|{email}|Will be replaced with the email address of the recipient user as stored in the user settings. Some views in the UI recognize this parameter and prefill the respective field with this value, for example, during the process of password reset.|
|{username}|Will be replaced with the value of the username property specified in the user configuration, see [User options and settings](https://cumulocity.com/docs/get-familiar-with-the-ui/user-settings/).|
|{binaryId}|Will be replaced with the respective `binaryId` for the binary artefact to be used in the download link.|
|{exportApi}|Will be replaced with the respective API in which the error occurred.|
|{size}|Will be replaced with the storage usage percentage value.|
> **Info:**
> The above mentioned placeholders might not be applicable to certain templates. While preparing content, note the information provided in the UI.
### Two-factor authentication {#twofactor-authentication}
Under **Two-factor authentication**, you can change the SMS template which is sent to the users.
### Support link {#support-link}
In the **Support link** section, you can provide a URL which is then used as default link for the **Request support** option in the user menu. If you set this value to "false", then the **Request support** option in the user menu will be hidden. If you leave the **Support link** field empty, the URL for the link will be taken from the tenant options. However, an application can override this setting by defining the "supportUrl" application option.
### Password reset {#password-reset}
In the **Password reset** section you can change all settings related to password reset email templates.
At the top you can select if you want to allow sending emails to unknown email addresses.
In the **Password reset email template** fields, provide an email template to be used when the address is known and one to be used when the address is unknown. The link to reset the password might for example be: {tenant-domain}/apps/devicemanagement/index.html?token={token}&email={email}.
In the **Email subject** field, provide a subject for all password reset related emails.
In the following two fields provide an email template to be used on password change confirmation and a template for the invitation email.
### Email server {#email-server}
In the **Email server** section, you can configure custom email server settings.
In the **Protocol and encryption** field, select a protocol/encryption type from the dropdown list. May be one of:
* SMTP (no encryption): email.protocol=smtp and email.connection.encrypted=false
* SMTP (STARTTLS): email.protocol=smtp and email.connection.encrypted=true
* SMTPS (SSL/TLS): email.protocol=smtps and email.connection.encrypted=true
Provide the host, port, username, password, and sender address for the email server. The empty password configuration is supported for the Enterprise tenant.
> **Caution:**
> The sender address configured here is used for all emails which the platform sends on behalf of your tenant. It is also used for the emails which users send through the `POST /email/emails` endpoint, so such emails appear to come from your tenant. Only grant the CREATE permission for the "Email" permission type (`ROLE_EMAIL_CREATE`) to administrators and trusted technical users such as microservice users which must send emails as part of their function. Do not include it in roles that you assign to regular tenant users or to devices, and review the roles which contain it whenever you review your tenant's permissions.
> Treat the CREATE permission for the "Email" permission type (`ROLE_EMAIL_CREATE`) as equivalent to administrator-level access.
> For details, see [Global roles](https://cumulocity.com/docs/standard-tenant/managing-permissions/#to-add-a-global-role).
### Data export {#data-export}
In the **Data export** section, you can set the email subject and email template for data export and specify the **User unauthorized error message**.
### Storage limit {#storage-limit}
In the **Storage limit** section, you can specify the email subject and email template for emails being send *before* data is removed on exceeding the storage limit (warning) and *after* data removal is performed (limit exceeded).
### Suspending tenants {#suspending-tenants}
In the **Suspending tenants** section, you can provide settings for emails being send on tenant suspension.
At the top you can select if you want to send the email to the suspended tenant's administrator and specify an additional email receiver. Below you set the subject and template for the tenant suspended email.
Click **Save configuration** at the bottom to save your settings.
> **Info:**
> Some additional configuration settings can be specified globally in the Management tenant. Contact your Operations team for further details.
## Branding
With the Branding feature, you can fully customize the look of your tenant to your own preferences.
> **Requirements:**
> APPLICATION ACCESS:
>
> The branding feature comes as default with the Enterprise tenant and is available in the Administration application.
>
> The branding functionality is enabled by subscribing to the "feature-branding" application.
>
> ROLES & PERMISSIONS:
>
> * To manage and apply the branding configuration:
> * READ, ADMIN permission for the "Application management" permission type
>
> On tenant creation, there are default roles available that can be used as a sample configuration for the above-mentioned permissions:
> * Tenant Manager - manages tenant-wide configurations like applications, tenant options and retention rules
### To configure branding settings {#to-configure-branding-settings}
In the **Branding** page, you can maintain multiple branding variants. One of the branding variants is always configured as the global branding. The global branding will by default apply to all apps on your tenant and your subtenants.
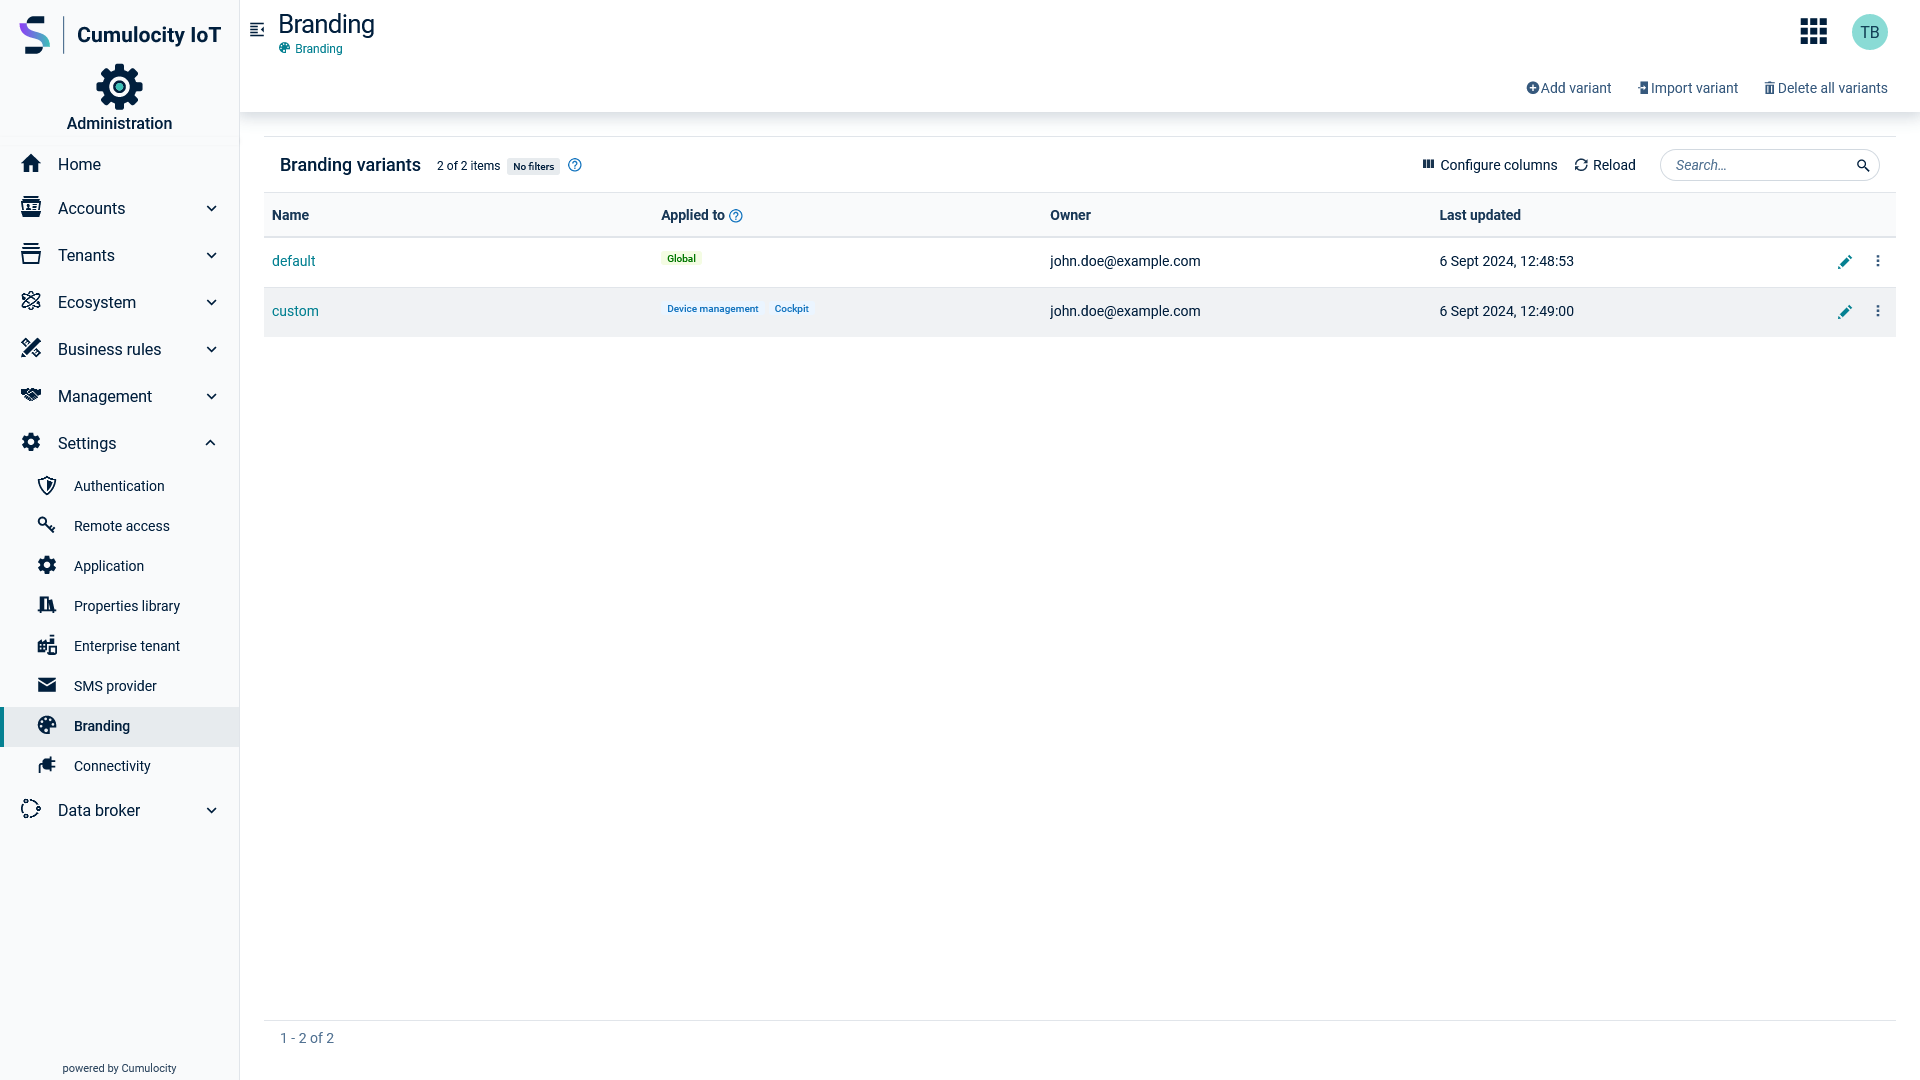 In addition to the global branding, there can also be branding variants that apply only to specific applications. This allows to brand applications differently.
For each branding variant, you can configure various parameters like logos, colors and font types used throughout the platform.
The [parameters](https://cumulocity.com/docs/enterprise-tenant/customization/#editing-parameters) can be configured through the multiple tabs available on the **Branding** page. Most of the parameters are immediately applied to your current window as a preview.
If you want to make changes to one of your branding variants, we recommend you to duplicate the corresponding branding variant first and to make your changes on the duplicated variant as any saved changes would immediately be applied. This way you can review and edit the preview of your branding variant first across all applications before it is set as global branding and/or applied to your target applications.
To edit a branding variant you can configure the following tabs:
- **Generic**: Allows you to change generic parameters of your branding that are the same across all themes.
- **Light theme**: Allows you to edit the branding parameters for the light theme.
- **Dark theme**: Allows you to edit the branding parameters for the dark theme. The dark theme support needs to be enabled first in the **Generic** tab.
- **Custom CSS**: Allows you to customize the looks of your applications even more by providing your own Cascading Style Sheets.
- **Advanced branding**: Allows you to make direct changes to the branding JSON object via a text editor. This can be useful to set some of the [ApplicationOptions the Web SDK provides](https://resources.cumulocity.com/documentation/websdk/ngx-components/classes/ApplicationOptions.html) which are not immediately supported by the branding editor.
For a more detailed preview of your settings, click **Open preview** to check the look and feel of your branding settings in the overall platform. You may interact and even switch applications in the preview. Every change that you make in the **Branding** page is immediately applied to the **Preview** page after you click **Save**.
Click **Save** at the bottom to save your final branding settings to your tenant. This applies them to the places your branding variant applies to.
To revert back to the default settings, click **Delete all variants** in the in the top menu bar. With this action all branding variants are deleted. We therefore recommend you to export your existing variants beforehand.
### Editing parameters {#editing-parameters}
Each branding parameter can be configured in multiple ways.
#### Generic tab {#generic-tab}
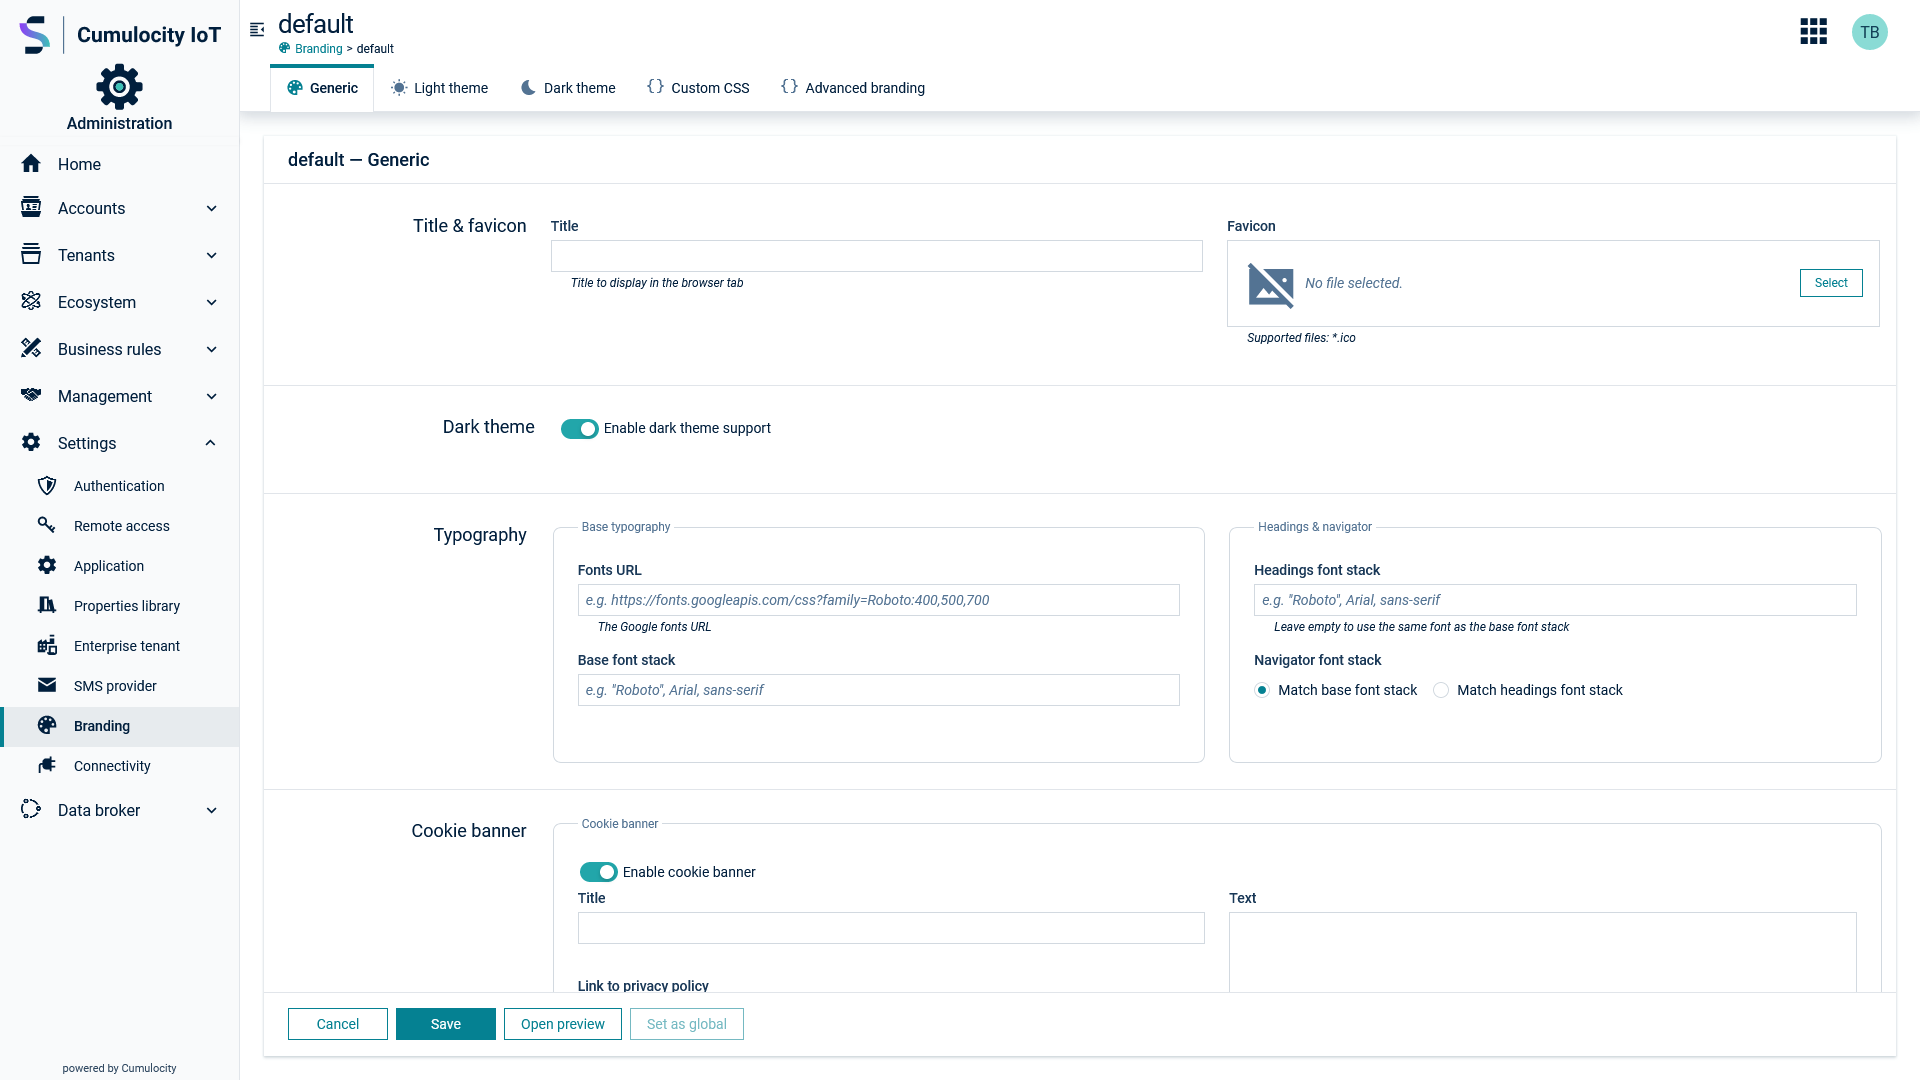
In the **Generic** tab, you can edit the generic settings of your branding variant that will apply to all of your branding themes.
In addition to the global branding, there can also be branding variants that apply only to specific applications. This allows to brand applications differently.
For each branding variant, you can configure various parameters like logos, colors and font types used throughout the platform.
The [parameters](https://cumulocity.com/docs/enterprise-tenant/customization/#editing-parameters) can be configured through the multiple tabs available on the **Branding** page. Most of the parameters are immediately applied to your current window as a preview.
If you want to make changes to one of your branding variants, we recommend you to duplicate the corresponding branding variant first and to make your changes on the duplicated variant as any saved changes would immediately be applied. This way you can review and edit the preview of your branding variant first across all applications before it is set as global branding and/or applied to your target applications.
To edit a branding variant you can configure the following tabs:
- **Generic**: Allows you to change generic parameters of your branding that are the same across all themes.
- **Light theme**: Allows you to edit the branding parameters for the light theme.
- **Dark theme**: Allows you to edit the branding parameters for the dark theme. The dark theme support needs to be enabled first in the **Generic** tab.
- **Custom CSS**: Allows you to customize the looks of your applications even more by providing your own Cascading Style Sheets.
- **Advanced branding**: Allows you to make direct changes to the branding JSON object via a text editor. This can be useful to set some of the [ApplicationOptions the Web SDK provides](https://resources.cumulocity.com/documentation/websdk/ngx-components/classes/ApplicationOptions.html) which are not immediately supported by the branding editor.
For a more detailed preview of your settings, click **Open preview** to check the look and feel of your branding settings in the overall platform. You may interact and even switch applications in the preview. Every change that you make in the **Branding** page is immediately applied to the **Preview** page after you click **Save**.
Click **Save** at the bottom to save your final branding settings to your tenant. This applies them to the places your branding variant applies to.
To revert back to the default settings, click **Delete all variants** in the in the top menu bar. With this action all branding variants are deleted. We therefore recommend you to export your existing variants beforehand.
### Editing parameters {#editing-parameters}
Each branding parameter can be configured in multiple ways.
#### Generic tab {#generic-tab}
In the **Generic** tab, you can edit the generic settings of your branding variant that will apply to all of your branding themes.
 ##### Title & favicon {#title-favicon}
Under **Title & favicon**, specify the following items:
* The title: This is displayed in the browser's address bar.
* The favicon: This is displayed in the browser's address bar. Click **Select** to select a file from your file system. The supported favicon format is ICO.
##### Dark theme {#dark-theme-support}
Here you can enable the dark theme support on this branding variant.
If enabled, the [**Dark theme** tab](https://cumulocity.com/docs/enterprise-tenant/customization/#light-dark-theme-tab) is available.
##### Typography {#typography}
under **Typography** you specify the font settings for your brand variant.
You can select your base and headings font stack, and select an option for the navigator font stack. This is either same as base or same as headings font. You can also add a link to existing remote fonts to be used.
##### Cookie banner {#cookie-banner}
Under **Cookie banner** you specify the settings for the banner with the cookie usage information. If not disabled here, the banner is shown for all users of the current tenant and all subtenants until a user clicks **Agree and proceed**.
If you disable the cookie banner, this also disables the product experience tracking by Gainsight for the current tenant and all subtenants.
The following parameters can be specified:
* Title: Cookie banner title.
* Text: Cookie banner text with a general statement on the cookie usage and the use cases for it.
* Link to privacy policy: A link to the page with the privacy policy.
* Version of privacy policy: A version of the privacy policy (for example, a date). In case the version changes, the consent of all existing users is invalidated.
#### Light & dark theme tab {#light-dark-theme-tab}
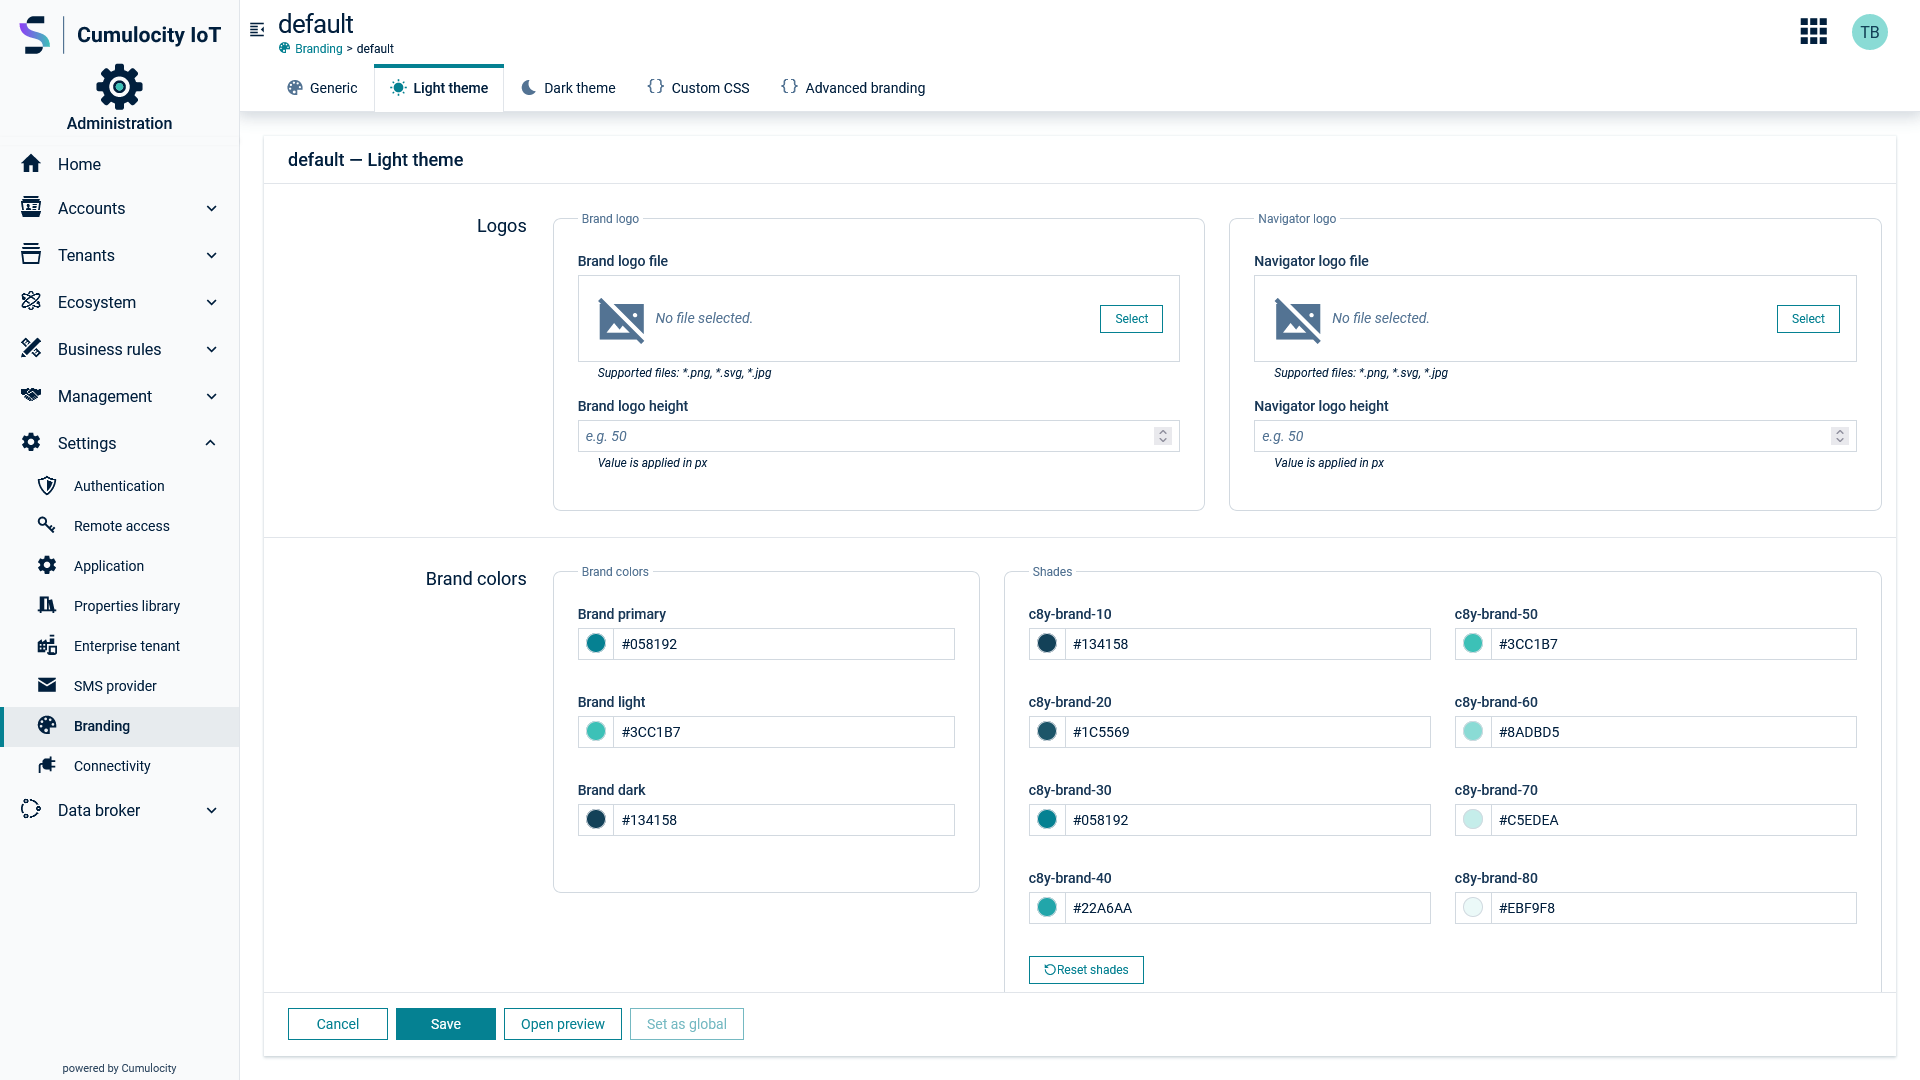
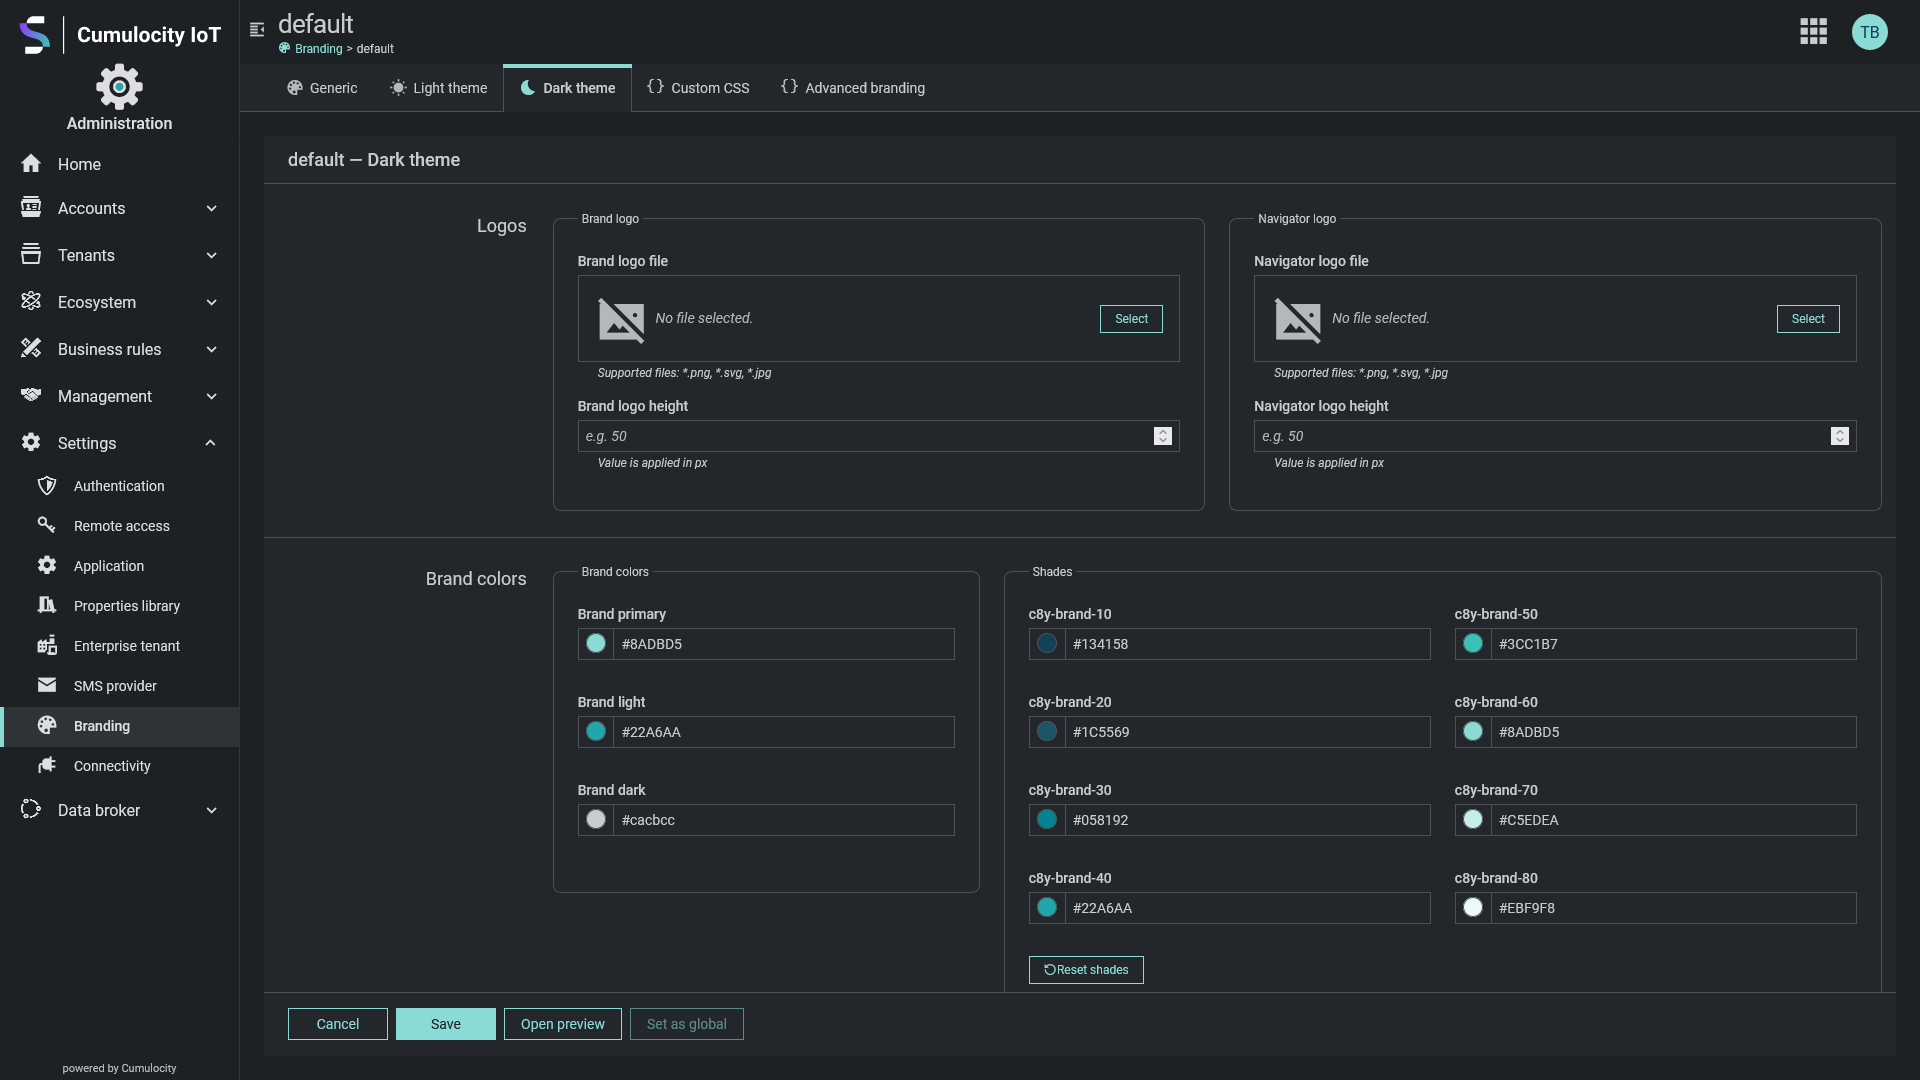
The same set of parameters is available for both the light and the dark theme and can be changed in the corresponding tabs.
Further details regarding these parameters can be found in the [Branding](https://cumulocity.com/codex/design-system/design-tokens/branding-tokens/overview) and [Color palette](https://cumulocity.com/codex/design-system/design-tokens/color-tokens/overview) sections of the Codex.
The theme switcher in the right drawer allows you to switch between the light and dark theme, once you enable the dark theme on your branding variant.
##### Title & favicon {#title-favicon}
Under **Title & favicon**, specify the following items:
* The title: This is displayed in the browser's address bar.
* The favicon: This is displayed in the browser's address bar. Click **Select** to select a file from your file system. The supported favicon format is ICO.
##### Dark theme {#dark-theme-support}
Here you can enable the dark theme support on this branding variant.
If enabled, the [**Dark theme** tab](https://cumulocity.com/docs/enterprise-tenant/customization/#light-dark-theme-tab) is available.
##### Typography {#typography}
under **Typography** you specify the font settings for your brand variant.
You can select your base and headings font stack, and select an option for the navigator font stack. This is either same as base or same as headings font. You can also add a link to existing remote fonts to be used.
##### Cookie banner {#cookie-banner}
Under **Cookie banner** you specify the settings for the banner with the cookie usage information. If not disabled here, the banner is shown for all users of the current tenant and all subtenants until a user clicks **Agree and proceed**.
If you disable the cookie banner, this also disables the product experience tracking by Gainsight for the current tenant and all subtenants.
The following parameters can be specified:
* Title: Cookie banner title.
* Text: Cookie banner text with a general statement on the cookie usage and the use cases for it.
* Link to privacy policy: A link to the page with the privacy policy.
* Version of privacy policy: A version of the privacy policy (for example, a date). In case the version changes, the consent of all existing users is invalidated.
#### Light & dark theme tab {#light-dark-theme-tab}
The same set of parameters is available for both the light and the dark theme and can be changed in the corresponding tabs.
Further details regarding these parameters can be found in the [Branding](https://cumulocity.com/codex/design-system/design-tokens/branding-tokens/overview) and [Color palette](https://cumulocity.com/codex/design-system/design-tokens/color-tokens/overview) sections of the Codex.
The theme switcher in the right drawer allows you to switch between the light and dark theme, once you enable the dark theme on your branding variant.
 ##### Logos {#logos}
Under **Logos**, specify the following items:
* Your brand logo: This showns during the application loading. Click **Select** to select a file from your file system. The supported formats are PNG, SVG and JPG.
* The brand logo height.
* Your navigator logo: This is located on top of the navigator panel. Click **Select** to select a file from your file system. The supported formats are PNG, SVG and JPG.
* The navigator logo height.
##### Brand colors {#brand-colors}
In the **Brand colors** section you specify the colors you like to use in the branding variant.
You can configure the following parameters by providing a HEX, RGB or RGBA value:
* Brand primary.
* Brand light: Mainly used for two-color icons.
* Brand dark: Mainly used for two-color icons.
* A set of 8 shades that you can generate based on your brand primary color. To generate the shades click **Reset shades**. The shades are used in various locations in the different applications.
##### Status colors {#status-colors}
In ther **Status colors** section you specify the colors used to display the different statuses.
For each status (**Info**, **Warning**, **Danger** and **Success**) you can provide three colors ("default, "light" and "dark").
##### Generic {#generic}
In the **Generic** section you specify the colors used in generic places.
The following parameters can be specified by providing a HEX, RGB or RGBA value:
* Body background color
* Text color
* Text muted color
* Link color
* Link hover color
In addition, you can also specify the **Button border-radius**.
##### Action bar {#action-bar}
In the **Action bar** section you specify the parameters for the action bar.
The following parameters can be specified by providing a HEX, RGB or RGBA value:
* Background color
* Text color
* Icon color
* Button color
* Button hover color
##### Main header {#main-header}
In the **Main header** section you specify the parameters for the main header.
The following parameters can be specified by providing a HEX, RGB, or RGBA value:
* Background color
* Text color
* Button hover color
##### Navigator {#navigator}
In the **Navigator**section you specify the parameters for the navigator.
The following parameters can be specified by providing a HEX, RGB, or RGBA value:
* Background color
* Text and buttons color
* Separator color
* Header background color
* Title color
* Active background color: Background color of the current item in the navigator
* Active border color: Border color of the current item in the navigator
* Active text color: Text color of the current item in the navigator
##### Right drawer {#right-drawer}
In the **Right drawer** section you specify the parameters for the right drawer.
The following parameters can be specified by providing a HEX, RGB or RGBA value:
* Background color
* Text color
* Text muted color
* Separator color
* Link color
* Link hover color
#### Custom CSS {#custom-css-tab}
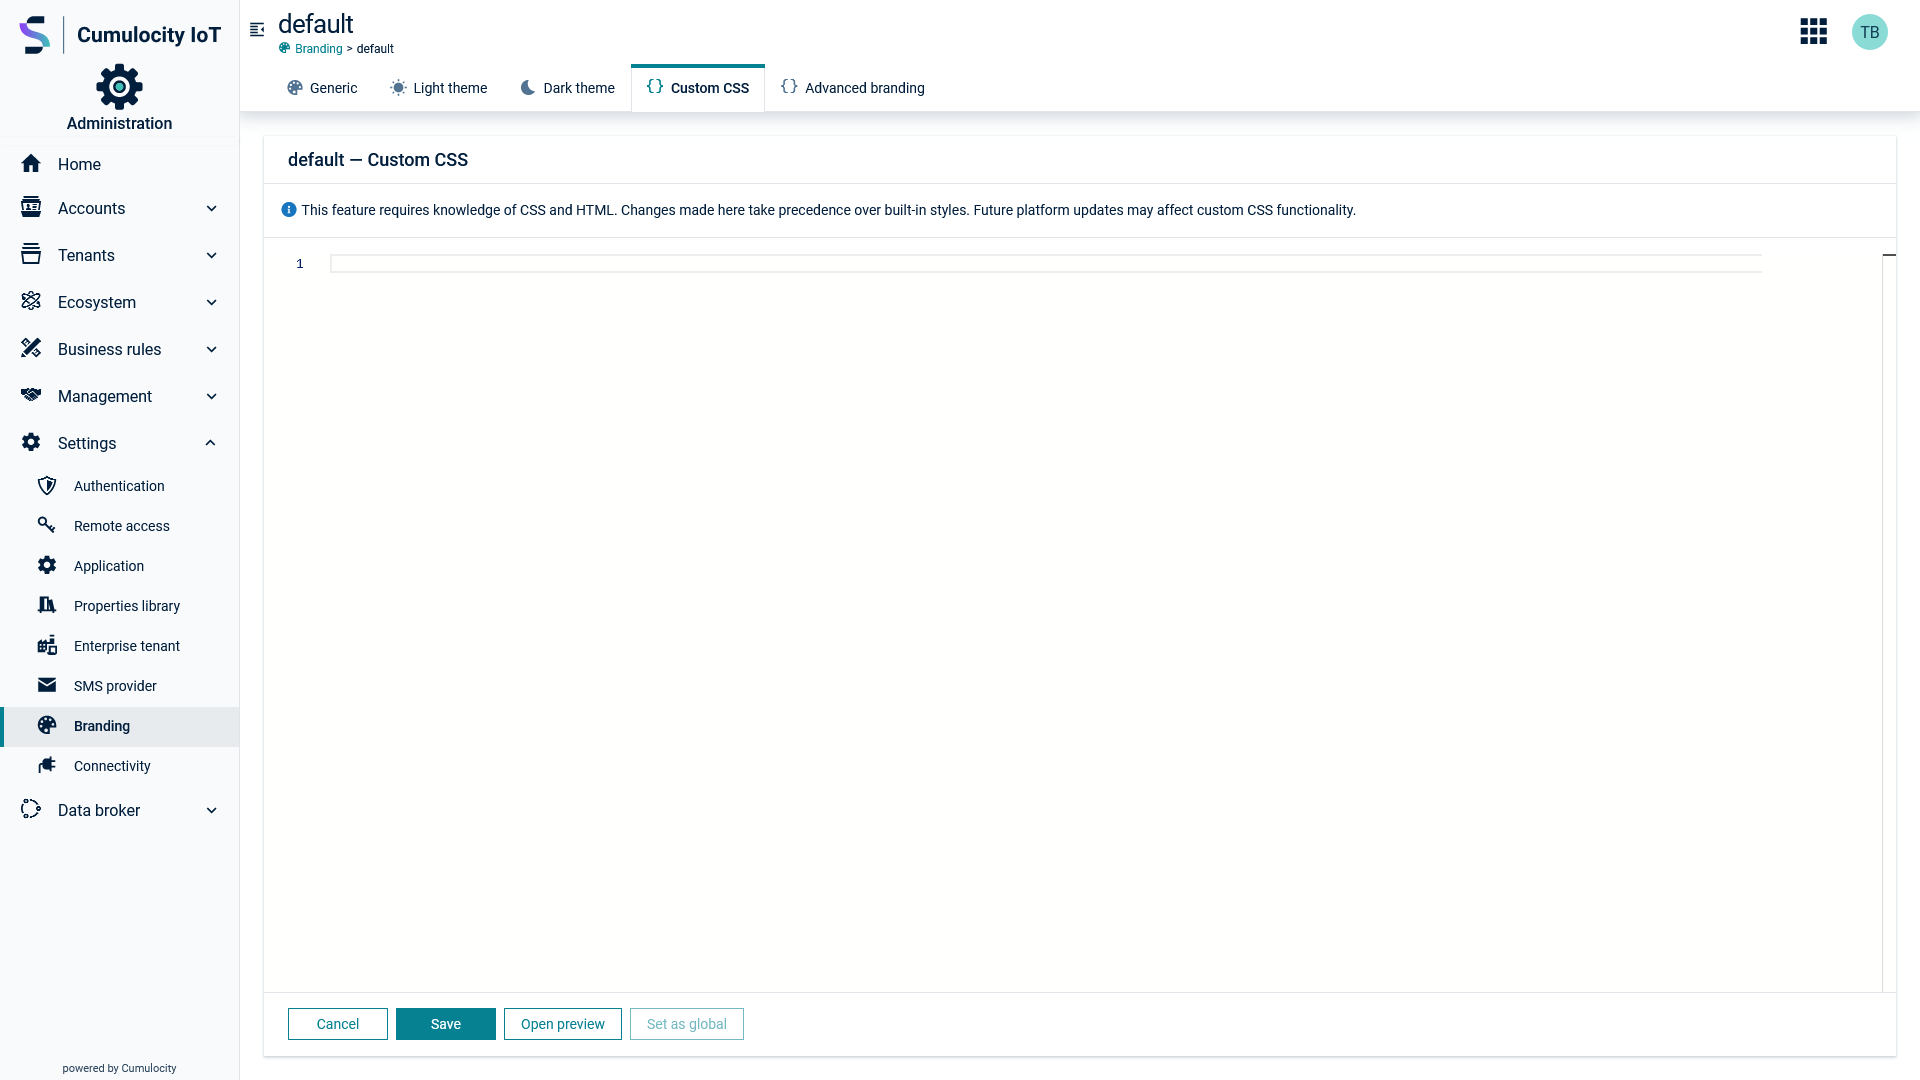
The **Custom CSS** tab allows to customize the looks of your applications even more by providing your own Cascading Style Sheets.
You can utilize this to change colors for locations that have not been covered by the dialog window provided in the [**Light/Dark theme** tab](https://cumulocity.com/docs/enterprise-tenant/customization/#light-dark-theme-tab).
##### Logos {#logos}
Under **Logos**, specify the following items:
* Your brand logo: This showns during the application loading. Click **Select** to select a file from your file system. The supported formats are PNG, SVG and JPG.
* The brand logo height.
* Your navigator logo: This is located on top of the navigator panel. Click **Select** to select a file from your file system. The supported formats are PNG, SVG and JPG.
* The navigator logo height.
##### Brand colors {#brand-colors}
In the **Brand colors** section you specify the colors you like to use in the branding variant.
You can configure the following parameters by providing a HEX, RGB or RGBA value:
* Brand primary.
* Brand light: Mainly used for two-color icons.
* Brand dark: Mainly used for two-color icons.
* A set of 8 shades that you can generate based on your brand primary color. To generate the shades click **Reset shades**. The shades are used in various locations in the different applications.
##### Status colors {#status-colors}
In ther **Status colors** section you specify the colors used to display the different statuses.
For each status (**Info**, **Warning**, **Danger** and **Success**) you can provide three colors ("default, "light" and "dark").
##### Generic {#generic}
In the **Generic** section you specify the colors used in generic places.
The following parameters can be specified by providing a HEX, RGB or RGBA value:
* Body background color
* Text color
* Text muted color
* Link color
* Link hover color
In addition, you can also specify the **Button border-radius**.
##### Action bar {#action-bar}
In the **Action bar** section you specify the parameters for the action bar.
The following parameters can be specified by providing a HEX, RGB or RGBA value:
* Background color
* Text color
* Icon color
* Button color
* Button hover color
##### Main header {#main-header}
In the **Main header** section you specify the parameters for the main header.
The following parameters can be specified by providing a HEX, RGB, or RGBA value:
* Background color
* Text color
* Button hover color
##### Navigator {#navigator}
In the **Navigator**section you specify the parameters for the navigator.
The following parameters can be specified by providing a HEX, RGB, or RGBA value:
* Background color
* Text and buttons color
* Separator color
* Header background color
* Title color
* Active background color: Background color of the current item in the navigator
* Active border color: Border color of the current item in the navigator
* Active text color: Text color of the current item in the navigator
##### Right drawer {#right-drawer}
In the **Right drawer** section you specify the parameters for the right drawer.
The following parameters can be specified by providing a HEX, RGB or RGBA value:
* Background color
* Text color
* Text muted color
* Separator color
* Link color
* Link hover color
#### Custom CSS {#custom-css-tab}
The **Custom CSS** tab allows to customize the looks of your applications even more by providing your own Cascading Style Sheets.
You can utilize this to change colors for locations that have not been covered by the dialog window provided in the [**Light/Dark theme** tab](https://cumulocity.com/docs/enterprise-tenant/customization/#light-dark-theme-tab).
 #### Advanced branding {#advanced-branding-tab}
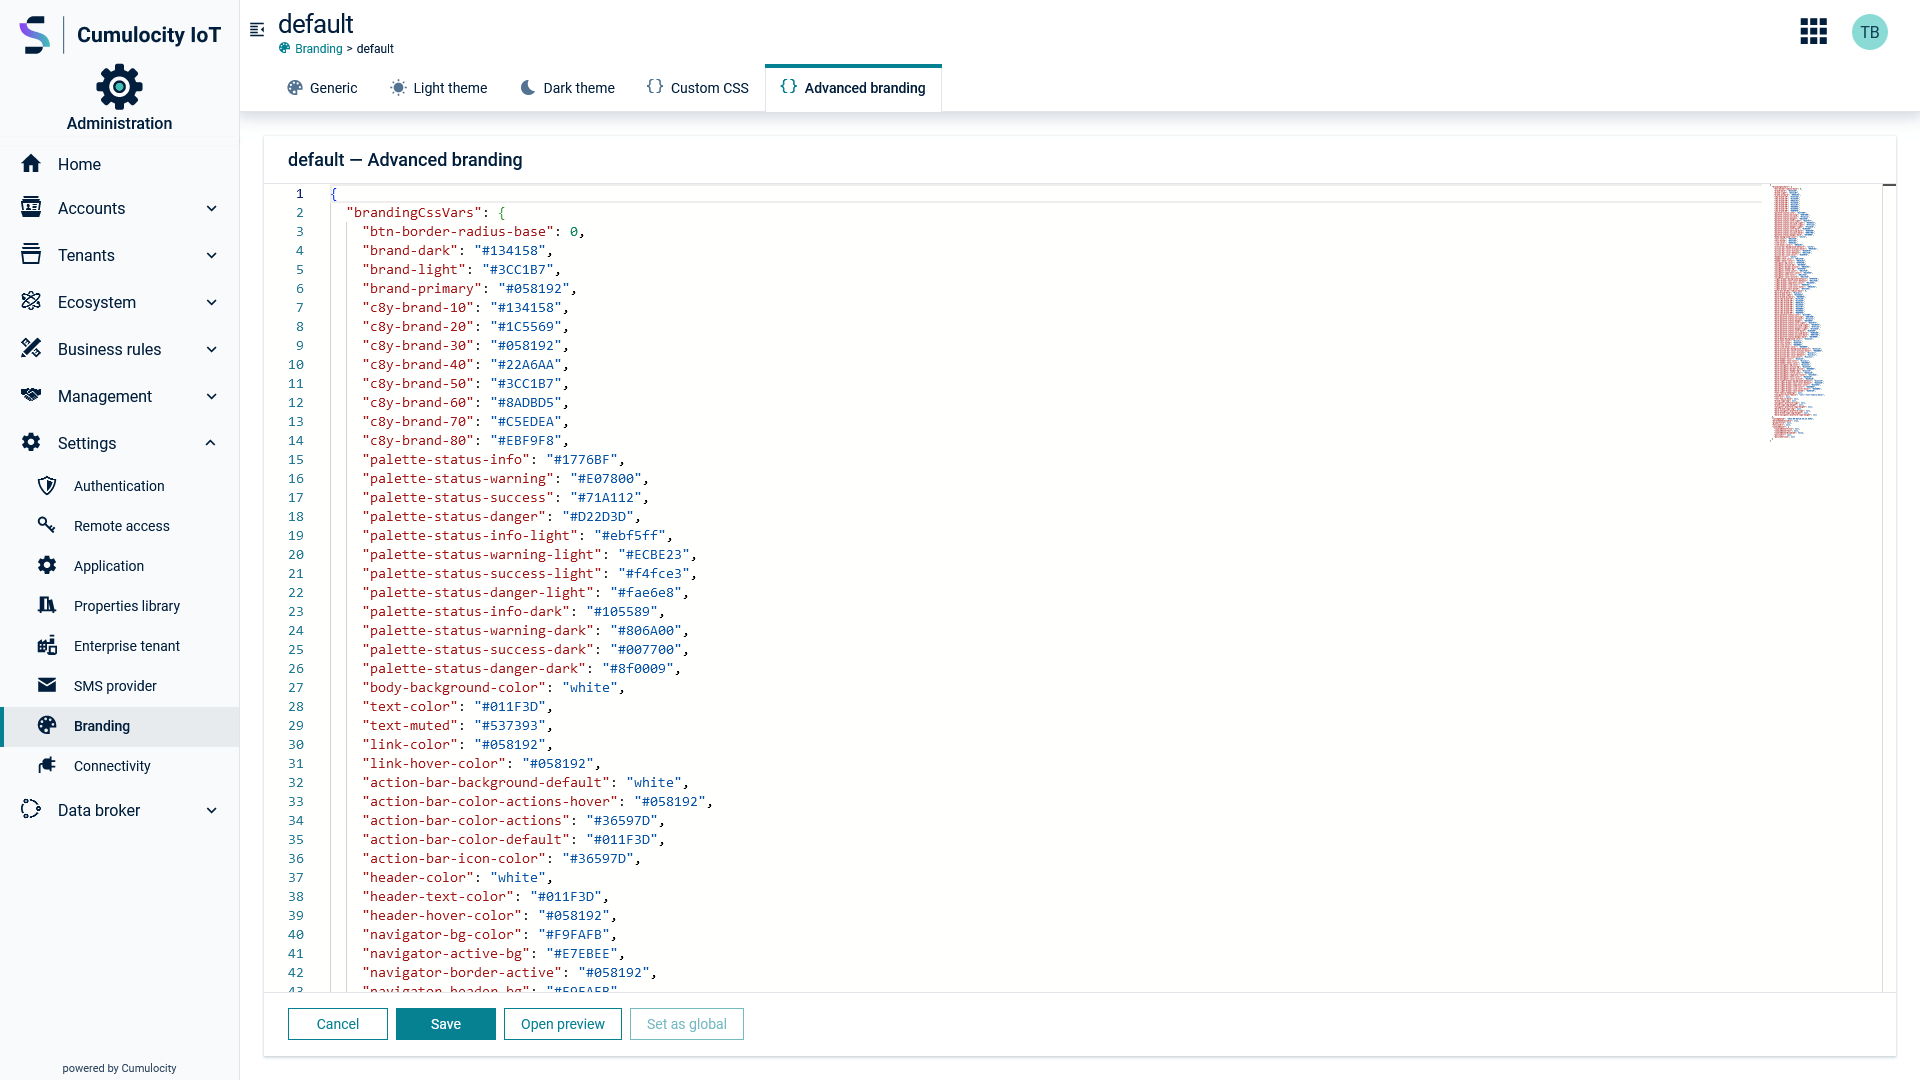
The **Advanced branding** tab allows to make direct changes to the branding JSON object, which is usually filled by the other tabs behind the scenes, via a text editor. This can be useful to set some of the [ApplicationOptions the Web SDK provides](https://resources.cumulocity.com/documentation/websdk/ngx-components/classes/ApplicationOptions.html) which are not immediately supported by the forms the branding editor includes. More details regarding these options can also be found within [Cumulocity Web developer codex](https://cumulocity.com/codex/advanced-development/services/options-service/overview).
#### Advanced branding {#advanced-branding-tab}
The **Advanced branding** tab allows to make direct changes to the branding JSON object, which is usually filled by the other tabs behind the scenes, via a text editor. This can be useful to set some of the [ApplicationOptions the Web SDK provides](https://resources.cumulocity.com/documentation/websdk/ngx-components/classes/ApplicationOptions.html) which are not immediately supported by the forms the branding editor includes. More details regarding these options can also be found within [Cumulocity Web developer codex](https://cumulocity.com/codex/advanced-development/services/options-service/overview).
 ## Domain name
A key feature of the Enterprise tenant is the ability to operate the Cumulocity platform using a custom domain name. This means that you can configure the platform to serve you and your customers using a host name of choice, for example *.iot.mycompany.com rather than the default URL of Cumulocity. In addition you'll be able to create subtenants
using your domain. These will be using **\.iot.mycompany.com** as their host names.
> **Requirements:**
> APPLICATION ACCESS:
>
> The domain management feature comes as default with the Enterprise tenant tenant and is available in the Administration application.
>
> The domain management functionality is enabled by subscribing to the "sslmanagement" microservice.
>
> ROLES & PERMISSIONS:
>
> * To upload certificate:
> * READ, ADMIN permission for the "Inventory" permission type;
> * READ, ADMIN permission for the "Options management" permission type;
> * READ, ADMIN permission for the "Application management" permission type;
>
> On tenant creation, there are default roles available that can be used as a sample configuration for the above-mentioned permissions:
> * Tenant Manager - manages tenant-wide configurations like applications, tenant options and retention rules
>
> PREREQUISITES
>
> There are three prerequisites for using a custom domain:
>
> 1. To activate your domain, a valid license that covers your wildcard domain is required.
> Please contact [product support](https://cumulocity.com/docs/additional-resources/contacting-support/) to install a license for your domain.
> 2. You've obtained a valid wildcard SSL certificate for your IoT domain, for
> example a certificate for *\*.iot.mycompany.com*.
> 3. There is a valid DNS configuration for your domain which ensures that all requests to *\*.iot.mycompany.com* are
> routed to Cumulocity. (see below).
>
> SSL CERTIFICATE REQUIREMENTS
>
> The following criteria must be met by any SSL certificate to be used with the Enterprise tenant feature:
>
> * The certificate is currently valid and has not expired. More specifically, validFrom points to a point in time in the
> past, and validTo to a point in the future.
> * The certificate has been issued by a well-established certificate authority (CA). Self-signed certificates are
> explicitly not supported.
> * The certificate is a wildcard certificate issued for your domain *\*.iot.mycompany.com*. The use of a wildcard
> certificate is mandatory, as it will also be used for subdomains created from your Enterprise tenant.
> * Every single certificate in the chain is provided using the X509 format.
> * The common name (CN) in the subject of the primary certificate (the first one in the chain) holds the value of your
> wildcard domain name, for example, "CN=\*.iot.mycompany.com".
>
> Cumulocity supports a single certificate that is signed by the root CA, as well as a full chain certificate which
> contains one or more intermediate certificates.
> **Info:**
> The custom domain name functionality is only available for Cumulocity cloud installations or on-prem installations which don't use a custom load balancer.
### To package the SSL certificate in PKCS #12 {#to-package-the-ssl-certificate-in-pkcs-12}
In order to use an SSL certificate with Cumulocity, the certificate together with its private key must be uploaded to the platform in a single file, using the PKCS #12 file format.
Most certificate authorities deliver their certificates and corresponding private keys in the PEM file format, using two
separate text files for the certificate chain and the private key. Make sure that the private key is not
protected with a password/passphrase.
Such PEM files can easily be repackaged into #PKCS #12 using [OpenSSL](https://www.openssl.org/). In the following
example, OpenSSL is used to combine a certificate chain (*chain.cert*) and the corresponding key (*privkey.pem*) into a
PKCS #12 keystore file (*out_keystore.p12*) that can be used with Cumulocity.
```shell
openssl pkcs12 -export -out out_keystore.p12 -inkey privkey.pem -in cert.pem -certfile chain.pem
```
### DNS requirements for enterprise domains {#dns-requirements-for-enterprise-domains}
The DNS entries for your custom domain must be configured in a way that all requests are routed to the Cumulocity platform.
We **strongly recommend** you to use a wildcard CNAME entry for this purpose. The CNAME must contain your wildcard
domain from the certificate in the NAME field. The VALUE field of the CNAME entry must point to the hostname of Cumulocity. This target hostname can be easily determined by looking at your current tenant URL. If your tenant URL
is *http://mytenant.cumulocity.com*, the target hostname is *mytenant.cumulocity.com*. Please also make sure to delete any
conflicting A entries.
**Example:**
If you want to use **.iot.mycompany.com* for your enterprise subtenants and if you're using the Cumulocity at *mytenant.cumulocity.com*, the following CNAME entry must be added to your DNS zone:
```shell
NAME TYPE VALUE
----------------------------------------------------
*.iot.mycompany.com. CNAME mytenant.cumulocity.com.
```
We highly discourage any use of alternative DNS configurations for the following reasons:
- *Wildcard A entries* take the IP address of the platform in the value field and hence redirect all requests based on
the given IP rather than a hostname. This results in major problems if the IP address of the IoT platform should
change in the future.
- *Singular A entries or singular CNAME entries* instead of DNS wild cards require a single DNS entry for each
enterprise domain being created. This is very error prone and prevents the creation of subtenants without always
tampering with DNS settings.
### To upload the certificate and activate your domain {#to-upload-the-certificate-and-activate-your-domain}
Once the DNS configuration is in place and if a certificate with the given requirements is available, it can be easily
uploaded to the platform.
On the **Domain name** tab in the **Enterprise tenant** page, click **Upload certificate**. Select the certificate from your file system and click **Upload**.
Afterwards, you can activate the domain with a single click on its name. After the domain has been activated, you will be redirected
to your Enterprise tenant using the new domain name. You will also receive an email with information about the
activation. Note that your Management tenant domain name is static, for example, if your wildcard domain is "*
.iot.mycompany.com" then your Management tenant domain will be "management.iot.mycompany.com".
> **Info:**
> After the activation is completed you will no longer be able to access your tenant with the Cumulocity domain name. Instead, use your custom domain name.
### To update your certificate {#to-update-your-certificate}
When your certificate expires, you must update your certificate with a new one with an extended validation period. When updating a certificate, you must make sure that the certificate meets the following requirements:
* It is valid, like when being uploaded for the first time.
* It is currently valid (validFrom in the past and validTo in the future).
* It has exactly the same common name (domain name) as the currently active certificate.
> **Info:**
> Keep in mind that after replacing the certificate it may take some minutes until the new certificate has been delivered to the users/browsers.
### To deactivate your certificate {#to-deactivate-your-certificate}
If you wish to return to your old domain at Cumulocity, you can simply deactivate you certificate.
> **Important:**
> Use with care. Your customers will not be able to access their subtenants anymore.
### Troubleshooting {#troubleshooting}
In case you cannot reach Cumulocity using your custom domain, we recommend you to perform the following checks to verify your DNS setup.
**Check if the DNS entry is correct**
Execute the following command:
```shell
host management.
```
The following result should be returned:
```shell
management. is an alias for
has address
```
**Check if the API is responding**
Execute the following command:
```shell
curl -v -u '/:' --head http://management./inventory/managedObjects
```
The following result should be returned:
```shell
...
HTTP/1.1 200 OK
...
```
> **Info:**
> Keep in mind that after changing the DNS entry it might take up to 24 hours until the new entry has been propagated.
## Domain name
A key feature of the Enterprise tenant is the ability to operate the Cumulocity platform using a custom domain name. This means that you can configure the platform to serve you and your customers using a host name of choice, for example *.iot.mycompany.com rather than the default URL of Cumulocity. In addition you'll be able to create subtenants
using your domain. These will be using **\.iot.mycompany.com** as their host names.
> **Requirements:**
> APPLICATION ACCESS:
>
> The domain management feature comes as default with the Enterprise tenant tenant and is available in the Administration application.
>
> The domain management functionality is enabled by subscribing to the "sslmanagement" microservice.
>
> ROLES & PERMISSIONS:
>
> * To upload certificate:
> * READ, ADMIN permission for the "Inventory" permission type;
> * READ, ADMIN permission for the "Options management" permission type;
> * READ, ADMIN permission for the "Application management" permission type;
>
> On tenant creation, there are default roles available that can be used as a sample configuration for the above-mentioned permissions:
> * Tenant Manager - manages tenant-wide configurations like applications, tenant options and retention rules
>
> PREREQUISITES
>
> There are three prerequisites for using a custom domain:
>
> 1. To activate your domain, a valid license that covers your wildcard domain is required.
> Please contact [product support](https://cumulocity.com/docs/additional-resources/contacting-support/) to install a license for your domain.
> 2. You've obtained a valid wildcard SSL certificate for your IoT domain, for
> example a certificate for *\*.iot.mycompany.com*.
> 3. There is a valid DNS configuration for your domain which ensures that all requests to *\*.iot.mycompany.com* are
> routed to Cumulocity. (see below).
>
> SSL CERTIFICATE REQUIREMENTS
>
> The following criteria must be met by any SSL certificate to be used with the Enterprise tenant feature:
>
> * The certificate is currently valid and has not expired. More specifically, validFrom points to a point in time in the
> past, and validTo to a point in the future.
> * The certificate has been issued by a well-established certificate authority (CA). Self-signed certificates are
> explicitly not supported.
> * The certificate is a wildcard certificate issued for your domain *\*.iot.mycompany.com*. The use of a wildcard
> certificate is mandatory, as it will also be used for subdomains created from your Enterprise tenant.
> * Every single certificate in the chain is provided using the X509 format.
> * The common name (CN) in the subject of the primary certificate (the first one in the chain) holds the value of your
> wildcard domain name, for example, "CN=\*.iot.mycompany.com".
>
> Cumulocity supports a single certificate that is signed by the root CA, as well as a full chain certificate which
> contains one or more intermediate certificates.
> **Info:**
> The custom domain name functionality is only available for Cumulocity cloud installations or on-prem installations which don't use a custom load balancer.
### To package the SSL certificate in PKCS #12 {#to-package-the-ssl-certificate-in-pkcs-12}
In order to use an SSL certificate with Cumulocity, the certificate together with its private key must be uploaded to the platform in a single file, using the PKCS #12 file format.
Most certificate authorities deliver their certificates and corresponding private keys in the PEM file format, using two
separate text files for the certificate chain and the private key. Make sure that the private key is not
protected with a password/passphrase.
Such PEM files can easily be repackaged into #PKCS #12 using [OpenSSL](https://www.openssl.org/). In the following
example, OpenSSL is used to combine a certificate chain (*chain.cert*) and the corresponding key (*privkey.pem*) into a
PKCS #12 keystore file (*out_keystore.p12*) that can be used with Cumulocity.
```shell
openssl pkcs12 -export -out out_keystore.p12 -inkey privkey.pem -in cert.pem -certfile chain.pem
```
### DNS requirements for enterprise domains {#dns-requirements-for-enterprise-domains}
The DNS entries for your custom domain must be configured in a way that all requests are routed to the Cumulocity platform.
We **strongly recommend** you to use a wildcard CNAME entry for this purpose. The CNAME must contain your wildcard
domain from the certificate in the NAME field. The VALUE field of the CNAME entry must point to the hostname of Cumulocity. This target hostname can be easily determined by looking at your current tenant URL. If your tenant URL
is *http://mytenant.cumulocity.com*, the target hostname is *mytenant.cumulocity.com*. Please also make sure to delete any
conflicting A entries.
**Example:**
If you want to use **.iot.mycompany.com* for your enterprise subtenants and if you're using the Cumulocity at *mytenant.cumulocity.com*, the following CNAME entry must be added to your DNS zone:
```shell
NAME TYPE VALUE
----------------------------------------------------
*.iot.mycompany.com. CNAME mytenant.cumulocity.com.
```
We highly discourage any use of alternative DNS configurations for the following reasons:
- *Wildcard A entries* take the IP address of the platform in the value field and hence redirect all requests based on
the given IP rather than a hostname. This results in major problems if the IP address of the IoT platform should
change in the future.
- *Singular A entries or singular CNAME entries* instead of DNS wild cards require a single DNS entry for each
enterprise domain being created. This is very error prone and prevents the creation of subtenants without always
tampering with DNS settings.
### To upload the certificate and activate your domain {#to-upload-the-certificate-and-activate-your-domain}
Once the DNS configuration is in place and if a certificate with the given requirements is available, it can be easily
uploaded to the platform.
On the **Domain name** tab in the **Enterprise tenant** page, click **Upload certificate**. Select the certificate from your file system and click **Upload**.
Afterwards, you can activate the domain with a single click on its name. After the domain has been activated, you will be redirected
to your Enterprise tenant using the new domain name. You will also receive an email with information about the
activation. Note that your Management tenant domain name is static, for example, if your wildcard domain is "*
.iot.mycompany.com" then your Management tenant domain will be "management.iot.mycompany.com".
> **Info:**
> After the activation is completed you will no longer be able to access your tenant with the Cumulocity domain name. Instead, use your custom domain name.
### To update your certificate {#to-update-your-certificate}
When your certificate expires, you must update your certificate with a new one with an extended validation period. When updating a certificate, you must make sure that the certificate meets the following requirements:
* It is valid, like when being uploaded for the first time.
* It is currently valid (validFrom in the past and validTo in the future).
* It has exactly the same common name (domain name) as the currently active certificate.
> **Info:**
> Keep in mind that after replacing the certificate it may take some minutes until the new certificate has been delivered to the users/browsers.
### To deactivate your certificate {#to-deactivate-your-certificate}
If you wish to return to your old domain at Cumulocity, you can simply deactivate you certificate.
> **Important:**
> Use with care. Your customers will not be able to access their subtenants anymore.
### Troubleshooting {#troubleshooting}
In case you cannot reach Cumulocity using your custom domain, we recommend you to perform the following checks to verify your DNS setup.
**Check if the DNS entry is correct**
Execute the following command:
```shell
host management.
```
The following result should be returned:
```shell
management. is an alias for
has address
```
**Check if the API is responding**
Execute the following command:
```shell
curl -v -u '/:' --head http://management./inventory/managedObjects
```
The following result should be returned:
```shell
...
HTTP/1.1 200 OK
...
```
> **Info:**
> Keep in mind that after changing the DNS entry it might take up to 24 hours until the new entry has been propagated.