# Grouping devices
Source: https://cumulocity.com/docs/device-management-application/grouping-devices/
Sector: Device management & connectivity
Release: Latest
> **Related topics:**
> * [Application enablement & solutions > Cockpit > Managing assets > Assets hierarchy](https://cumulocity.com/docs/cockpit/managing-assets/#asset-hierarchy) for information on the asset hierarchy, assets and groups.
> * [Platform administration > Standard tenant administration > Managing permissions > Inventory roles](https://cumulocity.com/docs/standard-tenant/managing-permissions/#inventory-roles) on how to assign inventory roles to groups of devices.
> * The [managed objects API](https://cumulocity.com/api/core/#tag/Managed-objects) for REST API methods concerning managed objects (devices or groups of devices).
> * The [bulk operations API](https://cumulocity.com/api/core/#tag/Bulk-operations) for REST API methods concerning bulk operations.
Devices can be grouped according to a particular use case. A device can be located in multiple groups and groups themselves can again be part of multiple groups.
Cumulocity distinguishes between top-level groups and subgroups:
* **Top-level groups** are shown in the **Group** menu in the navigator at top-level.
* **Subgroups** can be used to further subdivide top-level groups.
## Managing groups
### To view groups {#to-view-groups}
Click **Groups** in the navigator to see all groups in a list format.
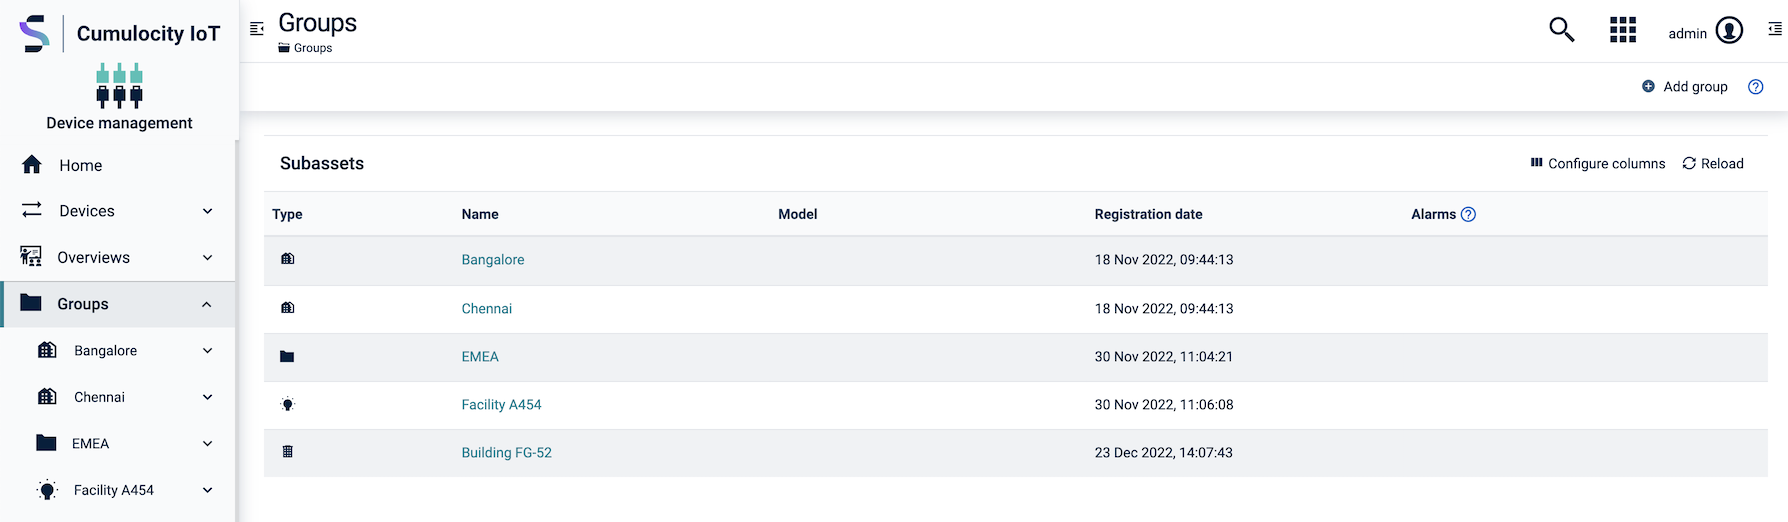
For each group, various information is provided, for example the type and name. Click **Configure columns** at the right, to add or remove columns and customize the view to your preference. See also [Configuring columns](https://cumulocity.com/docs/device-management-application/viewing-all-devices/#configuring-columns).
To filter the groups for certain criteria, hover over the column headers and click the respective filter icon .
See also [To filter devices](https://cumulocity.com/docs/device-management-application/viewing-all-devices/#to-filter-devices).
Note that this function only creates a temporary filter. For permanent filters, you can use the [smart groups](https://cumulocity.com/docs/device-management-application/grouping-devices/#using-smart-groups) function.
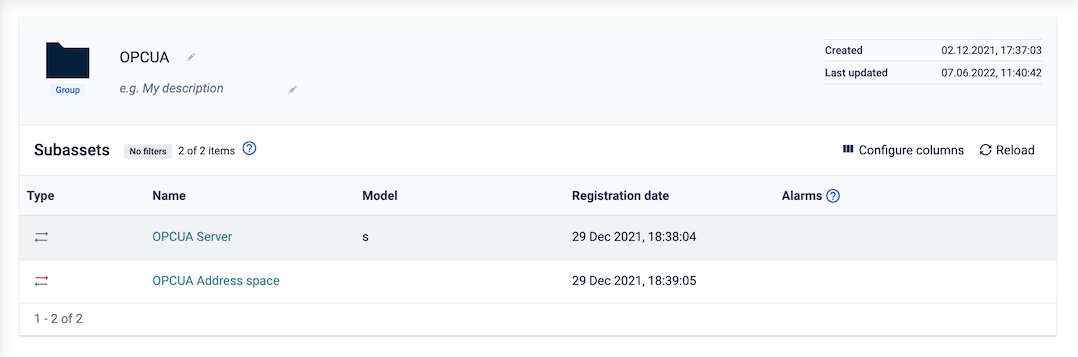
Click a group to view its details.
**Subassets page**
At the top of the **Subassets** page, the name and the description of the group is displayed (editable), followed by the information when the group was created and last updated.
Below, all assets assigned to the group are listed. For each asset, various information is displayed, for example the type and name. As with the top-level groups list, you can add or remove columns and customize the list to your preference, or you can apply filters to filter the list for certain criteria.
Morover, you can assign devices, see [To assign devices to a group](https://cumulocity.com/docs/device-management-application/grouping-devices/#to-assign-devices-to-a-group).
### To add a group {#to-add-a-group}
1. Click **Add group** at the right of the top menu bar.
2. In the resulting dialog box, enter a unique group name and an optional description and click **Next**.
3. In the list, select the devices you want to add. You may apply filters to reduce the number of displayed devices.
4. Click **Create** to create the new group.
The new group will be added to the groups list.
> **Info:**
> A group can be created with "0" devices in it.
To add a new group as a child of an existing group, navigate to its **Subassets** page and click **Add Group** in the top menu bar.
### To edit a group {#to-edit-a-group}
1. In the navigator, click a group to open it.
2. In the **Subassets** page, you can edit the name and description of the group.
For further information on permissions, see [Managing permissions and roles](https://cumulocity.com/docs/standard-tenant/managing-permissions/).
### To delete a group {#to-delete-a-group}
Hover over the respective entry you want to delete and click the delete icon at the right.
## Managing devices in groups
### To assign devices to a group {#to-assign-devices-to-a-group}
You can assign devices to groups in several ways.
**From the group perspective**
You can quickly assign devices to groups by using the drag and drop functionality in the navigator, see [Restructuring groups and devices](https://cumulocity.com/docs/device-management-application/grouping-devices/#restructuring-groups-and-devices).
Moreover, you can assign devices performing the following steps:
1. In the navigator, select a group from the **Group** menu and then open the **Subassets** page.
2. Click **Assign devices** at the right of the top menu bar.
3. In the list, select the devices you want to add. You may apply filters to reduce the number of displayed devices.
4. Click **Assign** to assign the selected devices.
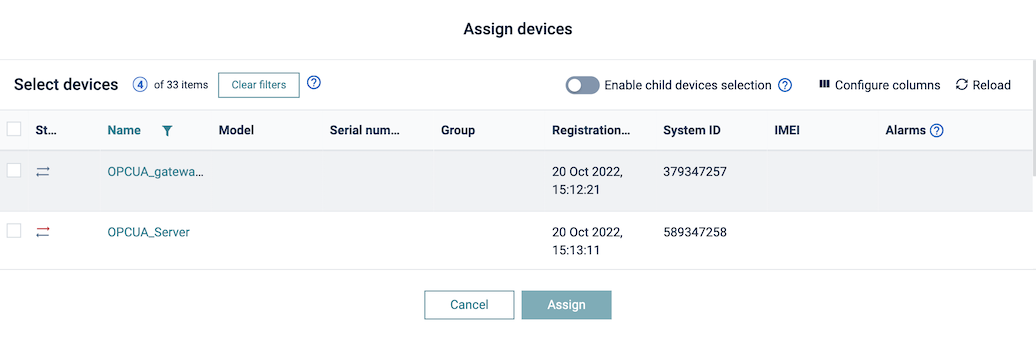
The devices will be assigned to the selected group and shown as subassets in the **Subassets** page.
**From the device perspective**
1. Select a device from the device list and open it.
2. In the **Info** tab, scroll down to the **Groups assignment** card. From the dropdown field, select the group you want to assign the device to. You can also directly enter a group name here or you can enter just parts of a name to filter the list for it and only show the matching group names.
3. Click **Assign**.
The device will be assigned to the selected group.
If you search for a group by its name which does not exist yet, a **New** button will appear so that you can create a new group with this name from here and assign the device to that group.
> **Info:**
> In order to create a new group, the user must have the permissions ROLE_INVENTORY\_CREATE and ROLE_INVENTORY\_ADMIN.
### To unassign a device {#to-unassign-a-device}
Hover over the respective device you want to unassign and click the unassign icon at the right.
Unassigning a device does not delete the device, subdevices or any associated data. The device is only removed from this group.
### To delete a device {#to-delete-a-device}
Hover over the respective device you want to delete and click the delete icon at the right.
The device will be permanently deleted.
### To view the device details {#to-view-the-device-details}
To display the details of a particular device, click its name.
The device details for the device will be displayed.
## Restructuring groups and devices
You can easily restructure groups, subgroups and devices by a drag & drop functionality.
### To move a group {#to-move-a-group}
1. In the navigator, select a group which you want to move to another group.
2. Drag and drop it to the desired group.
3. In the resulting dialog box, confirm the operation.
### To move or add a device {#to-move-or-add-a-device}
1. In the navigator, select the group or device which you want to move or add to another group.
2. Drag and drop it to the desired group.
3. In the resulting dialog box, select if you want to move or add the device.
## Using smart groups
Smart groups are groups dynamically constructed based on filtering criteria. This type of group can be used, for example, for bulk upgrades of devices of a certain type to a new software or firmware version.
> **Info:**
> Smart groups are only available in the Device Management application and not visible in the Cockpit application.
Smart groups can be created from the device list.
### To create a smart group {#to-create-a-smart-group}
1. To open the device list, click **All devices** in the navigator.
2. Filter the devices in the list to select the desired devices. See [To filter devices](https://cumulocity.com/docs/device-management-application/viewing-all-devices/#to-filter-devices) for details on filtering.
3. Click **Create smart group** at the right of the top menu bar.
4. Enter a name for the group and click **Create**.
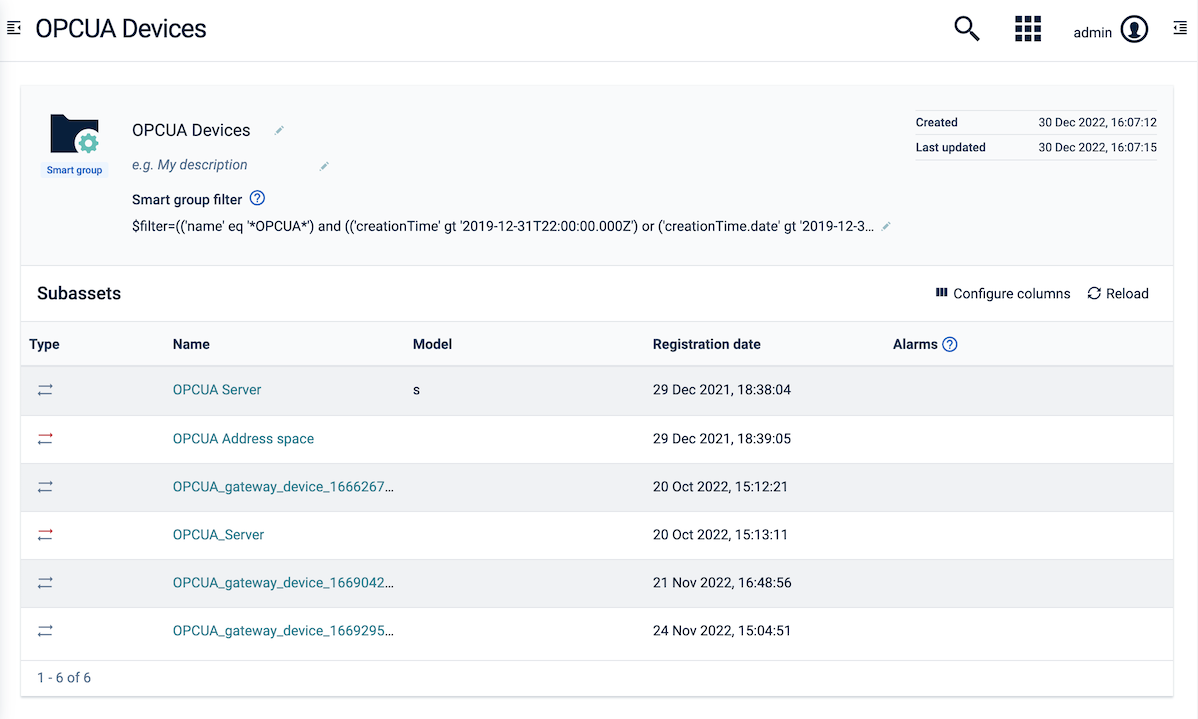
The new group will appear as a top-level group in the **Groups** menu of the navigator. Smart groups can be distinguished by a small cogwheel in the folder icon .
Below the smart group name and description you can see the filter criteria which have been applied on building the smart group. You can edit the filter settings here and adjust your selection.
### To delete a smart group {#to-delete-a-smart-group}
Hover over the respective entry you want to delete and click the delete icon at the right.
> **Important:**
> Deleting a smart group is irreversible.